Updated for Version “Luna III”
Durin is a 5★ Pyro Sword character in Genshin Impact who deals off-field Burst damage in one of two special states that focus either on team buffs or personal damage. Learn about Durin’s best builds, best weapons, best artifacts, and best teams in this quick guide.
Note that the information given may change if new discoveries are made. More extensive testing is in progress.
Join our Discord to check on and participate in the theorycrafting process.
Table of Contents
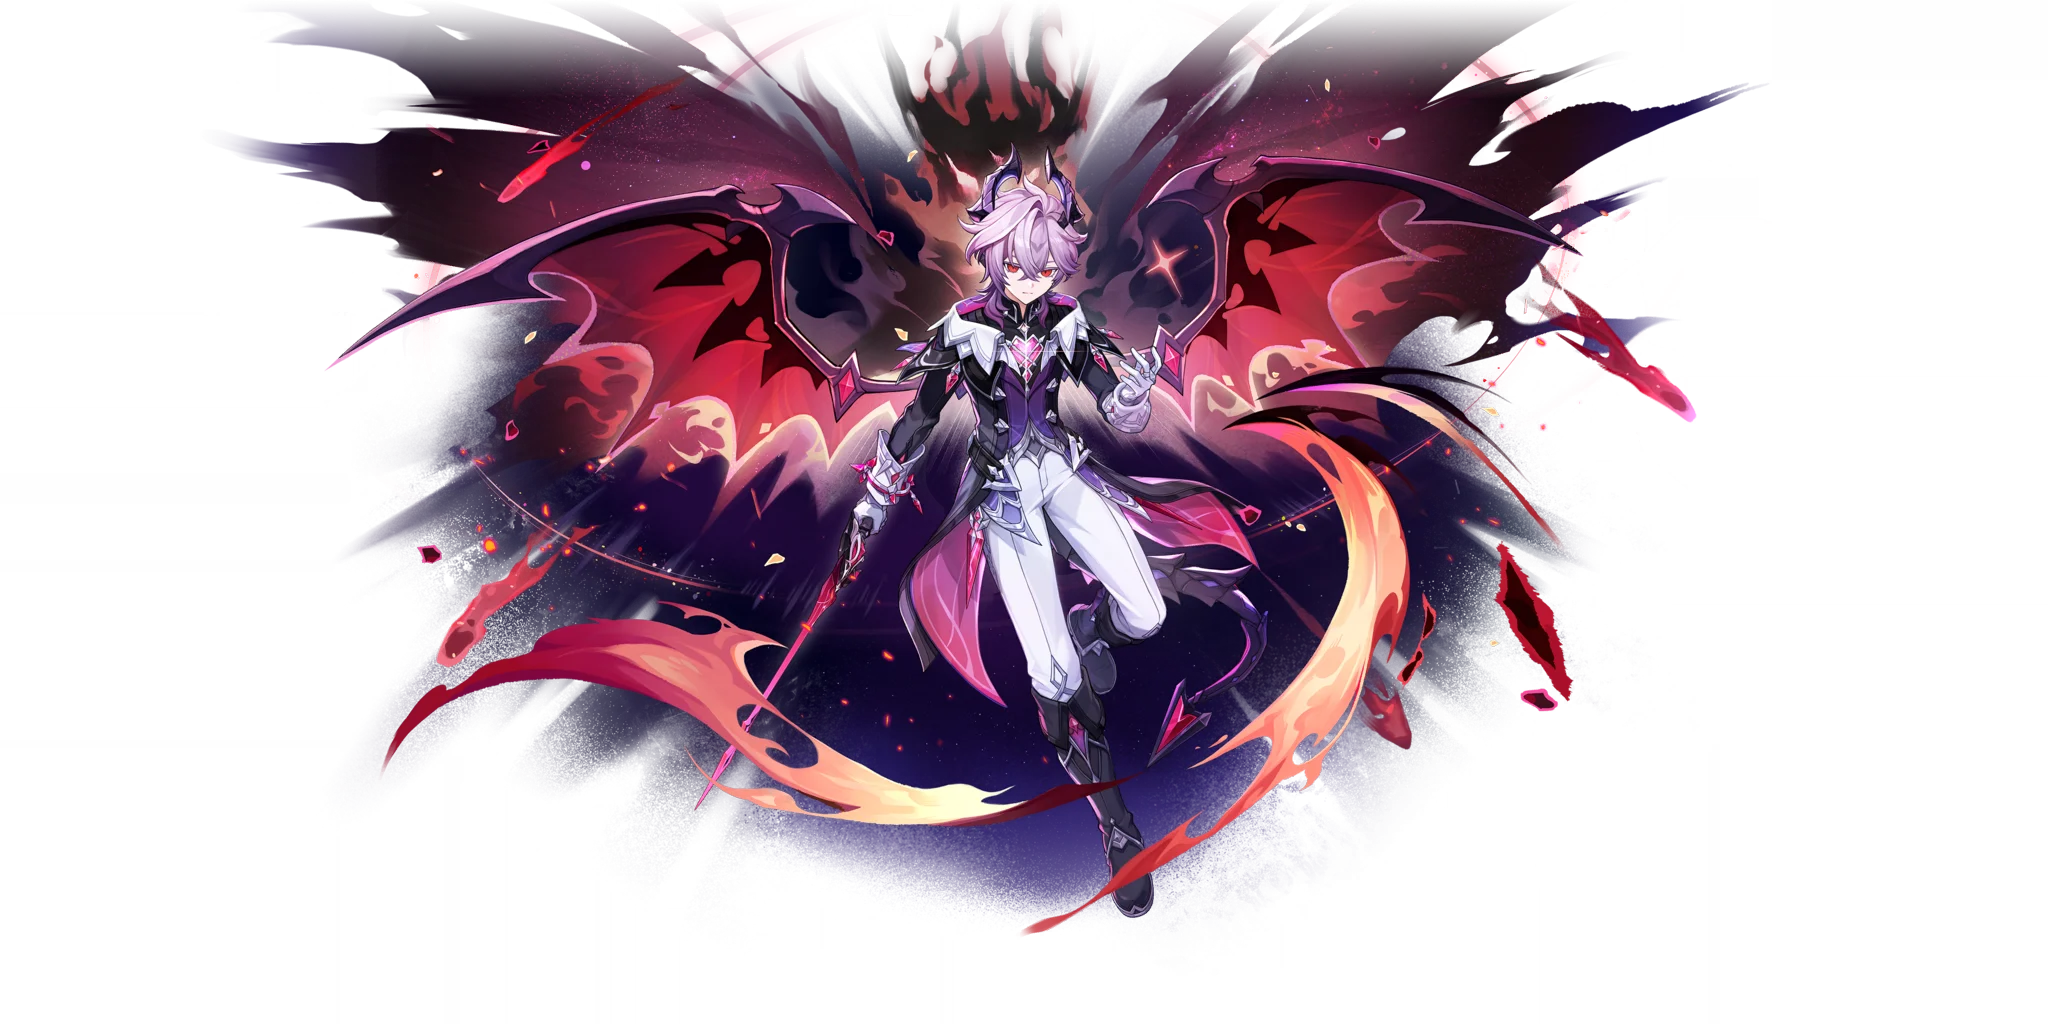
Infographic
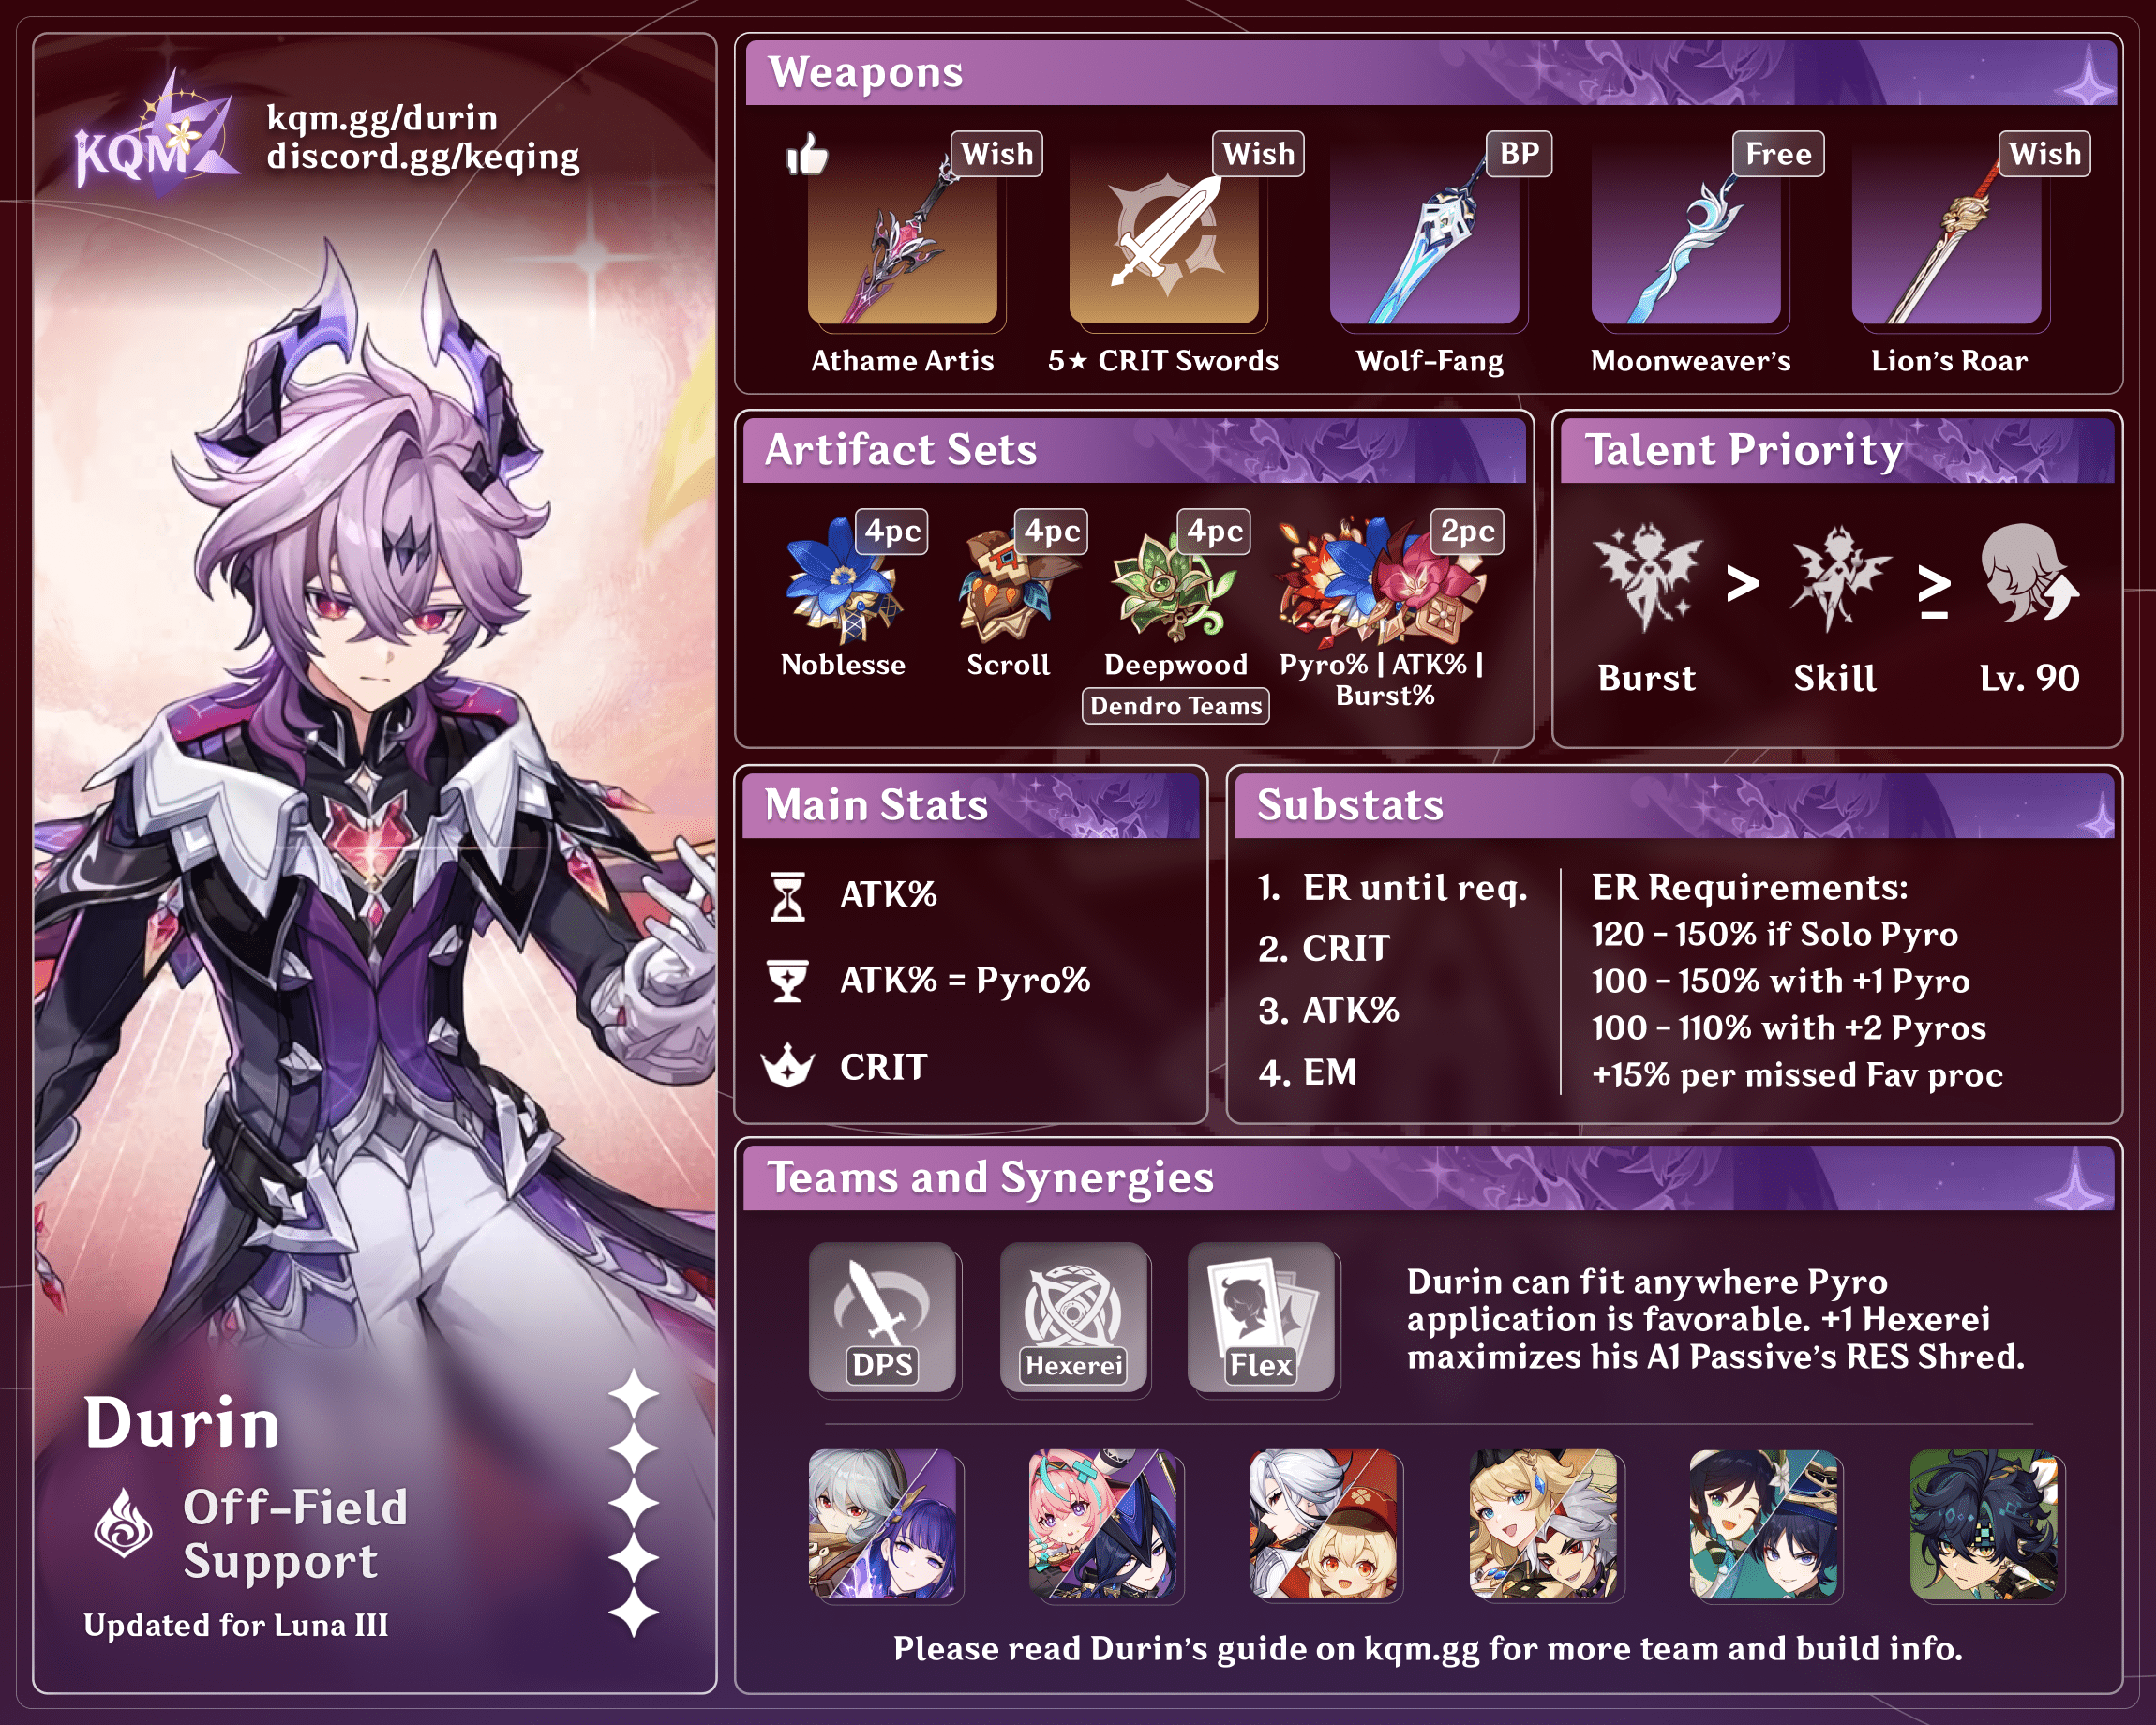
Credits to: cegewinne, irokei, haafr, and KQM Staff

Credits to: cegewinne, irokei, haafr, and KQM Staff

Credits to: euphorysm, irokei, and KQM Staff
Character Overview
Pros
- Simple gameplay in either of his two playstyles.
- Ability to enable Hexerei Passives.
- Rare ability to shred Anemo, Dendro, and Geo RES.
- Variety of viable Sword options.
- Strong synergy with many on-field damage dealers in various team archetypes.
Cons
- A support playstyle that doesn’t benefit Melt or Vape teams before C2.
- Slow rate of Pyro application, preventing him from being the sole Melt or Vape enabler for most on-field Cryo and Hydro damage dealers, respectively.
- A Hexerei Passive that encourages another Hexerei teammate, which can limit teammate options.
Playstyles
Durin’s Burst is the core of his kit. Depending on his state, he focuses on team buffs or personal damage. In most teams, he plays primarily off-field, but some teams do allow him to play on-field. However, Durin has short-ranged Normal and Charged Attacks and requires C6 Bennett’s Pyro Infusion to make his on-field playstyle worthwhile.
Burst Support (White)
In Durin’s Purity state (White form), he deals periodic AoE off-field Pyro damage and shreds enemy Elemental RES for Pyro and Elements involved in Pyro-related reactions (except Melt and Vaporize). This state lends itself to a support-oriented build that focuses on team DPS.
Burst DPS (Dark)
In Durin’s Darkness state (Dark form), he deals periodic single-target off-field Pyro damage and buffs his own Melt and Vaporize damage. As such, Durin’s artifact set and weapon focus more on his personal DPS, while his teammates should enable Melt and Vape.
Talents
Level and Talent Priority
Burst > Skill > (Normal Attack)
Durin’s Burst deals the majority of his personal damage. His Skill deals negligible damage, but its Energy generation scales with Talent levels so it should still be leveled.
Durin’s Normal Attack Talent is not worth leveling in a support playstyle, but it can be used in a DPS playstyle where he plays on-field. Level 90 maximizes his ATK stat and Transformative Reaction damage, so it can be considered after leveling his Burst and Skill. 80/90 is generally sufficient, however.
Talent Overview
 Normal Attack | Radiant Wingslash
Talent Description
Normal Attack
Performs up to 4 consecutive sword strikes.
Charged Attack
Consumes a certain amount of Stamina to perform a slash toward the front.
Plunging Attack
Plunges from mid-air to strike the ground below, damaging opponents along the path and dealing AoE DMG upon impact.
A fairly standard set of attacks. Durin only uses his Normal and Charged Attacks in an on-field DPS playstyle.
 Elemental Skill | Binary Form: Convergence and Division
Talent Description
Purify the substance of souls and wishes to undergo Essential Transmutation. While transmuted, Durin’s Elemental Skill Binary Form: Convergence and Division will be replaced with the special Elemental Skill Transmutation: Confirmation of Purity, and the Normal Attack Radiant Wingslash will be replaced with the special Elemental Skill Transmutation: Denial of Darkness.
Transmutation: Confirmation of Purity
Deal 1 instance of AoE Pyro DMG to nearby opponents, reverse Essential Transmutation, and enter the Confirmation of Purity state for 30s.
Transmutation: Denial of Darkness
Deal 3 consecutive instances of Pyro DMG to opponents in front, reverse Essential Transmutation, and enter the Denial of Darkness state for 30s.
When Durin enters the Confirmation of Purity or Denial of Darkness state while in battle, he will restore a certain amount of Elemental Energy. Elemental Energy can be restored this way once every 6s.
Durin’s Skill generates 4 Pyro particles upon hitting an enemy, allows him to activate either of his two states, and restores Energy to himself. It has a 12s cooldown and deals decent damage relative to his Burst.
At Talent Level 9, entering either of Durin’s two states restores 30 Energy, which alleviates his ER requirements. The Energy refund activates immediately, so Durin can cast his Skill after his Burst if it is fully charged and he is already in the desired form.
- To enter his support-oriented Confirmation of Purity state (White form), Durin simply needs to cast his Skill twice.
- To enter his damage-oriented Denial of Darkness state (Dark form), Durin needs to cast his Skill and perform 1 Normal Attack.
In game, the forms are distinguished by a unique indicator above Durin’s HP bar and under his character portrait in the party display.
 Elemental Burst | Principle of Purity: As the Light Shifts
Talent Description
Unleash the power of the “Beast” in different ways. Durin can use different Elemental Bursts based on his Essential Transmutation state.
Principle of Purity: As the Light Shifts
When Durin is in the Confirmation of Purity state, he will use the Elemental Burst Principle of Purity: As the Light Shifts, dealing 3 instances of AoE Pyro DMG to opponents in front, and manifesting his power in the Dragon of White Flame form. The Dragon of White Flame will follow the current active character and attack nearby opponents at intervals, dealing AoE Pyro DMG. This DMG is considered Elemental Burst DMG.
Principle of Darkness: As the Stars Smolder
When Durin is in the Denial of Darkness state, he will use the Elemental Burst Principle of Darkness: As the Stars Smolder, dealing 3 instances of AoE Pyro DMG to opponents in front, and manifesting his power in the Dragon of Dark Decay form. The Dragon of Dark Decay will follow the current active character and periodically attack a single nearby opponent, dealing Pyro DMG. This DMG is considered Elemental Burst DMG.
When Durin is not in a special state as a result of Essential Transmutation, he will use the Elemental Burst Principle of Purity: As the Light Shifts.
Durin performs different Bursts based on the state activated by his Skill. The Purity Burst (White form) caters more to his support playstyle in teams other than Melt or Vaporize, whereas the Darkness Burst (Dark form) caters more to his DPS playstyle in Melt or Vaporize teams where he triggers the reaction. In game, the Bursts are distinguished by different icons and auras around the icon (when the Burst meter is full).
In either state, Durin’s Burst has 20s uptime and an 18s cooldown, so he can effectively maintain 100% Burst uptime in most teams. It applies 1U of Pyro every other hit and does not snapshot buffs.
Principle of Purity: As the Light Shifts (White Form)
When Durin is in the Confirmation of Purity state, his Burst immediately deals 3 instances of AoE Pyro damage and then deals AoE Pyro damage every 1s. If Durin is not in a special state, it triggers the Purity version by default.
The AoE Pyro damage from Durin’s Purity state Burst centers on the enemy with a radius wide enough to trigger Burgeon on nearby Dendro Cores.
Principle of Darkness: As the Stars Smolder (Dark Form)
When Durin is in the Denial of Darkness state, his Burst immediately deals 3 instances of AoE Pyro damage followed by single-target Pyro damage every 1.25s.
 Ascension 1 Passive | Light Manifest of the Divine Calculus
Talent Description
Durin will trigger different buffs depending on the form that his power manifests as when he unleashes his Elemental Burst. When that form is:
Dragon of White Flame
After nearby party members trigger Burning, Overloaded, Pyro Swirl, or Pyro Crystallize reactions on an opponent, or deal Pyro DMG or Dendro DMG to an opponent affected by Burning, that opponent’s Pyro RES, and the RES for the corresponding Element involved in the reaction, are decreased by 20% for 6s.
Dragon of Dark Decay
Durin’s Vaporize DMG is increased by 40% and his Melt DMG is increased by 40%.
Durin’s A1 Passive changes based on which Burst he uses. His Hexerei Passive increases the following buffs by 75%.
Dragon of White Flame (White Form)
In his support-oriented state, Durin shreds enemy Elemental RES by 20% (35% with Hexerei Passive) for Pyro and Elements involved in Pyro-related reactions (except Melt and Vaporize). This shredding capability allows him to be a competitive off-field Pyro teammate for Anemo, Dendro, Electro, and Geo damage dealers.
Dragon of Dark Decay (Dark Form)
In his damage-oriented state, Durin’s Melt and Vaporize DMG increases by 40% (70% with Hexerei Passive). This buff allows him to be a viable Melt or Vaporize DPS unit.
 Ascension 4 Passive | Chaos Formed Like the Night
Talent Description
After unleashing an Elemental Burst, Durin gains the Primordial Fusion of Forms effect for 20s: Durin gains 10 stacks of Primordial Fusion. When a periodic attack from Dragon of White Flame or Dragon of Dark Decay deals DMG, 1 stack of Primordial Fusion will be consumed to increase the DMG dealt by 3% of the original DMG for every 100 ATK. A maximum of 75% additional DMG can be dealt this way. When a single attack from Dragon of White Flame or Dragon of Dark Decay hits multiple opponents, only one stack of Primordial Fusion is consumed.
Primordial Fusion stacks are reset when the Elemental Burst is unleashed again.
Durin’s A4 Passive grants him a Burst Base DMG Multiplier for 10 hits of his Burst. He can achieve a 1.75x Burst Base DMG Multiplier buff with 2500 ATK. One instance of his Burst damage against multiple enemies counts as 1 hit.
 Hexerei Passive | Witch’s Eve Rite: Ode to Ascension
Talent Description
After completing Witch’s Homework: Of This World, Durin will become a Hexerei character. When the party includes at least 2 Hexerei characters, you will gain the Hexerei: Secret Rite effect, which enhances Hexerei characters.
Hexerei: Secret Rite
Increases all effects of the Ascension Talent Light Manifest of the Divine Calculus (except for Duration) by 75%.
After becoming a Hexerei character through the required quest and being in a team with at least one other Hexerei character, Durin’s A1 Passive buffs increase by 75%.
- In his Purity state (White form), he grants 35% RES Shred instead, which effectively allows him to replace a 4pc VV user.
- In his Darkness state (Dark form), he gains 70% Melt and Vaporize DMG Bonus, which greatly increases his personal damage.
Although Durin does not necessarily need to team up with another Hexerei character, he usually performs best with one.
Constellations
If you want to vertically invest into Durin, his C2 is a good stopping point before his C6, which is his best Constellation.
 Constellation 1 | Adamah’s Redemption
Constellation Description
After casting his Elemental Burst, Durin’s effects will vary depending on the form of his Elemental Burst:
- Principle of Purity: As the Light Shifts: All other nearby party members gain 20 stacks of Cycle of Enlightenment lasting 20s. When nearby active characters deal Normal Attack, Charged Attack, Plunging Attack, Elemental Skill, or Elemental Burst DMG, 1 stack of Cycle of Enlightenment will be consumed to increase the DMG dealt by 60% of Durin’s ATK. Stack counts for characters in the party who have Cycle of Enlightenment are managed individually.
- Principle of Darkness: As the Stars Smolder: Durin gains 20 stacks of Cycle of Enlightenment lasting 20s. When Durin deals Elemental Burst DMG, 2 stacks of Cycle of Enlightenment will be consumed to increase the DMG dealt by 150% of Durin’s ATK.
When an Elemental Burst is used, Cycle of Enlightenment stacks will be refreshed.
Durin’s C1 changes based on his Burst state. In either state, the affected character obtains 20 stacks of Cycle of Enlightenment (CoE) that last 20s. CoE stacks are considered Additive Base DMG Bonus (like Shenhe’s Icy Quill buff or Yun Jin’s Burst buff).
Principle of Purity: As the Light Shifts (White Form)
In his support-oriented state, 1 stack of CoE increases 1 instance of teammate Talent DMG by 60% of Durin’s ATK. This only applies to the on-field character, but multiple characters can swap in to take advantage of the buff if the rotation allows it.
In a support-oriented build, C1 Durin prefers ATK% substats over CRIT substats.
Principle of Darkness: As the Stars Smolder (Dark Form)
In his damage-oriented state, 2 stacks of CoE increase 1 instance of Durin’s Burst damage by 150% of his ATK. As a result, only 10 Burst hits are buffed.
 Constellation 2 | Unground Visions
Constellation Description
For 20s after Durin uses an Elemental Burst, after nearby party members trigger Vaporize, Melt, Burning, Overloaded, Pyro Swirl, or Pyro Crystallize reactions, or deal Pyro DMG or Dendro DMG to an opponent affected by Burning, all nearby party members gain a 50% increase to their Pyro DMG and to the corresponding elemental DMG involved in the reaction for 6s.
Durin’s C2 is his best Constellation before C6. After using his Burst in either state, he grants 50% Elemental DMG Bonus to the entire team for Elements involved in any Pyro-related reaction. This results in substantial DPS gains in either playstyle.
 Constellation 3 | Flame Mirror’s Revelation
Constellation Description
Increases the Level of Principle of Purity: As the Light Shifts by 3.
Maximum upgrade level is 15.
Durin’s C3 is a sizable boost to his Burst, which comprises the majority of his personal damage.
 Constellation 4 | Emanare’s Source
Constellation Description
Durin’s Elemental Burst DMG is increased by 40%. Additionally, when effects that consume Cycle of Enlightenment stacks are triggered as part of the Constellation Adamah’s Redemption, there is a 30% chance that no Cycle of Enlightenment stacks will be consumed.
Durin’s C4 increases his Burst DMG by 40% and grants a 30% chance for each stack of CoE to not be consumed. On average, this would result in roughly 28 stacks instead of 20, but the exact value depends on RNG.
 Constellation 5 | Scouring Flame’s Sundering
Constellation Description
Increases the Level of Binary Form: Convergence and Division by 3.
Maximum upgrade level is 15.
Durin’s C5 increases his Skill Talent level, which primarily impacts his Energy generation. At Talent Level 13, his Skill regenerates 42 Energy, which significantly lowers his ER requirements.
His Skill deals very minor damage compared to his Burst, so this Constellation is essentially worthless if he already has low ER requirements.
 Constellation 6 | Dual Birth
Constellation Description
Durin’s Elemental Burst DMG ignores 30% of opponents’ DEF.
Additionally, Durin’s Elemental Bursts Principle of Purity: As the Light Shifts and Principle of Darkness: As the Stars Smolder are each enhanced:
- After Principle of Purity: As the Light Shifts and Dragon of White Flame hit an opponent, that opponent’s DEF is decreased by 30% for 6s.
- DMG from Principle of Darkness: As the Stars Smolder and Dragon of Dark Decay will ignore an additional 40% of opponents’ DEF.
Durin’s C6 is his most impactful Constellation for personal damage, as his Burst DMG ignores 30% of enemy DEF. His C6 has an additional effect that changes based on his Burst state. In either state, his C6 enhances his personal damage by a significant amount.
Principle of Purity: As the Light Shifts (White Form)
In his support-oriented state, Durin’s Burst hits shred enemy DEF by 30% for 6s.
Principle of Darkness: As the Stars Smolder (Dark Form)
In his damage-oriented state, Durin’s Burst hits ignore an additional 40% of enemy DEF (total 70% DEF Ignore).
C1 vs. R1
Durin’s DPS increase from his C1 and R1 Athame Artis depends on his playstyle. Assuming a baseline of C0 and R1 Wolf-Fang, C1 generally results in a higher team DPS increase than R1.
If you already have other 5-star Swords with CRIT DMG or CRIT Rate secondary stats, then Durin’s Constellations are an even better investment than R1 Athame Artis.
Combos
Combo Notation
- N = Normal Attack
- C = Charged Attack
- A = Aimed Shot
- P = Plunging Attack
- hP = High Plunge
- lP = Low Plunge
- E = Elemental Skill
- tE = Tap Skill
- hE = Hold Skill
- Q = Elemental Burst
- D = dash (cancel)
- J = jump (cancel)
- W = walk (cancel)
- > = switch character
- ( ) = these actions are optional; please refer to the notes below
- [ ] = repeat these actions the specified number of times
| 2[E] Q / Q 2[E] | Support Combo (White Form) This combo enables Principle of Purity: As the Light Shifts (Durin’s support-oriented White form). His Energy refund activates immediately, so Durin can cast his Skill after his Burst if it is fully charged. Casting Durin’s Skill after his Burst also allows him to Melt or Vape his Burst’s initial hits more consistently. However, he usually cannot absorb his Skill’s Pyro particles on-field for rotation timing. |
| E N1 Q | DPS Combo (Dark Form) This combo enables Principle of Darkness: As the Stars Smolder (Durin’s damage-oriented Dark form). If Durin starts with a filled Burst meter, then he doesn’t benefit from his first Energy refund. In some teams, Durin can cast his Skill, swap to teammates, and then cast his Burst to save his A4 Passive until he is properly buffed. |
Artifacts
ER Requirements
Calcs for ER requirements can be found here (last updated for Version 6.2). Teammates hold Favonius weapons when reasonable.
These ER requirements assume 1 Skill cast at Talent Level 9, which generates 30 Energy after Durin activates one of his forms. In teams where Durin can cast his Skill twice per rotation, he doesn’t need any ER.
| Off-Field | On-Field | |
| 0 Pyro Teammates | 120-150% | N/A |
| 1 Pyro Teammate | 100-150% | 100-125% |
| 2 Pyro Teammates | 100-110% | 100% |
Durin’s ER requirements vary greatly between his teams due to their different particle generation and Energy mechanics. These ranges are based on teams which he may commonly play in.
Use the Energy Recharge Calculator to determine exact requirements for your team and rotation. For more details on how Favonius weapons will affect your team, please use Ac1d’s Favonius Mastersheet.
Artifact Stats
 Sands |  Goblet |  Circlet |
| ATK% (> EM) | Pyro DMG Bonus = ATK% | CRIT Rate or CRIT DMG |
Stat Priority: ER (until requirement) > CRIT > ATK% ≥ (EM) > Flat ATK
An ATK% Sands is usually best, but an EM Sands can still work with substantial ATK% buffs from teammates and his equipment. An ER Sands can be used if Durin has ER requirements greater than 150%.
An ATK% Goblet and a Pyro DMG Bonus Goblet perform roughly on par with each other: the best option depends on substats and team buffs. His best Circlet should balance out his CRIT ratio.
With Durin as a support, EM stats can be preferable in Overloaded teams with a high rate of Electro application or in teams where Durin can trigger Burgeon.
Artifact Sets
Support Sets
In teams where Durin is a support and teammates already hold relevant support sets, a DPS-oriented artifact set like 4pc ESF can be used instead.
 4pc Noblesse Oblige (NO) | 4pc NO is Durin’s default support set for ATK-scaling DPS teammates. Its 2pc and 4pc set bonuses also provide nice buffs to his Burst damage. 4pc NO is also Durin’s typical best-in-slot DPS option if Durin’s teammates prefer other sets and no one else can hold it. |
 4pc Scroll of the Hero of Cinder City (Scroll) | 4pc Scroll is Durin’s default support set for PHEC (Pyro, Hydro, Electro, or Cryo) teammates that do not scale with ATK. It can also be used if another teammate can hold 4pc NO. Its 4pc effect can be difficult to consistently activate in teams with 2 other Pyro teammates, since Durin may not be able to trigger a reaction consistently. |
 4pc Deepwood Memories (DM) | 4pc DM buffs team Dendro damage via its Dendro RES Shred, which primarily benefits Dendro DPS units like Kinich and Emilie. Durin can hold this set if there is no other suitable holder. |
 4pc Archaic Petra (AP) | 4pc AP is a niche set in teams with a PHEC (Pyro, Hydro, Electro, or Cryo) DPS unit and a Geo teammate (like Albedo or Xilonen). Its 4pc set effect can be difficult to activate against large or mobile enemies, but it’s still one of his best options in such teams. |
 4pc Silken Moon’s Serenade (SMS) | 4pc SMS can be used in teams with one or two Nod-Krai characters. Another unit can usually hold 4pc SMS instead, so Durin still goes with 4pc NO in such cases. |
DPS Sets
4pc Noblesse Oblige (NO) | 4pc NO is also Durin’s typical best-in-slot DPS option if Durin’s teammates prefer other sets and no one else can hold it. Its 2pc and 4pc set bonuses provide nice buffs to his Burst damage. |
 4pc Crimson Witch of Flames (CW), 4pc Gilded Dreams (GD) | 4pc CW is Durin’s best set in Overvape teams, while 4pc GD is his best set in teams where he triggers Burgeon. Both sets are still good options in Melt and Vaporize teams; however, they perform on par with 2pc set combos. |
 4pc Emblem of Severed Fate (ESF) | 4pc ESF is a solid generalist option, especially at high ER requirements. However, 2pc CW + 2pc NO offers similar DMG% stats when Durin has a low ER requirements, so there is no need to farm specifically for 4pc ESF. Additionally, 4pc NO is often Durin’s best option if his teammates can hold other support-oriented sets. |
 4pc Marechaussee Hunter (MH) | 4pc MH is a solid choice in teams with Furina where Durin plays on-field. Depending on Durin’s team and weapon, it can be best-in-slot or runner-up. Be careful not to overcap on CRIT Rate. |
 2pc Mixed Sets | 2pc Set Bonuses: Burst DMG, Pyro DMG, ATK%, EM, ER These 2pc set combos can be used while farming for a 4pc set. 2pc NO + 2pc CW is generally Durin’s best combo, but 2pc ATK% can be used in teams with substantial DMG% buffs. |
Weapons
Support Weapons
DPS-oriented Swords can still be used in Durin’s support playstyle.
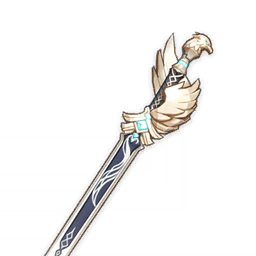
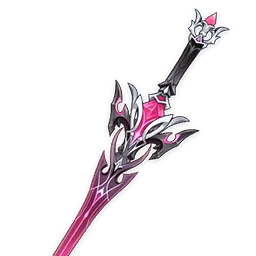 5★ Athame Artis | Athame Artis is Durin’s best-in-slot support weapon. Its CRIT Rate secondary stat, Burst DMG%, and ATK% buffs cater to his personal damage. Its ATK% buff to the active character complements Durin’s support playstyle. If you have this weapon, you should play Durin with at least one other Hexerei character to maximize its passive effects. |
 5★ Freedom-Sworn | Freedom-Sworn is a great option to buff ATK-scaling Normal, Charged, or Plunging Attack DPS characters. |
 4★ Favonius Sword | Favonius Sword helps the team meet their ER requirements. However, if the team can meet their ER requirements otherwise, then a DPS-focused Sword results in higher team damage. |
 4★ Xiphos’ Moonlight | Xiphos’ Moonlight is a gacha-exclusive Sword that leads to higher personal DPS than Favonius Sword. Durin requires some EM investment to make its passive worthwhile, which complements teams where he triggers Burgeon or Overloaded. |
DPS Weapons
5★ Athame Artis | Athame Artis is Durin’s best-in-slot DPS weapon. Its CRIT Rate secondary stat, Burst DMG%, and ATK% buffs cater to his personal damage. Its ATK% buff to the active character benefits Durin if he can play on-field. If you have this weapon, you should play Durin with at least one other Hexerei character to maximize its passive effects. If you already have a 5-star CRIT Sword available, it likely isn’t worth pulling for Athame Artis as it is only slightly better, and Durin’s Constellations are a much more worthwhile investment. |
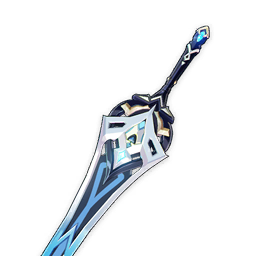
 5★ CRIT Swords | • Primordial Jade Cutter • Haran Geppaku Futsu • Mistsplitter Reforged • Azurelight • Absolution 5-star Swords with a CRIT DMG or CRIT Rate secondary stat are fairly close runners-up to Athame Artis. Primordial Jade Cutter and Haran Geppaku Futsu are generally the closest to Athame Artis in terms of personal DPS. |
 4★ Wolf-Fang | Wolf-Fang is generally Durin’s best 4-star Sword. At R5, it competes with many 5-star options. Note that Wolf-Fang’s passive cannot stack with Durin off-field. |
 4★ Moonweaver’s Dawn | R1 Moonweaver’s Dawn is Durin’s best freely accessible Sword (from the quest Echoes of an Unfinished Past). Refinements can only be obtained through Weapon Event Banners. It usually fares worse than Finale of the Deep in teams with healers, but it can be used if you want to save billets or money. Durin does not benefit from the second half of its passive, since his Burst costs 70 Energy. |
 4★ Lion’s Roar | R5 Lion’s Roar is a viable 4-star option, especially in Overloaded and Burning teams where the passive has maximal uptime. |
 4★ Finale of the Deep | R5 Finale of the Deep is a competitive craftable Sword option in teams with healers. With plentiful DMG buffs, it outperforms R1 Wolf-Fang. |
Teams
Rotation Notation
- N = Normal Attack
- C = Charged Attack
- A = Aimed Shot
- P = Plunging Attack
- E = Elemental Skill
- tE = Tap Skill
- hE = Hold Skill
- Q = Elemental Burst
- D = dash (cancel)
- J = jump (cancel)
- W = walk (cancel)
- > = switch character
- ( ) = these actions are optional; please refer to the notes below
- [ ] = repeat these actions the specified number of times
Teambuilding
- Durin prefers teams with at least one other Hexerei character to maximize his A1 Passive’s buffs, but some on-field DPS units still prefer non-Hexerei teammates.
Support Teams

Durin is a highly flexible support in a variety of teams with many different characters. He can fit into any team where off-field Pyro application results in favorable Elemental Reactions. On-field DPS units synergize well with Durin’s off-field support playstyle, but quickswap teams also enjoy Durin’s long-lasting Burst. At least one other Hexerei character maximizes Durin’s A1 Passive buffs; however, Durin can also work perfectly well by himself in many teams.
Notable Teammates
On-Field DPS Characters
These characters synergize well with Durin, thanks to his buffs and off-field Pyro damage.
 Electro DPS | Clorinde, Cyno, Keqing, Raiden, Razor, Sethos, Varesa, Yae Miko In Overloaded teams with Chevreuse, Durin enables consistent Overloaded reactions, off-field Pyro damage, and additional buffs, all of which greatly increase team DPS. When Durin pairs with Fischl, their combined personal damage and buffs further increase such teams’ damage ceilings. Durin also excels in Quickburn teams with Emilie, thanks to his ability to shred Electro and Dendro RES simultaneously. |
 Pyro DPS | Arlecchino, Diluc, Hu Tao, Klee, Lyney, Yanfei, Yoimiya In Overloaded teams with Fischl, Durin supports many Pyro on-field DPS units. Durin can replace Bennett or Chevreuse in such teams, resulting in either a Durin-Fischl-Chevreuse or Durin-Fischl-Bennett core. |
 Geo DPS | Itto, Navia, Ningguang, Noelle Durin (in his White form) is the only non-Geo character who can shred enemy Geo RES. Additionally, his Pyro application allows consistent Crystallize shard generation, which enables Geo Resonance’s RES Shred and teammate abilities. As such, he is a great option for on-field Geo DPS units. |
 Anemo DPS | Heizou, Ifa, Venti, Wanderer, Xiao Durin buffs on-field Anemo DPS units with his A1 Passive’s Anemo RES Shred. C6 Faruzan is often a best-in-slot teammate. He also enables Venti’s enhanced Hexerei Passive, allowing Venti to play as a potent on-field Anemo carry. |
Chasca | Durin provides continuous off-field Pyro application and shreds enemy RES (except Cryo and Hydro) to significantly increase Chasca’s damage. He pairs well with Fischl or Citlali/Escoffier. |
Kinich | Kinich appreciates Durin’s consistent off-field Pyro application, especially in multi-wave content. Furthermore, Durin’s A1 Passive constantly provides 20/35% Dendro RES Shred. Depending on his teammates, Durin should use 4pc DM, NO, or Scroll to further amplify the team’s damage. |
 Neuvillette | In teams with Neuvillette, both he and Durin can trigger Vaporize due to split Hydro and Pyro aura uptime. |
Mualani | Mualani appreciates Durin’s consistent Pyro application and his ability to activate Mona’s enhanced Hexerei abilities. While Durin doesn’t buff Mualani innately, he does provide strong complementary Pyro damage in his Darkness state (Dark form). |
Hexerei Characters
Hexerei teammates maximize Durin’s buffs and provide their own personal damage, buffs, and utility, which the on-field DPS character should benefit from. During Version “Luna III”, you can choose one of Fischl, Razor, or Sucrose, so Durin is guaranteed at least one Hexerei teammate in any account.
 Albedo | Albedo and Durin form an effective pairing, as they both provide valuable team buffs and off-field personal damage. Albedo offers Talent DMG Bonus through his Hexerei Passive and can grant 125 EM after using his Burst. |
 Fischl | Fischl is a premier off-field Electro DPS who synergizes well with Durin. Beyond her personal damage, her Hexerei Passive grants Fischl and the active character a 22.5% ATK buff if Overloaded occurs and a 90 EM buff if Electro-Charged or Lunar Charged occurs (while Oz is on-field). These buffs double at C6. In Overloaded teams, Durin, Fischl, and Chevreuse form a potent core for on-field Electro and Pyro DPS units. |
  Klee, Razor | Klee and Razor are strong on-field DPS options with Durin, especially in the Overloaded team archetype with Chevreuse. Razor’s C6 significantly increases his damage potential. |
 Mona | Mona complements Durin’s support-focused playstyle via her Omen’s DMG Bonus, whose duration can increase by up to 8s with Mona’s Normal Attacks. Moreover, Mona’s C1, C2, and C4 further enhance her buffing capabilities. |
 Sucrose | Sucrose provides valuable teamwide EM buffs, a minor DMG buff via her C6, and Elemental RES Shred via 4pc VV. She requires minimal field time as an off-field support, but she can also act as an on-field driver. Sucrose typically holds support-oriented Catalysts like Favonius Codex, Hakushin Ring, and Thrilling Tales of Dragon Slayers. |
 Venti | After becoming a Hexerei character, Venti can be played as a potent on-field Anemo DPS. Durin is a strong teammate for Venti, providing Anemo RES Shred via his A1 Passive. Additionally, Venti’s Burst will almost certainly absorb Pyro in this team due to the rotation, which lets Durin ignore ER investment. |
Flex
 Chevreuse | Chevreuse enables a strong Overloaded core with Durin and Fischl. She provides buffs to Electro and Pyro damage and minor healing. Even before C6, she is a fantastic teammate for on-field Electro and Pyro DPS units. |
Example Teams
This is not a comprehensive list of teams. The inclusion or exclusion of any given team does not necessarily reflect its power level.

This is Durin’s standard Overloaded team archetype with Fischl and Chevreuse. The on-field DPS can be practically any Electro or Pyro on-fielder, so these options are just provided as examples. With Razor specifically, C6 Bennett can replace Fischl.
Chevreuse is the crux of the team at any Constellation, as she provides great buffs to Electro and Pyro damage and minor healing. However, Bennett can work if you don’t have her at all, but this results in lower team DPS for most carries and limits mobility to “Circle Impact”.
Durin can hold 4pc NO so Chevreuse can hold 4pc Scroll or 4pc Song of Days Past.
Sample Rotation (Varesa)
(Fischl E)¹ > Chevreuse Q hE > Durin 2[E] Q > Fischl Q / E > Varesa combo
¹First rotation only.
Sample Rotation (Raiden)
Raiden E > Durin 2[E] Q > Chevreuse Q hE > Fischl N2 Q > Raiden Q combo > (Fischl E)¹
¹Every other rotation.
Sample Rotation (Razor — Fischl)
(Razor tED)¹ > (Fischl E)¹ > Chevreuse Q hE > Durin 2[E] Q > Fischl Q / E > Razor combo
Sample Rotation (Razor — Bennett)
(Razor tED)¹ > Chevreuse (Q)¹ hE > Durin 2[E] Q > Bennett EQ > Razor combo
¹First rotation only.
Sample Rotation (Klee)
(Fischl E)¹ > Chevreuse Q hE > Durin 2[E] Q > Fischl Q / E > Klee combo
¹First rotation only.

Durin’s A1 Passive buff maintains 100% uptime on this team thanks to the persistent Burning aura. Iansan must weave in a Normal Attack to clear the Burning aura, trigger Quicken, and activate 4pc Scroll for Dendro DMG Bonus.
Sample Rotation (Iansan)
Emilie E / Q > Durin 2[E] Q > Iansan E N1 Q > Kinich combo
Sample Rotation (Bennett)
Emilie E / Q > Durin 2[E] Q > Bennett EQ > Kinich combo > (Bennett E N2)¹
¹If needed to meet Bennett’s ER requirements.

This is a viable alternative to Itto’s other Mono Geo teams. While the team lacks a dedicated shielder, Pyro Crystallize shards can be used as a shield to maintain Geo Resonance uptime.
Sample Rotation
Albedo E > Durin 2[E] Q > Gorou Q E > Itto combo

After becoming a Hexerei character, Venti can be played as a potent on-field Anemo DPS. If Venti’s Burst absorbs Pyro (almost certain), then Durin requires no ER investment.
Sample Rotation
Faruzan¹ E C Q > Durin 2[E] Q > Bennett EQ > Venti tEQ combo
¹Burst only if Faruzan is C6.

Durin’s RES Shred and good personal damage let him function as a decent alternative to Anemo units in Flins teams, particularly in wave-based content.
Sample Rotation
Ineffa (Q)¹ E > Aino EQ > Durin 2[E] Q > Flins combo
¹Every other rotation.
Limited Roster Alternatives
These teams are meant for newer players whose limited roster prevents them from using the teams above; as such, the teams below result in lower damage output.

This is a great Overvape team. Lan Yan provides a shield for survivability, but Sucrose provides greater team damage with her buffs. Sucrose can hold Prototype Amber for healing instead of Hakushin Ring or TTDS.
Sample Rotation (Lan Yan — TTDS)
(Fischl E)¹ > Xingqiu EDQ N1 > Durin Q N1 > Lan Yan E N1 Q > Durin 2[E] N1 > Fischl Q / E N1 > Lan Yan 3[N3D]
¹First rotation only.
Sample Rotation (Sucrose — TTDS)
(Fischl E)¹ > Xingqiu EDQ N1 > Sucrose ED (Q)² N1 > Durin 2[E] Q N1 > Fischl Q / E N1 > Sucrose combo
Sample Rotation (Sucrose — Hakushin Ring)
(Fischl E)¹ > Xingqiu EDQ N1 > Durin 2[E] Q N1 > Fischl Q / E > Sucrose ED (Q)² combo
¹First rotation only.
²When available.

This is an accessible Melt DPS Kaeya team. Bennett should play on-field before C6 to provide supplementary Pyro application with his Skill, but Kaeya can on-field if Bennett is C6. The rotation below assumes Sucrose holds TTDS, which Kaeya’s Burst can snapshot.
Sample Rotation (Pre-C6 Bennett)
Durin 2[E] Q > Sucrose ED > Kaeya E > Bennett EQ > Kaeya Q E N1 > Sucrose Q / E N1 > Bennett 2[E N2D]
Sample Rotation (C6 Bennett)
Durin 2[E] Q > Sucrose ED > Kaeya E > Bennett EQ > Kaeya Q E N1 > Sucrose Q / E N1 > Kaeya E 2[N2C] E > Bennett E

Durin triggers Burgeon, Overloaded, and Vape in this team. Barbara is the on-field unit; she should move close to enemies to apply Hydro with her Skill while she performs Normal Attacks. The rotation below assumes Barbara holds Sacrificial Fragments.
Sample Rotation
(Fischl E)¹ > Barbara E > Dendro Traveler EQ D² > Durin 2[E] Q > Fischl Q / E > Barbara combo > Dendro Traveler E > Barbara combo
¹First rotation only.
²Dash towards Traveler’s Burst to apply Hydro.

This is a fine Noelle Mono Geo team. Albedo is the ideal 4th slot, but Geo Traveler is nonetheless a freely accessible option.
Sample Rotation
Gorou EQ > Geo Traveler EQ > Durin 2[E] Q > Noelle E Q N3D N3 > Gorou E > Noelle 3[N3D] N2
DPS Teams

In his DPS playstyle (Dark form), Durin can play in a Melt, Overvape, or Vape team for his personal A1 Passive buff. Some teams could be considered “dual carry” with Durin and an on-field DPS unit. While Melt teams are possible, Overvape and Vape teams tend to perform better overall.
He can play either on-field or off-field, but an on-field playstyle allows his Burst to take advantage of buffs that apply to the active character since it cannot snapshot. However, Durin has short-ranged Normal and Charged Attacks and requires C6 Bennett to make his on-field playstyle worthwhile.
Notable Teammates
Hydro
Hydro characters enable Durin to Vape his Burst hits and offer greater team flexibility. Overvape teams with Fischl are a viable team variation. Furthermore, Durin and a Hydro DPS unit can play in dual-carry setups where they mutually benefit from Vaporize reactions.
 ★ Furina | Furina is an excellent off-field Hydro applier and buffer for Durin, providing a massive teamwide DMG% buff and long-lasting Hydro application. The team requires a healer to offset Furina’s HP drain and stack Fanfare. |
 ★ Mona | Beyond being a Hexerei character, Mona can act as an on-field Hydro applier or a secondary off-field Hydro support. Her C1, C2, and C4 further enhance her buffs and driving capabilities. |
Mualani | Mualani appreciates Durin’s consistent Pyro application and his ability to activate Mona’s enhanced Hexerei abilities. While Durin doesn’t buff Mualani innately, he does provide strong complementary Pyro damage in his Darkness state (Dark form). |
 Xingqiu | Xingqiu is an off-field Hydro unit whose Elemental Burst provides highly consistent Hydro application, enabling Durin to Vaporize his Burst hits as well as Pyro-infused Normal and Charged Attacks with C6 Bennett. |
  Ayato, Tartaglia | Ayato and Tartaglia function as on-field Vape enablers for Durin. They can also be played in Overvape teams with Fischl. |
 Neuvillette | As the sole Hydro teammate, Neuvillette and Durin both trigger Vaporize due to split Hydro and Pyro aura uptime. When paired with Furina, Durin is the sole owner of Vape reactions. Neuvillette’s long team rotations allow Durin to recast his Skill to switch between his Purity and Darkness states, eliminating Durin’s ER requirements. |


Cryo
Cryo teammates, both on-field and off-field, enable Durin to Melt his Burst hits. Note that if Durin plays on-field with C6 Bennett, specific combos are required to avoid excessive Pyro application that can interfere with Melted Burst hits; a second Cryo character can be used to compensate for this issue.
Citlali | Citlali serves as an excellent support for Durin, providing substantial off-field Cryo application, Pyro RES Shred through her A1 Passive, and Pyro DMG Bonus through 4pc Scroll. She can further enhance Durin’s damage by holding TTDS or Starcaller’s Watch. She can also play on-field for more Cryo application, if necessary. |
 Rosaria | Rosaria’s Cryo application allows Durin to Melt most of his Burst hits. Her C2 increases her Burst duration by 4s, which lets Durin Melt 3 additional hits. Since Durin can freely swap off-field, Rosaria can swap in to cast her Skill for additional Cryo application and particle generation. She commonly holds Favonius Lance to reduce the ER requirements for herself and the team. |
 Wriothesley | Wriothesley acts as an on-field Cryo enabler whose Elemental application is sufficient for Durin to Melt his Burst hits. |


Flex
For information on Hexerei characters, see the corresponding section for Durin’s support teams.
These characters provide strong buffs, personal damage, or other forms of utility that benefit Durin and his teammates.
 ★ Bennett | Bennett is an indispensable unit for on-field Durin teams, offering a significant ATK boost and healing. At C6, Bennett grants Durin a Pyro Infusion and Pyro DMG Bonus, enabling Durin to function as an on-field Pyro DPS in Melt, Overvape, and Vape teams. |
★ Xilonen | Xilonen’s Skill easily shreds enemy Pyro RES while her Burst grants healing. Her lack of off-field Geo application prevents her from interrupting Melt or Vape reactions. She typically holds 4pc Scroll, but she can also hold 4pc AP or 4pc Instructor if another teammate can hold it as effectively as Xilonen. |
Geo | While Albedo is Durin’s ideal Geo teammate, other Geo characters can work alone or pair with Albedo to activate Geo Resonance. Some Melt and Vape teams allow 2 Geo teammates, which enables Geo Resonance. Off-field Geo DPS characters like Chiori synergize well with Albedo. Zhongli can be used for his strong shield, Universal RES Shred, and supportive artifact sets like 4pc TotM and 4pc Archaic Petra. |
Anemo | Anemo characters primarily provide Elemental RES Shred through 4pc VV. While Sucrose and Venti are ideal teammates as Hexerei characters, other Anemo units are still viable for their unique buffs and utility. |


Example Teams
This is not a comprehensive list of teams. The inclusion or exclusion of any given team does not necessarily reflect its power level.

This is a “dual carry” Vape team. Mona’s Skill Hydro application can cause Mualani’s first Sharky’s Bite to miss the Vape, but it is necessary to meet both her and Mualani’s ER requirements. Mona should hold 4pc Instructor and Durin should hold 4pc NO.
Sample Rotation (Furina)
Xilonen Q > Furina ED Q > Xilonen E N2 > Mona EQ N4 > Durin E N1 Q > Xilonen E N2 > Mona combo
Sample Rotation (Mualani)
(Xilonen Q)¹ > Mona E > Xilonen E N2 > Durin E N1 Q > Mona Q N1 > Mualani E 3-stacked bite² > Mona N3 > Xilonen E N2 > Mualani Q E 2[3-stacked bite]²
¹Burst for healing.
²Wait for a Pyro aura.

Durin can cast his Skill twice in a rotation, which negates any need for ER investment. Xilonen lends great utility and role consolidation but lacks personal damage. Choosing Albedo makes the team lack a healer, but Neuvillette stacks enough Fanfare alone.
Sample Rotation (Xilonen)
Neuvillette E > Furina E > Xilonen EQ N2 > Durin E N1 Q > Furina Q > Neuvillette C E C Q > Xilonen E N2 > Durin E N1 > Neuvillette 2[C]
Sample Rotation (Albedo)
Neuvillette E > Furina E > Albedo N1 ED > Durin E N1 Q > Furina Q > Neuvillette C E C Q > Albedo N1 ED > Durin E N1 > Neuvillette 2[C]

In this Overvape team, Durin plays on-field to fully benefit from Bennett’s buffs. While Bennett’s C6 isn’t necessary, it is a nice boost to team DPS. 4pc CW is the best set for Durin in this team, but 4pc ESF and 4pc GD aren’t far behind.
Sample Rotation
(Fischl E)¹ > Furina ED Q > Bennett EQ > Fischl Q / E > Durin E N1 Q combo > (Bennett E)²
¹First rotation only.
²If needed to meet Bennett’s ER requirements.
Limited Roster Alternatives
These teams are meant for newer players whose limited roster prevents them from using the teams above; as such, the teams below result in lower damage output.

This is a strong Overvape team alternative if Furina is unavailable.
Sample Rotation
(Fischl E)¹ > Xingqiu EDQ N1 > Bennett EQ N1 > Fischl Q / E N1 > Durin E N1 Q combo > Bennett E
¹First rotation only.

This is a standard Vape team with Durin driving Xingqiu’s Burst. Sucrose can hold TTDS and should not use her Burst.
Sample Rotation
Xingqiu EDQ N1 > Bennett EQ N1 > Sucrose ED N1 > Durin E N1 Q combo > Bennett E

This Melt team has limited Cryo application uptime if Rosaria hasn’t activated her C2; she can freely swap in to reapply Cryo with her Skill if needed. If Bennett is C6, Durin should not use Normal Attacks while on-field.
Sample Rotation
Bennett EQ > Rosaria Q > Sucrose ED (Q)¹ > Durin E N1 Q > Rosaria E > Durin combo > Rosaria E
¹Only in single-target.
Credits
Writers: irokei, luke_260
Contributors: pjeljr, caxia5, caramielle., haafr, pulsar79., baloopy, mystathi
Team images made with the KQM portrait generator.