Updated for Version “Luna VI“

Flins is a 5★ Electro Polearm character in Genshin Impact who deals significant Lunar-Charged damage on-field. Learn about Flins’s best builds, best weapons, best artifacts, and best teams in this quick guide.
Note that the information given may change if new discoveries are made. More extensive testing is in progress
Join our Discord to participate in the theorycrafting process.
Table of Contents
Infographic
Credits to: cegewinne, acerbus114, and KQM Staff
New Content
 Columbina | Flins’s best Hydro teammate who provides a hefty amount of teamwide Lunar-Charged buffs and personal damage. |
Durin | Durin is a good replacement for the Anemo unit in Flins’s teams with his RES Shred and personal damage. He prefers a Hexerei teammate (i.e. Fischl) to maximize his RES Shred passive. |
 Jahoda | Jahoda is a decent healer and 4pc VV debuffer in Flins’s Lunar-Charged teams. Her buffing capability greatly increases at C6. |
   Fischl, Sucrose, Mona | These characters have received Hexerei buffs that make their performance stronger in Flins’s teams when played with other Hexerei teammates. |
 Sacrificer’s Staff | This is a decent 4-star Polearm choice for Flins if he has a fairly high ER requirement. |
Character Overview
Pros
- Straightforward teambuilding and gameplay.
- Good AoE on his Burst, which is the majority of his damage.
- Good baseline performance at C0.
- Great Constellations to invest in if desired.
- Eloquent, courtly, and charming.
Cons
- Highly restricted team archetype and teammate options.
- Ineffa and Columbina are significantly ahead of other options.
- Often hears ghostly whispers.
Playstyles
On-Field DPS
Flins is an on-field DPS unit that deals great Lunar-Charged damage via his Burst. He enters a special state through his Skill that converts his Normal and Charged Attacks to Electro and enables his short Burst (preferred over his longer normal Burst). This special Skill state ends if Flins swaps out, so he favors teammates who provide buffs or damage from off-field. He also has Moonsign mechanics and relies on at least one Nod-Krai teammate to unlock his full damage potential.
Lunar-Charged
Flins can deal direct Lunar-Charged damage from his Talents and Constellations (as opposed to reaction damage). For the purposes of this guide, direct Lunar-Charged damage refers to that which originates from his Talents and Constellations, while Lunar-Charged reaction damage refers to that which originates solely from triggering the Elemental Reaction.
For more information on the Lunar-Charged reaction, check out Ineffa’s Quick Guide.
Talents
Level and Talent Priority
Burst > Level 90 > Skill
Flins’s Elemental Burst makes up for the majority of his personal damage, so it should be prioritized first.
Level 90 is recommended to maximize Flins’s Lunar-Charged reaction damage. Despite not affecting his direct Lunar-Charged damage, this is still a slightly higher damage increase than leveling his Skill. Leveling his Normal Attack Talent is mostly useless, as his Elemental Skill multipliers apply to the Normal and Charged Attacks used during his Skill state.
Leveling Flins to 100
Version Luna I introduces the new maximum Character Level: Level 100. Leveling characters from 90 to 100 gives them extra Base ATK, Base HP, and Base DEF. Additionally, it also increases the Level Multiplier of all Elemental Reactions, including Lunar-Charged.
Leveling Flins from 90 to 95/100 increases all of his damage, although with varying degrees of impact. Flins usually has around a 7% increase in total ATK going from Level 90 to 100. This benefits his direct Lunar-Charged and Electro damage (although the latter is only a small part of his damage).
Additionally, Flins’s Level Multiplier for his Lunar-Charged reaction damage improves by ~16%; his direct Lunar-Charged damage does not. Note that Lunar-Charged damage (both direct and reaction) does not improve based on the enemy’s DEF Multiplier in the damage formula.
Overall, Flins’s damage increases about 4-5% from Level 90 to 95, and another 4-5% from Level 95 to 100 (total about 8-10%). This is around the average value of leveling other typical ATK-scaling damage dealers.
Talent Overview
 Normal Attack | Pocztowy Demonspear
Talent Description
Normal Attack
Performs up to 5 consecutive spear strikes.
Charged Attack
Consumes a certain amount of Stamina to perform a forward spear throw.
Plunging Attack
Plunges from mid-air to strike the ground below, damaging opponents along the path and dealing AoE DMG upon impact.
Physical attacks that are not worth leveling. In some combos, Flins may use a couple Physical attacks at the end of his field time to obtain the final Electro particle generated during his special Skill state.
 Elemental Skill | Ancient Rite: Arcane Light
Talent Description
Flins summons forth the ancient power concealed within his lamp and switches to his Manifest Flame form. This form has the following characteristics:
- Flins’s Normal and Charged Attacks deal Electro DMG that cannot be overridden by other Elemental infusions, and he is unable to perform Plunging Attacks.
- His interruption resistance is increased.
- His Elemental Skill Ancient Rite: Arcane Light is replaced with the special Elemental Skill Northland Spearstorm.
Northland Spearstorm
Flins summons a flurry of spears in front, dealing AoE Electro DMG and causing his Elemental Burst Ancient Ritual: Cometh the Night to be replaced with the special Elemental Burst Thunderous Symphony for the next 6s.
The base CD of Northland Spearstorm is 6s and will not be affected by other effects.
Upon casting his Elemental Skill, Flins enters a special state (Manifest Form), which gives him some interruption resistance and an Electro Conversion for his Normal and Charged Attacks for 10s. Additionally, he can then use a special Skill with a fixed cooldown of 6s (cannot be reduced except by his C1). The special Skill deals an instance of Electro damage and transforms his normal Burst into a shorter one that costs less Energy (similar to Varesa’s) for the next 6s. Flins can use at most two of his short Bursts per Skill state.
Note: Flins generates an Electro particle (2s cooldown) every time he hits an enemy with an Electro Normal Attack during his Skill state. He can generate up to 5 particles in a single Skill state.
 Elemental Burst | Ancient Ritual: Cometh the Night
Talent Description
Flins unleashes the true power of his lamp, dealing AoE Electro DMG and, after a short delay, dealing 2 instances of middle-phase and 1 instance of final-phase AoE Electro DMG, all of which are considered Lunar-Charged DMG.
Moonsign: Ascendant Gleam: Flins’s Skill is enhanced: If there are thunderclouds nearby, Flins will deal an additional 2 instances of middle-phase Lunar-Charged AoE Electro DMG.
After using the special Elemental Skill Northland Spearstorm, Flins’s Elemental Burst Ancient Ritual: Cometh the Night will be replaced with the special Elemental Burst Thunderous Symphony for the next 6s.
Thunderous Symphony
Consume less Elemental Energy to unleash a special Elemental Burst. Flins deals a single instance of AoE Electro DMG that is considered Lunar-Charged DMG.
Moonsign: Ascendant Gleam: Flins’s Skill is enhanced: If there are thunderclouds nearby, Flins will deal an additional instance of Lunar-Charged AoE Electro DMG.
Flins has two Elemental Burst versions (similar to Varesa). His normal Burst costs 80 Energy and can be used whenever it is ready. It deals an initial instance of Electro damage, followed up by two small attacks (Middle Phase) and one final attack (Final Phase) that are considered Lunar-Charged damage (similar to Ineffa’s A1). If the team’s Moonsign is Ascendant Gleam (Level 2) and Lunar-Charged thunderclouds are nearby, then Flins deals four small Lunar-Charged attacks (Middle Phase) instead of two.
Flins’s short Burst costs 30 Energy, dealing a single instance of Lunar-Charged damage. If the team’s Moonsign is Ascendant Gleam (Level 2) and Lunar-Charged thunderclouds are nearby, Flins deals an additional Lunar-Charged attack. This short Burst does not have a cooldown, but it can only be used within 6s after Flins uses his special Elemental Skill. Effectively, this means that he can use his short Burst twice per field time.
Flins prefers his short Burst in most circumstances due to cooldown, Energy, and rotation reasons. He can use two short Bursts every 16s (compared to one normal Burst every 20s), dealing more damage while costing 20 less Energy. The direct Lunar-Charged damage from his short Bursts comprises the majority of his personal damage.
See the Combos section for more information on using his Burst in rotation.
 Ascension 1 Passive | Symphony of Winter
Talent Description
Flins will gain a corresponding buff effect based on the party’s Moonsign.
Moonsign: Ascendant Gleam: Lunar-Charged reactions triggered by Flins will deal an additional 20% DMG.
When the team’s Moonsign is Ascendant Gleam (Level 2), Flins’s Lunar-Charged damage is increased by 20%. This buff is a Reaction DMG Bonus and it stacks with the EM multipliers in the damage formula. It benefits both Lunar-Charged reaction damage and direct Lunar-Charged damage (from his Burst).
 Ascension 4 Passive | Whispering Flame
Talent Description
Flins’s Elemental Mastery is increased by 8% of his ATK. The maximum increase obtainable this way is 160.
A simple EM self-buff based on Flins’s ATK. Flins needs 2000 ATK to maximize this passive, which is generally easy to achieve.
Note that this passive’s EM buff does not consider ATK buffs that originate from a percentage of one character’s stat, for example Bennett’s Burst and Iansan’s Burst.
 Moonsign Benediction Passive | Old World Secrets
Talent Description
When a party member triggers an Electro-Charged reaction, it will be converted into the Lunar-Charged reaction, with every 100 ATK that Flins has increasing Lunar-Charged’s Base DMG by 0.7%, up to a maximum of 14%.
Additionally, when Flins is in the party, the party’s Moonsign will increase by 1 level.
Flins converts the Electro-Charged reaction into Lunar-Charged when he is on the team (like Ineffa). This allows him to play around the Lunar-Charged reaction without relying on Ineffa.
Additionally, Flins increases the Base DMG of Lunar-Charged dealt by the whole team based on his ATK, with a maximum of 14% Base DMG Bonus at 2000 ATK.
Constellations
 Constellation 1 | Part the Veil of Snow
Constellation Description
The basic cooldown of the special Elemental Skill Northland Spearstorm is reduced to 4s.
Additionally, when party members trigger Lunar-Charged reactions, Flins will recover 8 Elemental Energy. This effect can occur once every 5.5s.
Flins’s C1 reduces the cooldown of his special Skill to 4s. This allows him to use it 3 times per field time, thereby allowing 3 short Bursts per field time. With this Constellation, Lunar-Charged reactions also provide Flins with Flat Energy, so his ER requirements are only slightly higher at C1+.
Overall, this is one of his best Constellations, along with his C6.
 Constellation 2 | The Devil’s Wall
Constellation Description
For the next 6s after using the special Elemental Skill Northland Spearstorm, when Flins’s next Normal Attack hits an opponent, it will deal an additional 50% of Flins’s ATK as AoE Electro DMG. This DMG is considered Lunar-Charged DMG.
Moonsign: Ascendant Gleam: While Flins is on the field, after his Electro attacks hit an opponent, that opponent’s Electro RES will be decreased by 25% for 7s.
Flins’s C2 makes the first Normal Attack used after his special Skill deal an additional instance of direct Lunar-Charged damage. Furthermore, when the Moonsign is Ascendant Gleam (Level 2), Flins shreds enemy Electro RES by 25%. This benefits not only his personal damage, but also his teammates’ Electro damage (including Lunar-Charged damage).
Flins’s C2 is another good early Constellation to consider if you plan to hyperinvest into him.
 Constellation 3 | Stranger in the Night
Constellation Description
Increases the Level of Ancient Ritual: Cometh the Night by 3.
Maximum upgrade level is 15.
A simple yet effective increase to his Burst level as it deals a large proportion of his personal damage.
 Constellation 4 | Night on Bald Mountain
Constellation Description
Flins’s ATK is increased by 20%.
Additionally, his Ascension Talent “Whispering Flame” is enhanced: Flins’s Elemental Mastery is increased by 10% of his ATK. The maximum increase obtainable this way is 220
Flins’s C4 provides a simple 20% ATK buff and enhances his A4 Passive. At C4, he can now obtain at most 220 EM from the passive at 2200 ATK. An overall decent Constellation to have.
 Constellation 5 | Exile’s Shadow
Constellation Description
Increases the Level of Ancient Rite: Arcane Light by 3.
Maximum upgrade level is 15.
Flins’s Skill makes up a small part of his damage, so this has little impact on his performance.
 Constellation 6 | Songs and Dances of Death
Constellation Description
The DMG dealt to opponents by Flins’s Lunar-Charged reactions is elevated by 35%.
Moonsign: Ascendant Gleam: All nearby party members’ Lunar-Charged DMG is elevated by 10%.
At C6, Lunar-Charged damage dealt by Flins is elevated by 35%. In other words, each instance of Flins’s Lunar-Charged damage is multiplied by 1.35. Note that this is a new multiplier separate from Reaction DMG Bonus. This applies to all his Lunar-Charged damage sources, including his Burst, his C2, and reaction damage.
Additionally, when the Moonsign is Ascendant Gleam (Level 2), all teammates’ Lunar-Charged damage is elevated by 10%. This stacks for Flins, granting him 45% elevated Lunar-Charged damage overall.
This is Flins’s best Constellation.
Combos
Combo Notation
- N = Normal Attack
- C = Charged Attack
- A = Aimed Shot
- P = Plunging Attack
- hP = High Plunge
- lP = Low Plunge
- E = Elemental Skill
- tE = Tap Skill
- hE = Hold Skill
- Q = Elemental Burst
- sQ = Flins’s special/short Elemental Burst
- D = dash (cancel)
- J = jump (cancel)
- W = walk (cancel)
- > = switch character
- ( ) = these actions are optional; please refer to the notes below
- [ ] = repeat these actions the specified number of times
At C0, Flins uses his special Skill and Burst twice per field time, with some Normal and Charged Attack weaving in between to fill downtime. Using a Normal Attack right after entering his Skill state generates more particles than immediately casting his special Skill.
Short or Long Burst?
In general, it is not recommended to use Flins’s normal Burst because of its longer cooldown, longer animation, and higher Energy cost, while not providing much better damage than using two short Bursts. However, with some extra Energy from Flins’s gear (e.g. Bloodsoaked Ruins, Engulfing Lightning), rich enemy HP particles, or his teammates (e.g. C2 Xilonen, Electro Traveler, Fischl, Ororon), he can use his normal Burst every 2 or 3 rotations for extra damage. Still, it is not something to normally account for.
| E N1¹ E sQ 2[N4D] N2 E sQ N4D (N5) ¹N2 is also possible. | C0 Combo At C0, Flins should use his special Skill and Burst twice per field time and as early as possible to benefit from short-lived buffs. Within this 10-11s field time framework, this Normal Attack combo provides the highest MV (motion value) while also generating 5 Electro particles. However, Flins’s Normal Attacks do not comprise a significant part of his damage output, so using different combos (such as N5D spam) can still yield similar results as long as Flins can proc his particle generation five times per Skill state. However, if Flins does not have issues meeting his ER requirements, and the team’s cooldown allows him to run faster rotations, cutting down on the last Normal Attacks can be worth it despite the decreased particle generation. The last 2 Normal Attacks of his final string (N5) will be out of Flins’s Skill state, but players can still execute them to catch his fifth Electro particle. |
| E N2 E sQ N4D N3 E sQ N4D N2 E sQ (N4) | C1+ Combo Flins’s C1 allows him to use an extra special Skill and Burst in his combo. The last 2 Normal Attacks of his final string (N4) will be out of Flins’s Skill state, but players can still execute them to catch his fifth Electro particle. |
Artifacts
ER Requirements
Calcs for ER requirements can be found here (last updated for Version Luna V).
The table below shows the ER requirements for Flins to use his short Burst twice per field time at C0 (or thrice at C1+). The rough ER requirements needed to cast Flins’s normal Burst occasionally are included in the ERC spreadsheet linked above.
The following characters are assumed to hold Favonius weapons and trigger them during their field time:
- Electro Traveler
- Iansan
- Ororon
- Kuki Shinobu
- Xilonen
- Hydro teammates
- Non-Catalyst Anemo teammates
| Electro Teammate | C0 | C1+ |
| Electro Traveler | 100–105% | 105–125% |
| Fischl / Ororon / Kuki | 110–120% | 115–135% |
| Other Electro | 120–135% | 130–145% |
R1 Bloodsoaked Ruins decreases Flins’s ER requirements by around 30%.
The ERC spreadsheet linked above shows the rough ER requirements for Flins to normal Burst occasionally.
Use the Energy Recharge Calculator to determine exact requirements for your team and rotation. For more details on how Favonius weapons will affect your team, please use Ac1d’s Favonius Mastersheet.
Artifact Stats
 Sands |  Goblet |  Circlet |
| ATK% > EM | ATK% > EM | CRIT DMG / CRIT Rate |
Stat Priority: ER (until requirement) > CRIT > ATK% > EM > Flat ATK
ATK% performs better than EM on Flins because he tends to get a considerable amount of EM buffs from teammates and himself (A4 Passive). Flins scales the best with CRIT stats and prefers a CRIT ratio of 1 CRIT Rate to 2 CRIT DMG after accounting for buffs.
Electro DMG Bonus Goblets should be avoided since most of his damage comes from Lunar-Charged damage (which does not scale with Electro DMG).
For a better understanding of how to maximize Lunar-Charged damage, check this Lunar-Charged section from Ineffa’s Quick Guide.
Artifact Sets
 4pc Night of the Sky’s Unveiling (NotSU) | Flins’s best artifact set. Flins is ideally played in a team where the Moonsign is Ascendant Gleam (Level 2), where the 4pc set effect gives him 30% CRIT Rate and gives all party members 10% Lunar Reaction DMG Bonus (including Lunar-Charged). |
 4pc Marechaussee Hunter (MH) | A considerable temporary option in teams with Furina. While performing not so far behind 4pc NotSU, 4pc MH and Furina limit his team options by requiring a healer to maintain the buffs. He also loses out on the teamwide Lunar Reaction DMG Bonus of 4pc NotSU. |
 4pc Thundering Fury (TF) | A very niche set to consider for Flins in teams with Fischl; 4pc TF reduces the cooldown of Flins’s normal Skill, which allows him to cut down the rotation length, thus increasing Fischl’s Oz uptime. This results in a slight team DPS increase, but it is not recommended when Flins is at C1+ due to Flins’s mandatory field time requirement with 3 instances of special Bursts. |
 4pc Gilded Dreams (GD) | A transitory set to use while farming for 4pc NotSU if you already have pieces at hand. |
 2pc Mixed Sets | Bonuses: ATK%, EM, ER 2pc mixed sets are generally not much different from 4pc GD. They can also be used when building towards a full 4pc set. |
Weapons
This weapon list is not exhaustive. Use Genshin Optimizer to find out your best available Polearm option with your own artifacts and team buffs.
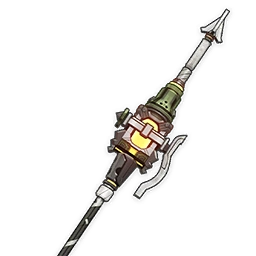
 5★ Bloodsoaked Ruins | Flins’s signature and best weapon option. It provides high Base ATK, CRIT Rate, CRIT DMG, and Lunar-Charged DMG Bonus. Its Energy refund greatly reduces his ER requirements (by approximately 25-30%). |
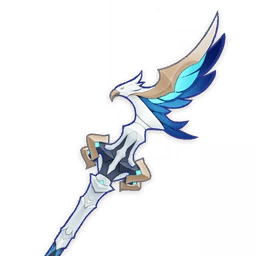
 5★ Staff of the Scarlet Sands | Staff of the Scarlet Sands is Flins’s second best weapon option, which gives him plenty of CRIT Rate and an extra ATK buff based on his EM. Flins can only stack the passive with his special Skill and have at most 2 stacks after the second special Skill use (at C0). Still, it performs well on him and becomes even better when the special Skill hits multiple enemies (which gives multiple passive stacks). EM main stats (Sands and Goblets) can be optimal with SoSS. Use the combination that gives you better substats (or consult Genshin Optimizer). A major downside of SoSS is its high CRIT Rate stat, which makes it slightly difficult to build around when also considering the 30% CRIT Rate from 4pc NotSU with a Moonsign of Ascendant Gleam (Level 2). Note that the ATK Bonus from this passive is not used in Flins’s A4 Passive where he gains an EM buff based on his ATK. Likewise, Flins’s A4 EM buff will not increase this weapon’s passive. |
 5★ CRIT Polearms | Fractured Halo, Staff of Homa, Symphonist of Scents, Lumidouce Elegy, Primordial Jade Winged-Spear (PJWS) Good 5-star options that can be used for their 5-star stats. Apart from PJWS, Flins cannot trigger the full passive of these Polearms. |
 5★ Vortex Vanquisher | Despite its reputation of being a “bad” weapon, Vortex Vanquisher performs decently well if Ineffa or another shielder is on the team. |
  5★ Skyward Spine, Engulfing Lightning | Engulfing Lightning allows Flins to use his normal Burst more frequently, but it is nothing to write home about. Both weapons get weaker with lower ER requirements. |
 4★ Deathmatch | Flins’s general best 4-star option, especially at high refinement where it can even compete with his other 5-star choices. However, its performance drops against 2 or more enemies. |
 4★ Ballad of the Fjords | Ballad of the Fjords performs slightly worse than Deathmatch (against one enemy) at equal refinements, as Flins can get an abundance of EM buffs from his teammates (Ineffa’s A4, 4pc SMS, Sucrose’s EM share, etc.) and himself (his A4, 2pc NotSU). |
4★ Sacrificer’s Staff | At C0, an R1 Sacrificer’s Staff only slightly outperforms an R5 Tamayuratei in single-target fights, as Flins’s cooldowns limit him to a single passive stack. However, at C1+, he can consistently gain and refresh stacks with each special Skill cast. This allows the Staff to rival or even surpass R1 Deathmatch, particularly at higher refinements or in scenarios where Flins has high ER requirements. |
 4★ Tamayuratei no Ohanashi | This event-limited weapon performs similarly to R1 Ballad of the Fjords, making it one of his best 4-star weapon options if you have it. Tamayuratei is good for its ER secondary stat; its value diminishes when Flins has lower ER requirements (below 130%). Nonetheless, it gets points for being a lantern that Flins can carry around! |
 4★ Prospector’s Shovel | This Nod-Krai craftable Polearm is the best free and fully obtainable option for Flins, providing him up to 48% Lunar-Charged DMG Bonus at Ascendant Gleam. |
 4★ Missive Windspear | Missive Windspear’s performance is not too far off from Prospector’s Shovel. A choice if you do not want to spend billets on Prospector’s Shovel and lack other options. |
 4★ Favonius Lance | Favonius Lance gets an honorable mention for its particle generation and ability to enable Flins’s normal Burst once every 2 or 3 rotations (on top of the usual 2 short Bursts every rotation). However, it is still not recommended over the aforementioned options unless you just really want to see his aura-farming normal Burst animation. |
Teams
Rotation Notation
- N = Normal Attack
- C = Charged Attack
- A = Aimed Shot
- P = Plunging Attack
- E = Elemental Skill
- tE = Tap Skill
- hE = Hold Skill
- Q = Elemental Burst
- sQ = Flins’s special/short Elemental Burst
- D = dash (cancel)
- J = jump (cancel)
- W = walk (cancel)
- > = switch character
- ( ) = these actions are optional; please refer to the notes below
- [ ] = repeat these actions the specified number of times
Teambuilding
- Flins’s viable teams require a Nod-Krai teammate to achieve a Moonsign of Ascendant Gleam (Level 2), which fully unlocks his kit and 4pc NotSU’s set effect. Teams with Flins as the sole Nod-Krai character (with a Moonsign of Nascent Gleam) perform far worse.
- A team focused on the Lunar-Charged reaction maximizes his Burst damage.
- One of Flins’s teammates should hold 4pc Silken Moon’s Serenade (SMS) to buff Lunar reaction damage.
- Flins is Energy-hungry, so an Electro teammate significantly reduces his ER requirements.
Lunar-Charged
Lunar-Charged teams maximize Flins’s Burst damage and enable his A1 Passive. With the EM and Lunar Reaction DMG Bonus buffs his team provides, Flins also deals a fair amount of Lunar-Charged reaction damage on top of his direct Lunar-Charged damage.
Notable Teammates
Nod-Krai
A teammate that can increase the team’s Moonsign Level is highly recommended. Teams with Flins as the sole Nod-Krai character (with a Moonsign of Nascent Gleam) perform far worse.
 Ineffa | Ineffa provides Flins with a shield, Electro particles, EM, Lunar-Charged Base DMG Bonus buff, and great off-field personal damage. She is so far the best Electro teammate for Flins. Her early vertical investment via C1 and R1 Fractured Halo also increases Flins’s damage. |
Columbina | Columbina is the best Hydro teammate for Flins. She provides long-lasting AoE Hydro application alongside good Lunar-Charged Base DMG% and Lunar-Charged Base DMG% buffs. Additionally, she grants thunderclouds a chance to deal double Lunar-Charged damage while contributing significant personal DPS herself. Columbina can choose between building higher ER to use her Burst every rotation or lower ER to cast it every other rotation. Generally, she prefers the latter to maximize her personal damage. However, as with more investment in Flins, it becomes better for Columbina to sacrifice her own output and Burst more frequently to maintain team buffs. |
Aino | Aino is a 4-star off-field Hydro applier that can enable Lunar-Charged. Her C1 gives the active character 80 EM, and her C6 gives the team 35% Lunar-Charged DMG Bonus. Aino’s short Burst cooldown (13.5s) allows Flins to run rotations as short as 16s (unlike most other Hydro units). |
Jahoda | Jahoda is a decent Anemo healer who can give Flins a 100 EM buff from her A4 Passive while holding 4pc VV for RES Shred. She can also apply off-field Hydro and Electro and, at C6, give 5% CRIT Rate and 40% CRIT DMG to Moonsign characters. However, these perks are locked behind her Skill, which requires some field time to charge. |
Lauma | Lauma’s Skill applies Dendro from off-field, generating Dendro Cores for Flins to trigger Hyperbloom; Lauma’s Burst buffs Hyperbloom damage. However, since Lauma replaces the Anemo unit in the last team slot, this comes at the expense of lower Lunar-Charged uptime and no Electro RES Shred. As a result, this lowers Flins’s Lunar-Charged damage in exchange for Hyperbloom damage. Ultimately, teams with Lauma are possible but perform worse than teams with Ineffa instead. |
Electro
A second Electro character is recommended to fund Flins’s Burst cost through Electro Resonance and their particle generation.
Fischl | Fischl deals good personal damage and produces many Electro particles to battery Flins’s Burst. With a Hexerei teammate, Fischl provides 90 EM or 22.5% ATK whenever Lunar-Charged or Overloaded (with Durin in the team) is triggered, respectively. These buffs double at C6 and have 100% uptime, which makes her a very good alternative to Ineffa for Flins’s teams. Flins–Fischl teams usually run a 17-18s rotation with Fischl using her Skill and Burst alternatively every rotation. Unconventionally, Flins can use 4pc TF to reduce his normal Skill’s cooldown, allowing the team to run 12s rotations to perfectly align with Oz uptime. |
Iansan | Iansan provides a hefty amount of ATK for Flins through her Burst. Flins can skip some of his Normal Attacks to run around in order to maintain Iansan’s ATK buff on his Burst, with some Normal Attacks occasionally being weaved in to generate particles without sacrificing much DPS. Iansan can hold 4pc Scroll to increase the Electro damage dealt by Flins (though not so much) and the Hydro damage of the Hydro unit. However, with Aino on the team, Iansan can use other sets like 4pc Noblesse since Aino’s personal damage is rather insignificant. |
 Sara | Sara offers a large ATK buff and a 60% CRIT DMG buff (at C6) to Electro and Lunar-Charged damage. However, her buffs only last around 6s with Skill and 7-8s with Burst, which is shorter than Iansan’s buffs. Unless the team’s rotation length is also gated by another character, Sara should use her Burst every other rotation so Flins can run a shorter rotation. |
  Kuki Shinobu, Dori | These off-field Electro healers help battery Flins’s Burst with either turret-like Electro particle generation (Shinobu) or a Flat Energy refund (Dori). |
 Electro Traveler | Electro Traveler’s Skill and Burst considerably decrease Flins’s ER requirements. Electro Traveler’s Burst should be used every other rotation as their Burst cooldown is 20s long. As such, the Electro RES Shred from their C2 is only active every other rotation. Beyond this, Electro Traveler comes with a big gameplay caveat. Their Elemental Skill leaves 3 Amulets at the enemy that can be picked up to receive Flat Energy. However, it can be difficult or impossible for Flins to pick up these Amulets if enemies are large or his teammates accidentally pick them up. As such, careful execution of the team’s rotation and movement is necessary to make full use of Electro Traveler. |
Ororon | Ororon’s damage is more AoE-focused compared to Fischl. While he does not generate as many particles as her, his A4 Passive gives Flat Energy which results in similar ER requirements for Flins. His C6 also gives Flins a respectable 30% ATK buff. |


Hydro
Off-field Hydro application is necessary to maintain Lunar-Charged uptime. Hydro units with shorter cooldowns (e.g. Aino, Mona) are preferred over ones with longer cooldowns (e.g. Xingqiu). These Hydro characters often use 4pc SMS to buff Flins and Ineffa.
 Yelan | Yelan’s 18s Burst cooldown only slightly extends the team’s rotation. Her DMG% buff is nice for Flins’ Electro damage, but this is a far smaller portion of his damage than Lunar-Charged. As such, it is not as impactful on Flins as on other DPS units. |
 Furina | While Furina’s Skill cooldown is 20s, she can use it once every other rotation thanks to its 30s uptime; this allows the team to run a 16s rotation. A healer helps generate Fanfare, but since the vast majority of Flins’ damage does not benefit from Elemental DMG Bonus, a teammate with better buffs (e.g., Sucrose) is generally better over a healer like Xilonen or Jean. |
Mona | Mona provides DMG Bonus, Lunar-Charged DMG Bonus (at C1), EM (at C2), and CRIT Rate (at C4), though Flins does not use DMG Bonus buffs well, and Mona’s DMG Bonus and her C4 buffs last only for Flins’s first short Burst. However, when played with another Hexerei teammate (Fischl or Sucrose), Mona can use her Normal and Charged Attacks to extend her Burst duration to cover both of Flins’s short Burst uses, which can be desirable if Mona is C4+. Use Favonius Codex or Prototype Amber over TTDS for Mona because she usually swaps to an Anemo unit instead of Flins for maximum 4pc VV uptime. |
 Kokomi | With a R5 Sacrificial Fragments, Kokomi can run a short rotation where she provides off-field Hydro application and healing through her Skill. |


Anemo
Anemo units are a common final slot in Flins’s Lunar-Charged teams due to their ability to Swirl Electro for 4pc Viridescent Venerer (VV) RES Shred. Among them, Sucrose is the most notable for her EM buffs which increase the Lunar-Charged damage dealt by the whole team. Many Anemo Catalyst users can hold 4pc TTDS to buff Flins. However, as Flins’s teams tend to run rotations shorter than 20s, the TTDS buff is often only available every other rotation.
 Sucrose | Sucrose’s valuable EM increases the Lunar-Charged damage dealt by the entire team. She can provide further buffs through her weapon choices, which include TTDS, Wandering Evenstar, and Thousand Floating Dreams. She also enables the Hexerei passives of other units, allowing them to synergize better with Flins. However, her own Hexerei buffs are mostly insignificant for him. |
Lan Yan | Lan Yan is a good Anemo option that incorporates 4pc VV, TTDS, and a sturdy shield into one slot, making her not a big DPS loss over pure buffing options like Sucrose. |
Kazuha | Lunar-Charged damage does not scale off DMG Bonus buffs, so Kazuha is not a good buffer for Flins’s teams. He can still be used for his personal damage, VV, and strong grouping. |


Flex
Some characters of different Elements can be used as long as they do not interfere with Lunar-Charged uptime.
Durin | Durin is a good replacement for the Anemo unit in Flins’s teams with his RES Shred and personal damage. He prefers a Hexerei teammate (primarily Fischl) to maximize his RES Shred passive. However, despite still allowing decent thundercloud uptime for Flins, Durin can decrease the team’s Lunar-Charged reaction damage |


Example Teams
This is not a comprehensive list of teams. The inclusion or exclusion of any given team does not necessarily reflect its power level.

This is the standard Lunar-Charged setup for Flins where all 3 teammates considerably buff him and buff each other. The Ineffa–Columbina duo deals significant off-field damage by themselves and are miles ahead of the next best options. Regardless, decent alternatives include Aino and Fischl.
If Columbina and Ineffa use their Bursts every other rotation (which is recommended), you should alternate them to keep the rotation length consistent. If at least one of them uses their Burst every rotation, Flins’s field time should be shortened by omitting the last few Normal Attacks. Additionally, if Sucrose is not on TTDS, switch to her at the end of each rotation to refresh VV’s RES Shred and her EM buff.
Sample Rotation (Columbina)
Ineffa E (Q)¹ > Columbina (Q)¹ E > Sucrose Q/ED² N1 > Flins combo > Sucrose N1 ED/C³
¹Alternate between their Bursts. Do not cast Ineffa’s Burst in the first rotation. Use Columbina’s Burst after her Skill in the first rotation.
²Use Sucrose’s Burst whenever available; otherwise, use her Skill.
³If neither Sucrose’s Burst nor Skill is available for the next rotation, use her Charged Attack instead.
Sample Rotation
Ineffa E(Q)¹ > Aino EQ > Sucrose ED(Q)¹ > Flins combo
¹Burst when available

Yelan and Mona are viable alternatives to Columbina if you have them. Ineffa should use 4pc Aubade of Morningstar and Moon while the Hydro teammate should hold 4pc SMS. Mona can use Favonius Codex to provide Energy, Prototype Amber to heal the team, or hold TTDS to further buff Flins.
Sample Rotation (Yelan)
Ineffa E(Q)¹ > Yelan EQ N1 > Sucrose ED(Q)¹ N1 > Flins combo
¹Burst when available
Sample Rotation (Mona)
Ineffa E (Q)¹ > Mona Q N4 E N1 > Sucrose ED (Q)¹ N1 > Flins combo
¹Burst when available

While Furina’s Common DMG% buff does not benefit Flins and Ineffa much, she can still be used for her good Hydro application and non-insignificant personal damage. Xilonen and Jahoda are the two most notable healers for the team, with Xilonen providing long-lasting RES Shred and Jahoda buffing the team with her EM and (at C6) CRIT buffs. However, Sucrose remains an optimal choice for the final slot, as her inclusion balances team-wide buffs with a streamlined rotation length.
Xilonen should use 4pc Instructor instead of 4p Scroll in this team since the EM buff is more impactful. Furina should also use her Skill every other rotation to allow a 16s rotation with Xilonen.
Sample Rotation (Xilonen)
Ineffa E(Q)¹ > Furina (ED)² Q > Xilonen EQ N2 > Flins combo
¹Burst when available
²Use Skill every other rotation
Sample Rotation (Jahoda)
Ineffa E (Q)¹ > (Jahoda E²) > Furina ED Q > Jahoda Q > Flins combo > Jahoda E
¹Burst when available
²Only do this on the first rotation if Jahoda is C6.

Fischl is a good option for Flins’s Electro teammate when Ineffa is not available. With Sucrose as the Hexerei teammate, Fischl is a very potent off-field damage dealer and buffer that can provide up to 180 EM to Flins and herself with full uptime.
This team usually runs a 17-18s rotation with Fischl using her Skill and Burst alternatively every rotation. Unconventionally, Flins can use 4pc TF to reduce his normal Skill’s cooldown, allowing the team to run 12s rotation to perfectly align with Oz uptime. This results in a slight team DPS gain; however, it only works for C0 Flins as he requires more field time at C1.
Sample Rotation (Standard)
Fischl E/Q > Columbina E (Q)¹ > Sucrose ED (Q)¹ N1 > Flins combo
¹Burst when available.
Sample Rotation (TF Flins)
Fischl E/Q¹ > Columbina E/Q¹ > Sucrose ED/Q² N1 > Flins E E N1 sQ N4D N5 E sQ N1
¹Alternate between Skill and Burst each rotation.
²Use Sucrose’s Burst whenever available; otherwise, use her Skill.

Durin is a good replacement for Sucrose with his RES Shred and personal damage. He also triggers Overloaded, which is useful when poise damage or blunt attacks are needed.
Fischl should use an R5 Sacrificial Bow to refresh her Skill’s cooldown, allowing herself to cast both her Skill and Burst every rotation for full Oz uptime.
Sample Rotation (R5 Sacrificial Bow Fischl)
Fischl E > Columbina E (Q)¹ > Durin 2[E]Q > Fischl N1 Q > Flins combo
¹Burst every other rotation
Sample Rotation (Other weapons)
Columbina E (Q)¹ > Durin 2[E]Q > Fischl N1 E/Q > Flins combo
¹Burst every other rotation

This team can run 2 different rotations depending on Jahoda’s Constellations. If she does not have C6, it is recommended to alternate between her Skill and Burst in order to run a short rotation. If Jahoda is C6, it is beneficial to have her full Skill be used every rotation. Fischl should equip R5 Sacrificial Bow to maintain her Oz uptime for the entire long rotation.
Sample Rotation (Short rotation)
Fischl N1 E/Q > Mona Q N4 E N1 > Jahoda 2[E]/Q > Flins combo
Sample Rotation (Long rotation)
Fischl E N1 > Mona Q N4 E N1 > Fischl N1 Q > Jahoda Q > Flins combo >Jahoda E

This Ineffa-less team uses an Electro buffer to maximize Flins’s personal damage. If necessary, Sucrose can be replaced with a sustain unit like Lan Yan, Jean, or Xilonen.
With Iansan, Flins can skip some of his Normal Attacks to frequently dash to maintain her ATK buff on his Burst, with some Normal Attacks occasionally being weaved in to generate Energy particles. Because his Normal Attacks do not constitute a large part of his damage, Flins’s damage output is still similar.
As for Sara, her Burst’s cooldown is 20s, so she should use it every other rotation to save time.
Sample Rotation (Iansan)
Aino EQ > Iansan E N1 Q > Sucrose ED > Flins E N1 E sQ D N3D N4D 2[D]¹ E sQ N4D N5
¹Dash to recharge Iansan’s ATK buff; use Flins’s special Skill immediately off cooldown afterwards
Sample Rotation (C2+ Sara)
Aino EQ > Sara E > Sucrose ED² > Sara C (Q)¹ > Flins combo
¹Burst every other rotation
²Wait until an Electro aura is applied before using her Skill

Flins’s ER requirement is low in this team thanks to Kuki’s particle generation. Lynette deals solid personal damage and further decreases Flins’s ER requirement with Favonius Sword. Heizou can use TTDS to further buff Flins, though the buff is only available every other rotation.
Sample Rotation (Lynette)
Aino EQ > Kuki (Q)¹ E > Lynette EQ > Flins combo
¹Burst when available
Sample Rotation (Heizou)
Aino EQ > Kuki (Q)¹ E > Heizou Q E > Flins combo
¹Burst when available

Fischl and Ororon provide off-field Electro damage and lower Flins’s ER requirement. Between the two, Fischl deals the most damage against a single target, while Ororon fares better against multiple targets.
Sucrose is a better buffer than Lan Yan if sustain is not a concern.
Sample Rotation (Fischl)
Aino EQ > Fischl N1 E/Q > Lan Yan 2[E] (Q)¹ > Flins combo
¹Burst when available
Sample Rotation (Ororon)
Aino EQ > Ororon E¹Q > Lan Yan 2[E] (Q)² > Flins combo
¹Ororon’s Skill can be used after Lan Yan to funnel particles to Flins when TTDS’s buff is unavailable
²Burst when available
Credits
Writer[s]: acerbus114
Contributors: caxia5, irokei, caramielle., pjeljr, baloopy, not.logic, ems, luke_260, luwunae, Hades1500
Team images made with the KQM portrait generator.