Updated for Version 5.8

Venti is a 5-star Anemo Bow character in Genshin Impact who brings VV RES Shred, unparalleled grouping, Energy regen, and respectable DPS from his frequent Swirls and decent Talent multipliers. Learn about Venti’s best builds, best artifacts, best weapons, and best teams in this quick guide.
Note that the information given may change if new discoveries are made. More extensive testing is in progress.
The full-length guide is available here.
Table of Contents
Infographic
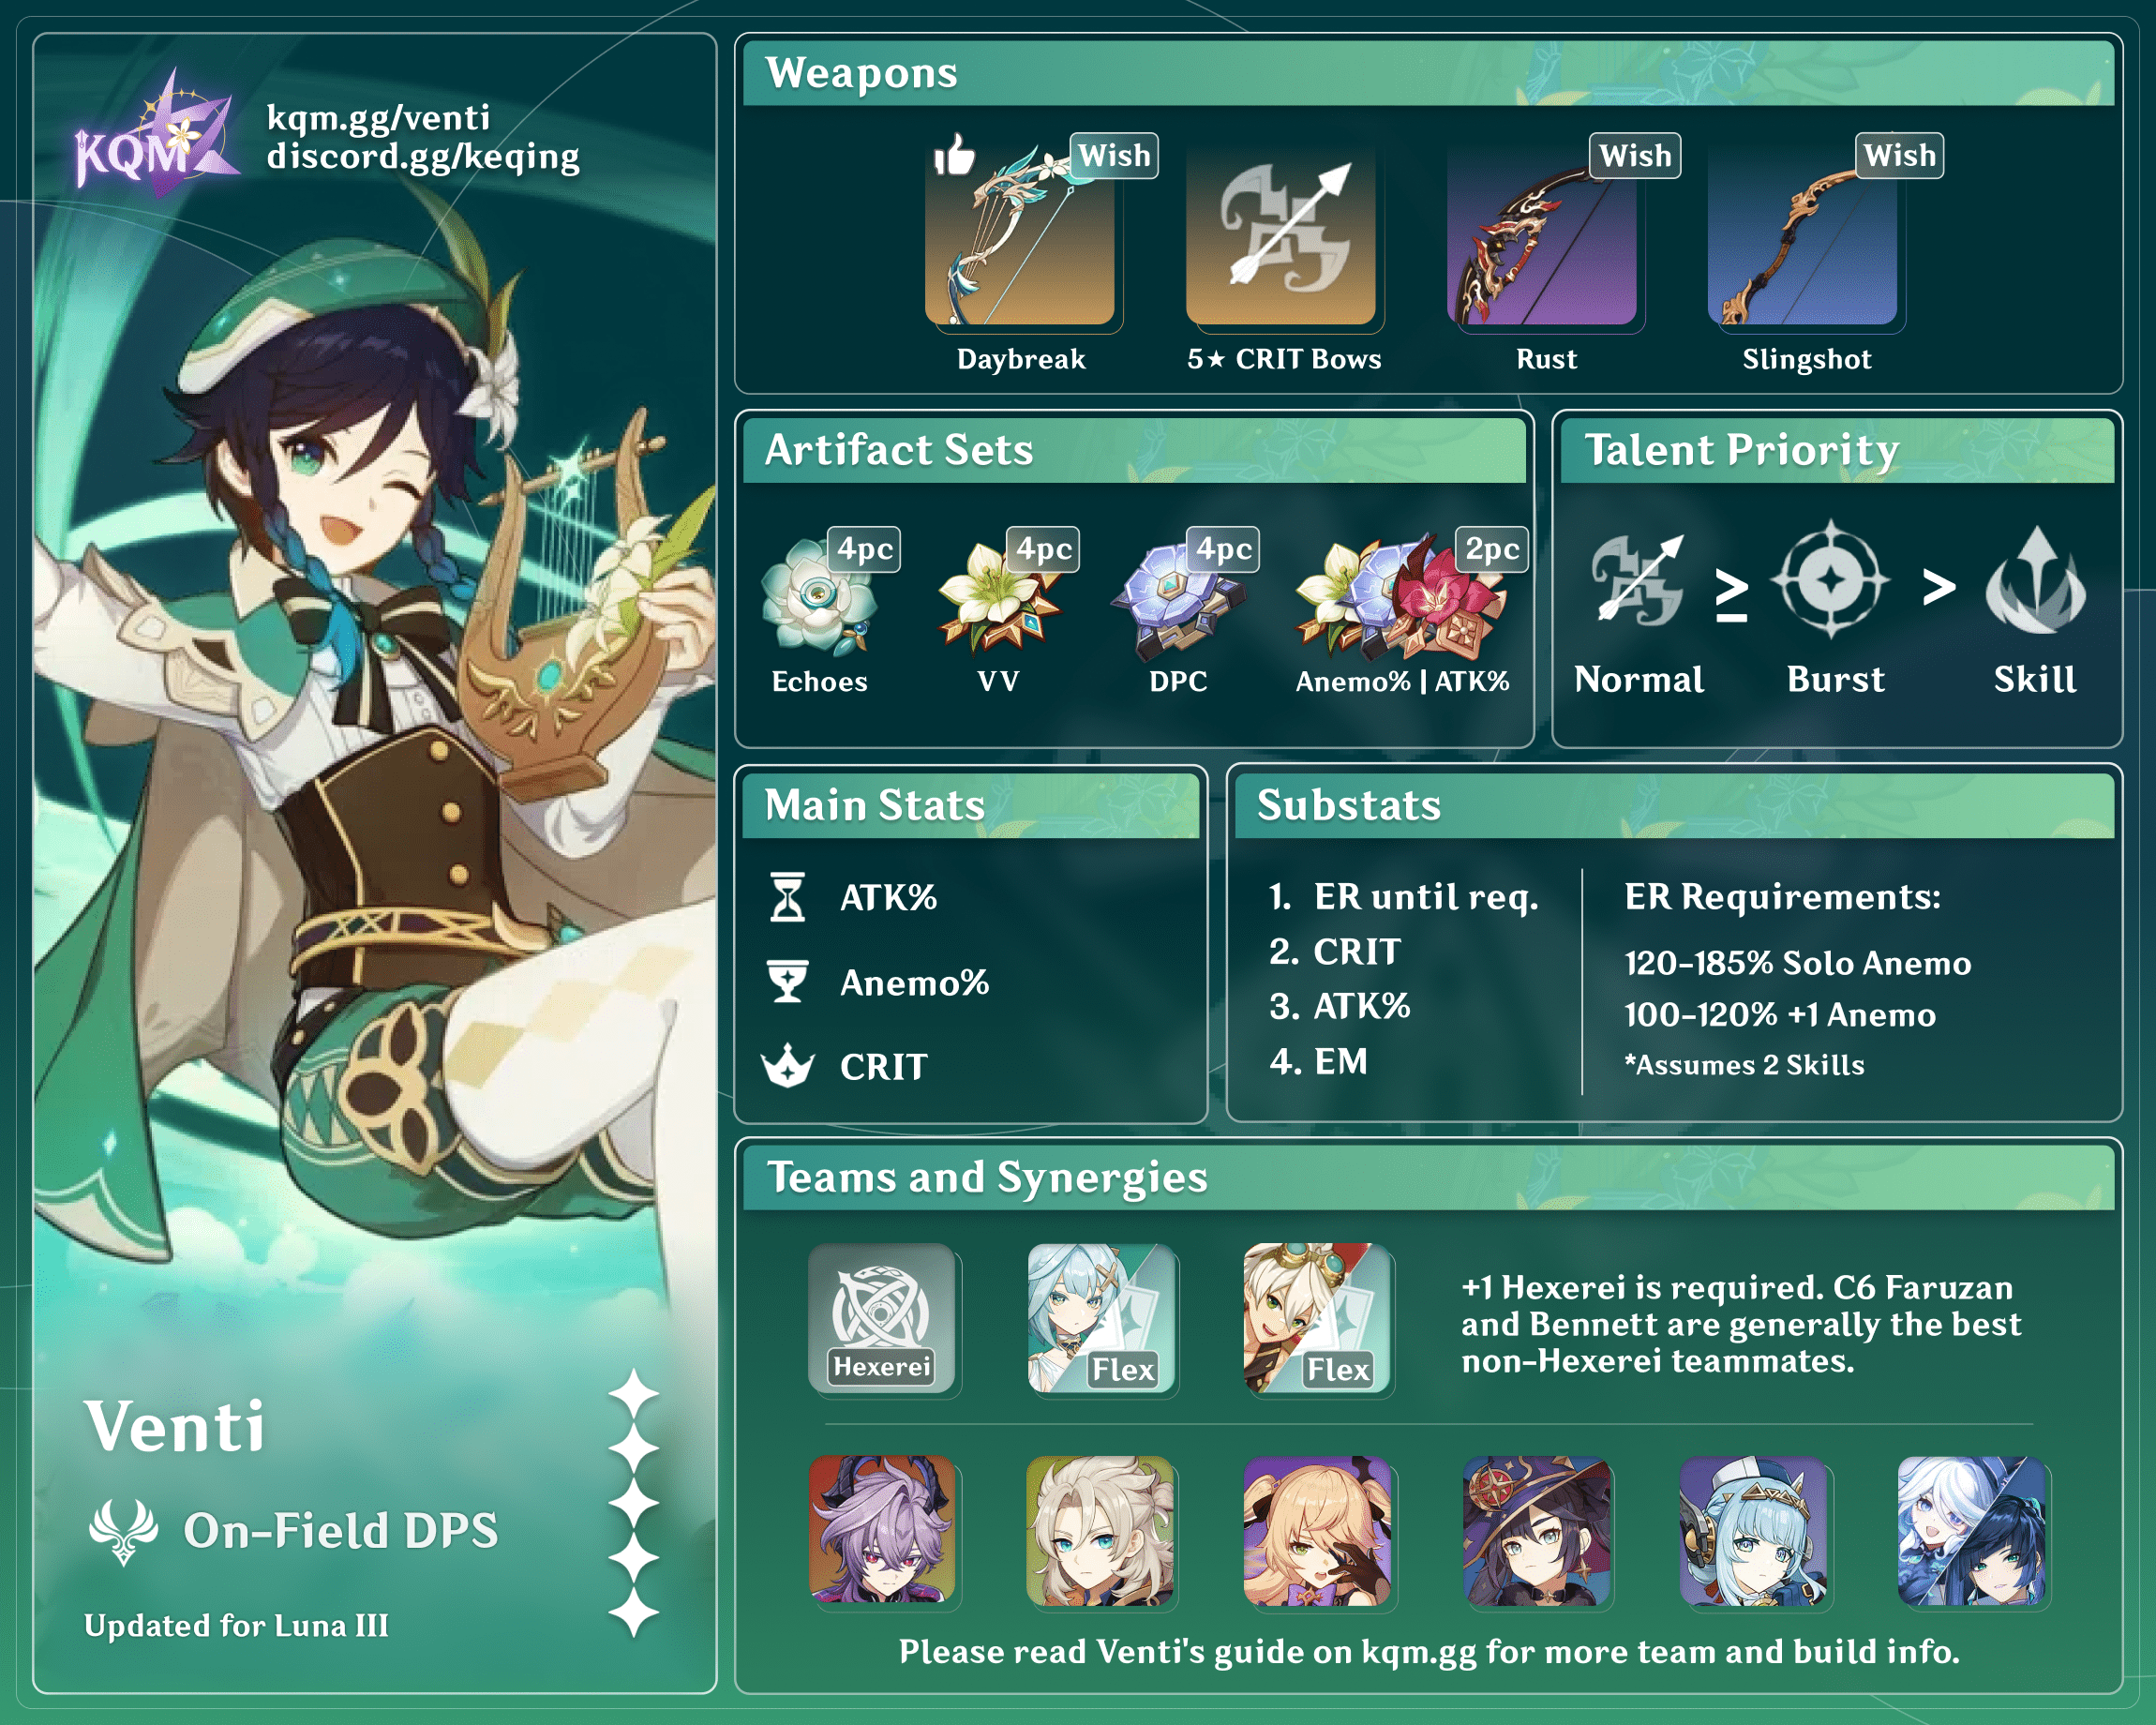
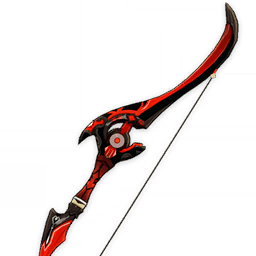
Credits to: Irokei, shade.645 and KQM Staff
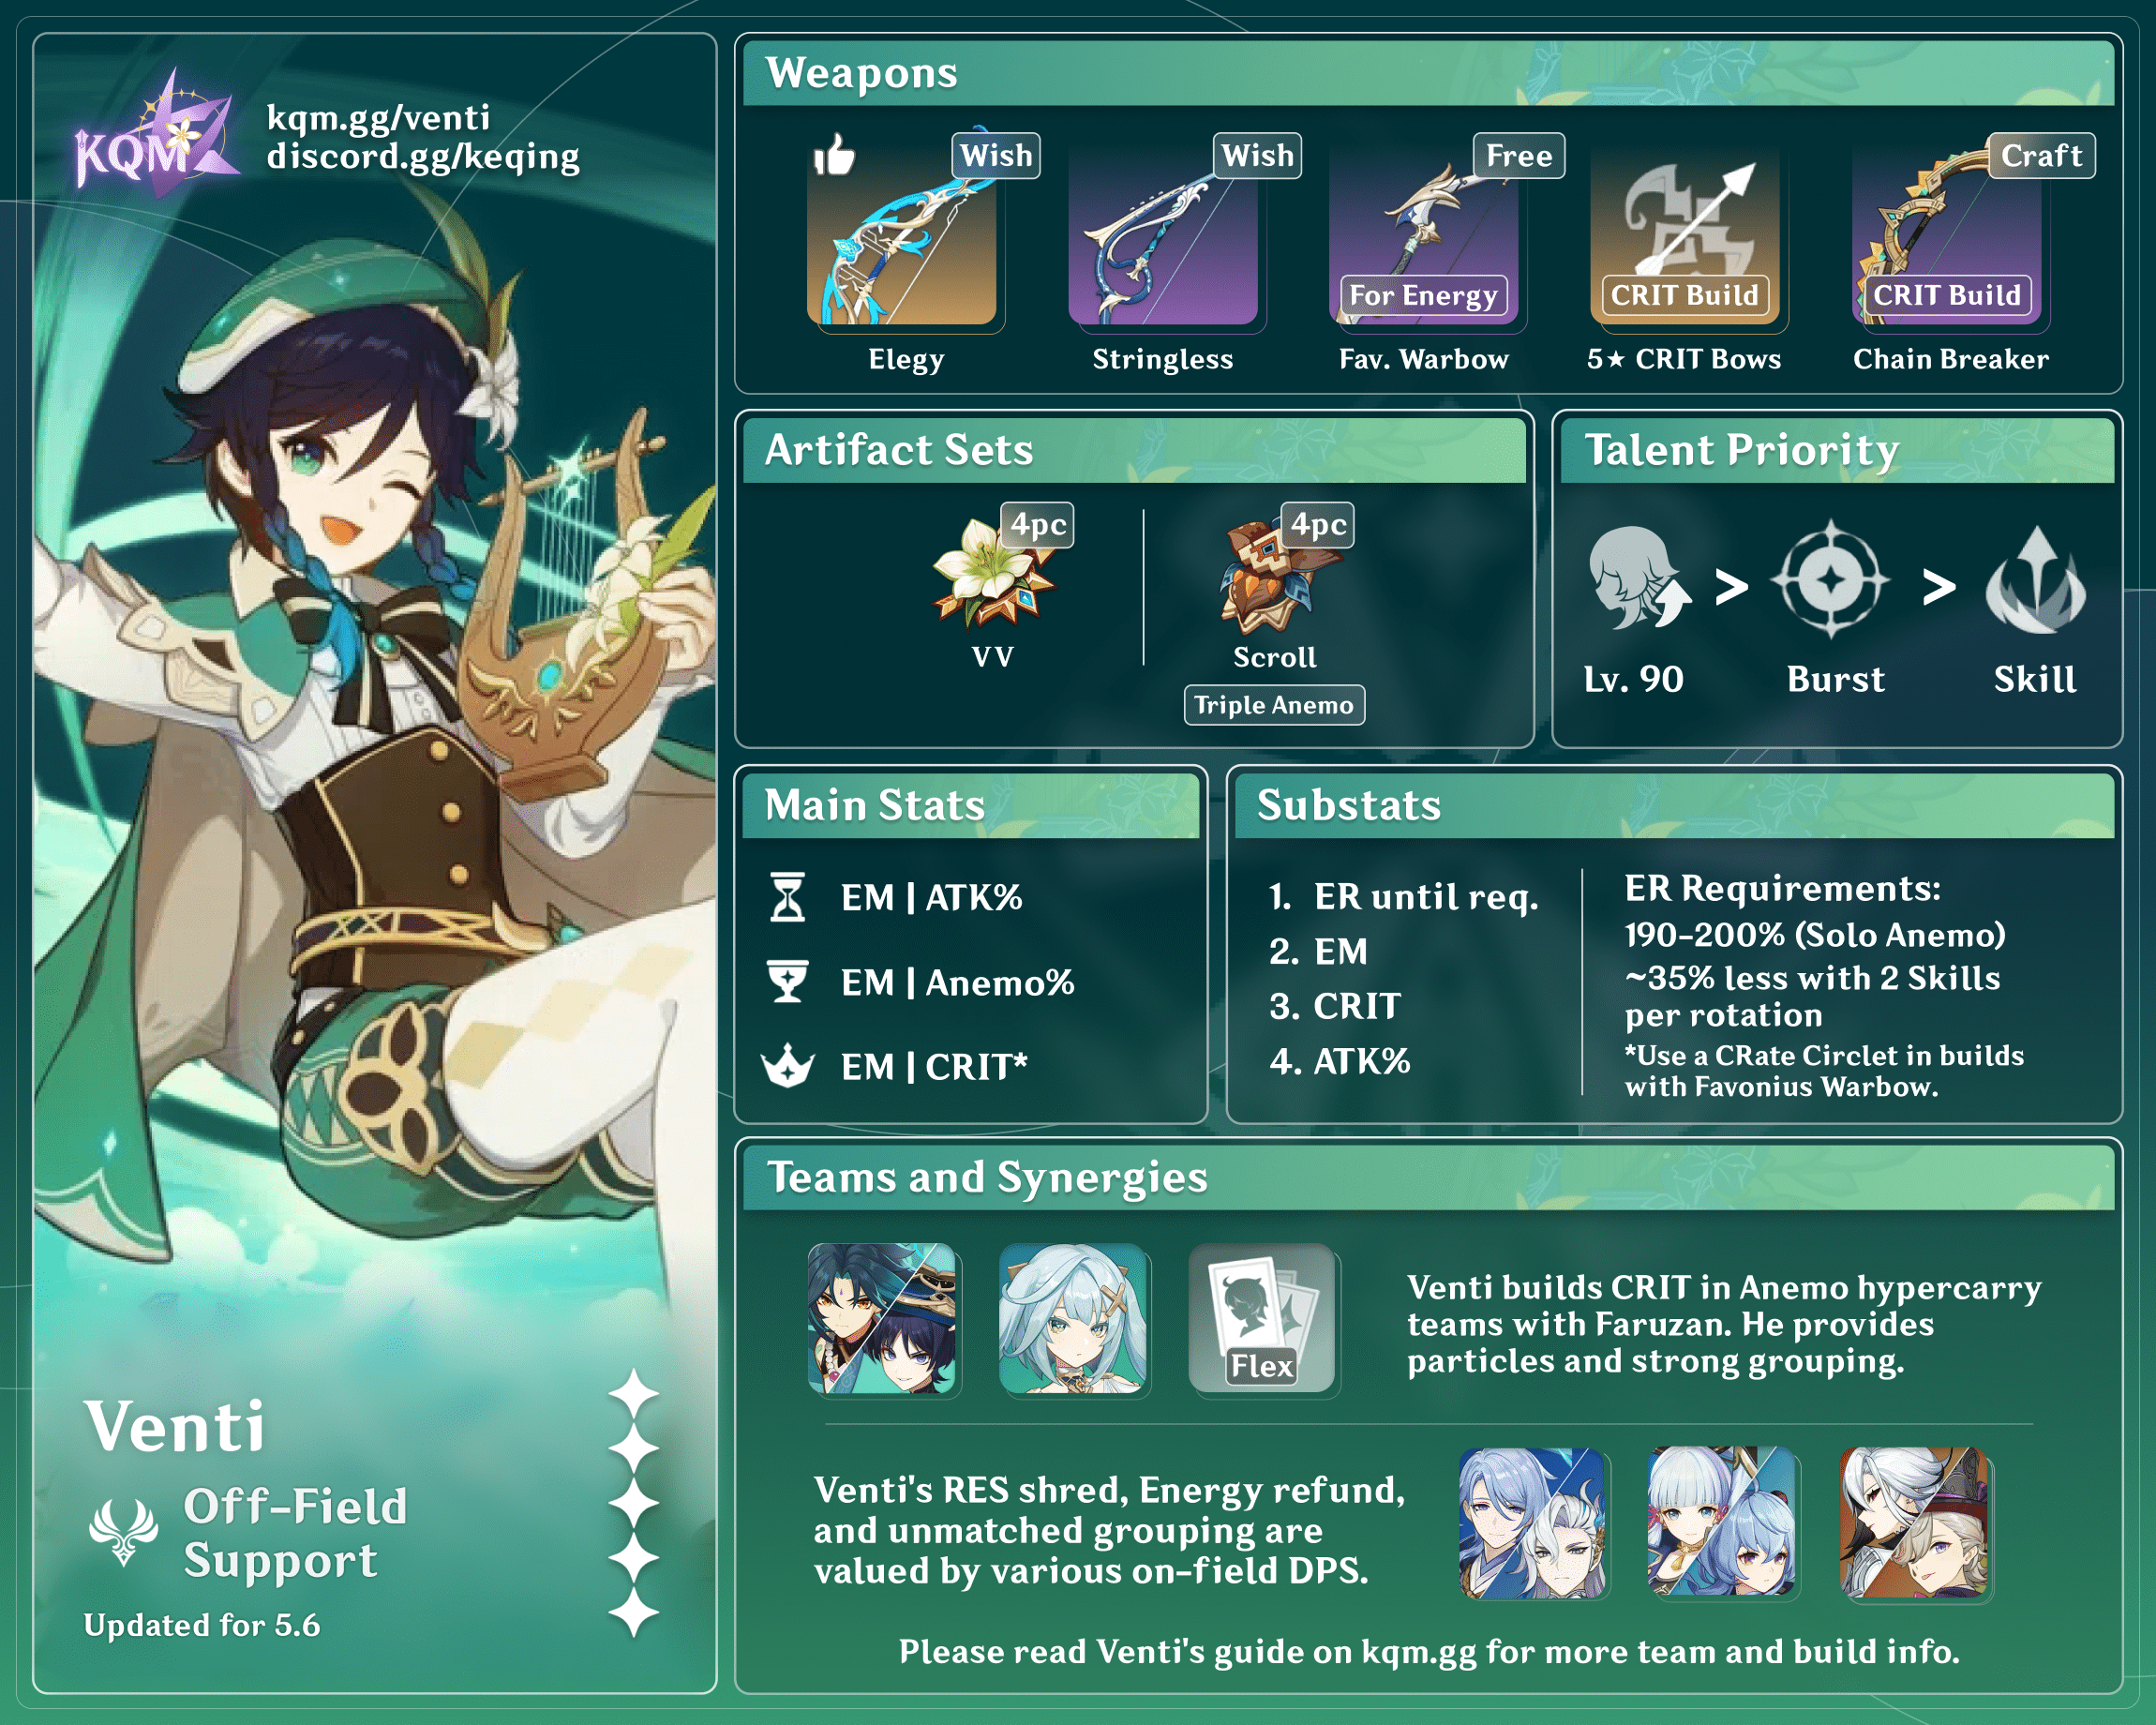
Credits to: kolvii, mocha_biscuit, shade.645 and KQM Staff
Character Overview
Playstyles
Reaction DPS / Support (“EM Venti”)
Venti uses his Skill and Burst in this playstyle to deal damage via Swirl and chain reactions such as Aggravate and Electro-Charged. He also supports his teammates with strong grouping and Energy regen from his Burst, as well as RES Shred from 4pc Viridescent Venerer. This is Venti’s strongest playstyle in most AoE scenarios.
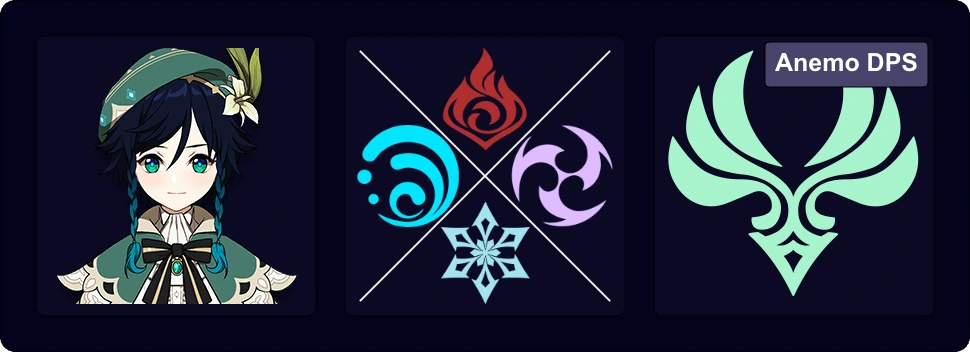
Anemo DPS / Support (“CRIT Venti”)
This playstyle shares all the supportive pros of Venti’s Reaction DPS playstyle, but uses Venti’s high Talent multipliers to deal direct Anemo damage instead. This is a strong playstyle for Venti in scenarios where he can snapshot buffs, or where his DPS from reactions is limited. It also scales well with vertical investment.
Talents
Level and Talent Priority
(Level 90) > Burst > Skill
Level 90 is top priority for EM Venti, as it affects Transformative Reaction scaling, while Talent levels do not. For bare minimum investment, EM Venti can skip leveling Talents altogether, but he has good enough multipliers for his Burst and Skill to be worth investing in if you so choose.
Level 90 is optional for CRIT Venti. His Burst is the primary focus, followed by his Skill.
The Normal Attack Talent is essentially useless across the board.
Talent Overview
 Normal Attack | Divine Marksmanship
Talent Description
Normal Attack
Performs up to 6 consecutive shots with a bow.
Charged Attack
Perform a more precise Aimed Shot with increased DMG.
While aiming, favorable winds will accumulate on the arrowhead. A fully charged wind arrow will deal Anemo DMG.
Plunging Attack
Fires off a shower of arrows in mid-air before falling and striking the ground, dealing AoE DMG upon impact.
Venti’s Normal Attack Talent does not hold much value for his typical playstyles. His Aimed Shot can be used to trigger 4pc VV, but this is almost never necessary due to his Skill’s short cooldown.
 Elemental Skill | Skyward Sonnet
Talent Description
O wind upon which all hymns and songs fly, bear these earth-walkers up into the sky!
Press
Summons a Wind Domain at the opponent’s location, dealing AoE Anemo DMG and launching opponents into the air.
Hold
Summons an even larger Wind Domain with Venti as the epicenter, dealing AoE Anemo DMG and launching affected opponents into the air.
After unleashing the Hold version of this ability, Venti rides the wind into the air.
Opponents hit by Skyward Sonnet will fall to the ground slowly.
Venti almost always uses the Tap version of his Skill for tighter rotations. This launches small enemies into the air and generates 3 Anemo Particles. Because of its 6s cooldown, it is often used multiple times in a rotation.
 Elemental Burst | Wind’s Grand Ode
Talent Description
Fires off an arrow made of countless coalesced winds, creating a huge Stormeye that sucks in opponents and deals continuous Anemo DMG.
Elemental Absorption
If the Stormeye comes into contact with Hydro/Pyro/Cryo/Electro, it will deal additional elemental DMG of that type.
Elemental Absorption may only occur once per use.
Venti’s Burst is the core of his kit in all playstyles. The Stormeye it summons is always aimed in the direction of the nearest enemy, but it is generated at a fixed distance from Venti’s position. Getting a sense of where the Stormeye appears is crucial for optimal Burst usage, particularly with enemies who cannot be drawn in. Poor Stormeye placement will tank his damage.
The Stormeye snapshots his stats on cast and deals a total of 20 ticks of Anemo damage over its 8s duration. If it comes into contact with Pyro, Hydro, Electro, or Cryo, it will absorb and deal additional damage instances of that Element (roughly 13-15). If multiple Elements come into contact with Venti’s Burst, the Absorption priority is Pyro > Hydro > Electro > Cryo.
From his Burst alone, Venti can trigger Swirl up to 7 times in single-target, and far more with additional enemies present. His Burst is also his most significant source of Talent damage; at T9, it has a total multiplier of 1,278% base Anemo damage as well as another 512% from the absorbed Element.
Venti’s Burst has exceptionally strong crowd control, with the Stormeye drawing groupable enemies toward its center throughout its duration. It will also lift smaller enemies, which may put them out of reach of certain characters’ attacks; a list of compatibilities and incompatibilities with Venti’s Burst can be found here, though it may not include newer characters.
 Ascension 1 Passive | Embrace of the Winds
Talent Description
Holding Skyward Sonnet creates an upcurrent that lasts for 20s.
Useful mostly for exploration and not combat.
 Ascension 4 Passive | Stormeye
Talent Description
Regenerates 15 Energy for Venti after the effects of Wind’s Grand Ode end. If an Elemental Absorption occurred, this also restores 15 Energy to all characters of that corresponding element in the party.
Further bolsters his Burst’s utility by granting a generous 15 Flat Energy to himself and party members of the absorbed Element. This gives Venti tremendous utility as a team battery, as long as he can reliably absorb the correct Element.
Constellations
 Constellation 1 | Splitting Gales
Constellation Description
Fires 2 additional arrows per Aimed Shot, each dealing 33% of the original arrow’s DMG.
Generally useless, as Venti does not use Charged Shots in any of his common playstyles.
 Constellation 2 | Breeze of Reminiscence
Constellation Description
Skyward Sonnet decreases opponents’ Anemo RES and Physical RES by 12% for 10s.
Opponents launched by Skyward Sonnet suffer an additional 12% Anemo RES and Physical RES decrease while airborne.
Most beneficial for Anemo DPS Venti, providing a source of Anemo RES Shred for himself and other Anemo units. Launching enemies with his Skill to gain the maximum effect of this Constellation is inconsistent in practice.
 Constellation 3 | Ode to Thousand Winds
Constellation Description
Increases the Level of Wind’s Grand Ode by 3.
Maximum upgrade level is 15.
Burst Talent levels are always welcome for Venti.
 Constellation 4 | Hurricane of Freedom
Constellation Description
When Venti picks up an Elemental Orb or Particle, he receives a 25% Anemo DMG Bonus for 10s.
This buff is best utilized with a rotation adjustment so that a teammate feeds him particles, as the particles from his Skill do not tend to reach him until after his Burst snapshots.
 Constellation 5 | Concerto dal Cielo
Constellation Description
Increases the Level of Skyward Sonnet by 3.
Maximum upgrade level is 15.
Skill Talent levels, though less impactful than Burst Talent levels, are still a small increase to Venti’s overall damage.
 Constellation 6 | Storm of Defiance
Constellation Description
Targets who take DMG from Wind’s Grand Ode have their Anemo RES decreased by 20%.
If an Elemental Absorption occurred, then their RES towards the corresponding Element is also decreased by 20%.
The C6 RES Shred is a great addition to Venti’s array of buffing capabilities. Since RES affects Swirl damage, this simultaneously increases his Swirl damage as well, making it a beneficial Constellation for any playstyle.
ER Requirements
| 1 Skill | 2 Skills (short rot.) | 2 Skills (long rot.) | |
| Solo Anemo | 175-210% | 145-165% | 115-145% |
| Triple Anemo | 125-160% | 110-135% | 110-135% |
Venti has 132% base ER when fully ascended thanks to his Ascension stat, making these numbers generally easy to reach. If using Favonius Warbow, his ER requirements will be met with the weapon’s secondary stat and passive alone.
These are general estimates only. Use the Energy Recharge Calculator to determine exact requirements for your team and rotation.
Reaction DPS
This playstyle focuses on using Venti’s supportive abilities to group enemies, refund Energy, and shred Elemental RES with 4pc Viridescent Venerer while dealing damage with Transformative Reactions (most notably Swirl). As these reactions scale solely with character level and Elemental Mastery (EM), this playstyle builds as much EM as possible to increase damage from Swirl and follow-up reactions that Swirl may trigger. EM Venti is very easy to build, as he only needs EM and ER and has very accessible F2P weapon choices. Since Swirl deals AoE damage and can trigger more times in AoE scenarios, this playstyle is strongest in AoE.
Artifacts
Artifact Stats
 Sands |  Goblet |  Circlet |
| EM or Energy Recharge% | EM | EM |
Substats: ER (until requirement) > EM
Sacrificing an EM Sands to reach his ER requirement is overall not recommended. An ER Sands should only be considered if Venti’s ER needs are very high and he’s not using an ER weapon. Even then, try to meet ER needs with substats if possible.
Artifact Sets
Calcs for artifact set comparisons can be found here (last updated for Version 3.3).
 4pc Viridescent Venerer (VV) | Uncontested BiS for this playstyle. The whopping 60% Swirl DMG Bonus maximizes Venti’s reaction damage, while the 40% RES Shred for the Swirled Element buffs his teammates. There is little reason to use anything else. Even in Double Anemo teams, Venti is often the better holder of this set (e.g. with 4pc Thundering Fury Kazuha). |
 4pc Gilded Dreams (GD) | A niche option for teams with a second Anemo who is a better holder of 4pc VV than Venti (e.g. Mizuki). |
Weapons
Calcs for weapon comparisons can be found here (last updated for Version 3.3).
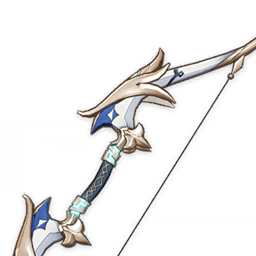
 5★ Elegy for the End | Indispensable for its teamwide buff, though it tends to lag behind other options for Venti’s personal damage, performing better with higher ER needs. If using Venti in teams with rotations shorter than 20s, this weapon’s passive will not trigger every rotation. |
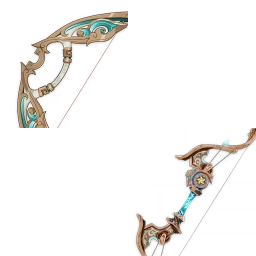
 4★ The Stringless | Unconditional EM stat stick that also gives a massive Skill and Burst DMG Bonus. The best option for Venti in most scenarios. |
 5★ Astral Vulture’s Crimson Plumage, Polar Star, Aqua Simulacra | Potent options for Venti due to the various buffs they provide, even in a Reaction DPS build. Only recommended when there are no other units who can use them better. Astral Vulture can compete with R5 Stringless in some scenarios. Aqua Simulacra falls off with Furina in the team. |
 4★ Favonius Warbow | Sacrifices Venti’s personal damage for team Energy, though it requires building CRIT Rate to consistently trigger its passive. Performs better when Venti’s own ER needs are high. A CRIT Rate Circlet can be considered with this weapon. |
 4★ Cloudforged / Windblume Ode | Event weapons whose EM secondary stats make them solid choices for players who don’t have a free copy of The Stringless. For Windblume Ode, make sure to use Skill before Burst to snapshot the passive. |
 4★ End of the Line | Surprisingly decent when ER needs are high (200%+), but does nothing for team Energy. |
 3★ Raven Bow | Performs very well despite being a 3-star weapon. A baseline F2P option if nothing else is available. |
Anemo DPS
This playstyle shares all the supportive pros of Venti’s Reaction DPS playstyle, but uses Venti’s high multipliers on his Burst and Skill to deal more direct damage, building CRIT and ATK instead of EM. This playstyle is often best in teams with low Swirl counts (e.g. single-target or only Hydro Swirls, which do not deal AoE damage), few opportunities to proc reactions, or significant buffs for Venti’s Talent damage from characters like Faruzan or Bennett. Some examples include Triple Anemo, Triple Hydro, and Freeze teams with Shenhe.
Artifacts
Artifact Stats
Sands | Goblet | Circlet |
| ATK% / EM / ER | Anemo DMG% / ATK% | CRIT |
Stat Priority: ER (until requirement) > CRIT > ATK% ≥ EM
Even in an Anemo DPS build, an EM Sands can be Venti’s best option in multi-target scenarios with high Swirl counts, though 5-star weapons favor an ATK% Sands regardless. An ER Sands is generally not recommended and should only be considered if his ER needs are very high and he’s not using an ER weapon. Even then, try to meet ER needs with substats if possible.
An ATK% Goblet can be competitive with an Anemo DMG% Goblet when using a lower Base ATK weapon with few external ATK buffs (e.g., if Venti is equipped with The Stringless or Favonius Warbow in a team without Bennett). In all other cases, though, Anemo DMG% is better.
For Circlet, choose whatever gets you closer to the ideal 1:2 CRIT ratio.
Artifact Sets
Calcs for artifact set comparisons can be found here (last updated for Version 3.3).
4pc Viridescent Venerer | Providing 40% RES Shred to Swirled Elements is a huge buff for any team, and Venti should almost always use this set if no one else does. The 2pc increases his own damage, and the RES Shred augments the damage from Swirl and the Element that is absorbed into his Burst. |
 4pc Scroll of the Hero of Cinder City (Scroll) | In Anemo Hypercarry teams where Venti runs alongside an on-field Anemo DPS like Wanderer, he can use this set to provide 12% Anemo DMG Bonus by Swirling any Element, whether on or off-field. Generally the best choice for team damage in such cases. |
 4pc Emblem of Severed Fate | Typically Venti’s best option for personal damage as long as his Burst has strong buffs to snapshot. It does nothing for his team, however, making it a worse option overall. |
Weapons
Calcs for weapon comparisons can be found here (last updated for Version 3.3).
5★ Elegy for the End | Indispensable for its teamwide buff, though it tends to lag behind other options for Venti’s personal damage, performing better with higher ER needs. If using Venti in teams with rotations shorter than 20s, this weapon’s passive will not trigger every rotation. |
 5★ Astral Vulture’s Crimson Plumage | A standout option for Venti, providing him with hefty portions of CRIT DMG, ATK%, and Burst DMG Bonus. However, it falls off somewhat in Triple Anemo teams where he cannot get the full benefit of its passive. |
 5★ Polar Star | Polar Star is a great weapon which offers both Skill and Burst DMG increases, along with CRIT Rate. Note that Venti only gets 2 stacks of its passive in the course of a normal rotation. Squeezing in a quick Normal Attack and an Aimed Shot before Venti’s Burst will fully stack it, but it is often not worth delaying the rotation just for Venti’s personal damage. |
 5★ Aqua Simulacra | A great CRIT DMG stat stick with an accessible DMG Bonus passive. In teams that lack DMG% buffs, it can be competitive with a 2-stack Polar Star. |
5★ Hunter’s Path / The First Great Magic (TFGM) / Thundering Pulse / Skyward Harp | Good CRIT stat sticks with variable performance. TFGM is particularly effective in Triple Anemo teams, but tends to lag behind otherwise. |
4★ The Stringless | The Stringless provides a large increase to Venti’s Skill and Burst damage. The EM, while not as useful here as in a Reaction DPS build, can still be highly beneficial in multi-target scenarios with high Swirl counts — in such situations, R5 Stringless can outperform some 5-star weapons. Refinements help its performance significantly. |
 4★ Mouun’s Moon | An extremely powerful gacha weapon that provides ATK% and Burst DMG. Scales very well with refinements, and can overtake some 5-star options at R5. |
 4★ Alley Hunter | A little behind Mouun’s Moon in performance, but still well worth using if you have it. Wait 10s at the start of a Domain to stack its passive. |
4★ Favonius Warbow | Sacrifices Venti’s personal damage for team Energy. Worth using in teams that struggle to meet their Energy needs, if there are no better holders. |
 4★ Song of Stillness / Chain Breaker | These craftable weapons are both solid options on Venti. Song of Stillness usually performs better, but requires Venti to receive regular healing to proc its passive. Chain Breaker has notably worse performance in Triple Anemo teams. |
 4★ Blackcliff Warbow | Very reliant on stacks and generally not worth the Starglitter over other easily obtainable options. |
Teams
Rotation Notation
- N = Normal Attack
- C = Charged Attack
- A = Aimed Shot
- P = Plunging Attack
- E = Elemental Skill
- tE = Tap Skill
- hE = Hold Skill
- Q = Elemental Burst
- D = dash (cancel)
- J = jump (cancel)
- W = walk (cancel)
- > = switch character
- ( ) = these actions are optional; please refer to the notes below
- [ ] = repeat these actions the specified number of times
Teambuilding
Like most Anemo support units, Venti brings competitive buffing with 4pc VV (or 4pc Scroll for Anemo hypercarries). This makes him easy to slot into a variety of teams. Because he lacks the innate buffing capabilities of units like Kazuha and Sucrose, he is rarely the best option from a damage perspective; still, there are a few traits that make him stand out:
- His Burst allows him to trigger frequent Swirls from off-field. This leads to potent damage in multi-target scenarios where his Swirls can proc further chain reactions, making him particularly well suited to archetypes like Aggravate and Electro-Charged.
- Since his release, Venti’s crowd control capabilities remain unmatched. He can group enemies very close together for a long period of time, and this is of particular benefit to certain teammates, including those with quadratic or pseudo–quadratic scaling (see below). However, Venti struggles in any content where enemies cannot be grouped.
- The Flat Energy he grants is tremendously helpful for teammates with high ER needs, as long as he can reliably absorb the correct Element. This allows other units to build more offensive stats and equip DPS weapons rather than ER weapons.
Quadratic Scaling
The damage of attacks with quadratic scaling increases exponentially (by an exponent of 2) according to the number of enemies hit. For example, hitting 3 enemies with linear scaling will result in 3 damage instances; hitting 3 enemies with quadratic scaling will result in 9 damage instances. Notable units with quadratic or pseudo-quadratic scaling include Ayato (Burst), Ganyu (Burst), and Childe (Riptide mechanic).
Notable Teammates
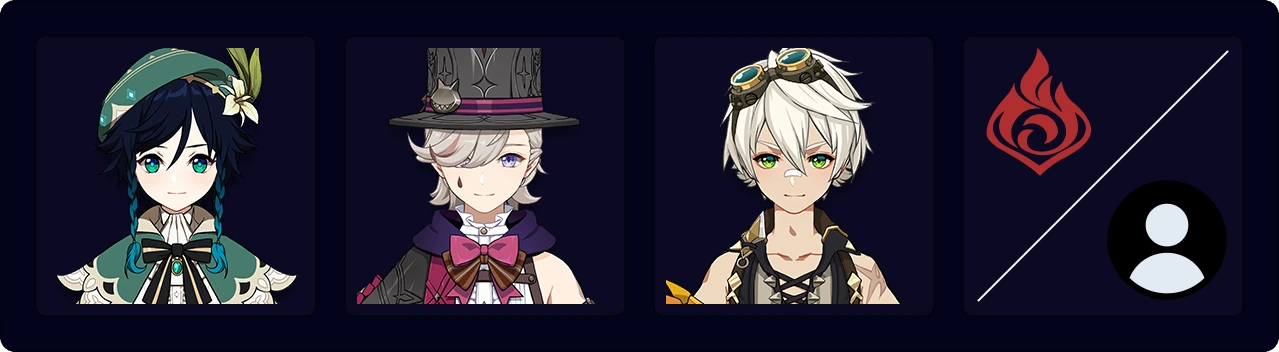
Pyro
 Bennett | Snapshotting Bennett’s Flat ATK buff onto his Burst greatly increases Venti’s raw Anemo damage, and Bennett also applies a high amount of Pyro aura that facilitates absorbing Pyro into Venti’s Burst if desired. This can be done most consistently by dashing toward Venti’s Burst while standing in Bennett’s circle, so it picks up the self-aura. Bennett, in turn, appreciates the Flat Energy refund, especially as solo Pyro, and Venti’s strong grouping keeps enemies reachable from within his Burst radius. |
 Lyney | Venti’s short Burst cooldown means he can Burst every rotation in Lyney teams, giving Lyney all the benefits of his strong crowd control and grouping while providing some AoE damage from Pyro Swirls. Lyney can also hit multiple enemies with his Skill, Burst, and Grin-Malkin Hat explosions. |
 Mavuika | Venti’s Burst gives supplemental Hydro or Cryo application that is not tied to Normal Attacks, and he keeps enemies neatly grouped so that they stay within Bennett’s circle, aren’t knocked out of range by Mavuika’s Charged Attacks, and can be easily hit by her Burst. Her Charged Attacks can generally hit lifted enemies, but the Final Flamestrider Charged Attack finisher can be inconsistent. The Energy refund from Venti’s Burst can be helpful in teams with Citlali or Furina as they often have high ER requirements, but careful aura management is required to avoid absorbing Pyro. |
 Dehya | Venti is a great support for Dehya in her on-field DPS teams. He keeps enemies in one place during her Burst, and she can generally still hit any that are lifted. His Flat Energy refund offsets her high ER requirements, giving her more room to build offensive stats. |
 Klee | Klee and Venti have surprising amounts of synergy. Her extremely high stagger values allow enemies that would not normally be lifted by Venti’s Stormeye to be sucked in. Venti also regroups enemies scattered by Klee’s Charged Attack. |
Hydro
 Ayato | Ayato’s Burst has pseudo-quadratic scaling, and Venti’s grouping helps Ayato hit multiple enemies with his Shunsuiken slashes. The Energy regen from Venti’s Burst also alleviates his ER needs. |
 Childe | Childe has true quadratic scaling on his Riptide mechanic, and he can apply Riptide in a multitude of ways. However, his melee attacks struggle to hit enemies lifted by Venti’s Burst, so it is best to pair them together with heavier enemies that can be grouped but not lifted, or arrange the rotation such that Venti’s Burst finishes as Childe begins his melee uptime. |
 Neuvillette | Venti keeps enemies grouped for Neuvillette’s Charged Attacks, even over multiple waves (with careful positioning), and Neuvillette can easily hit any enemies lifted by Venti’s Burst. Venti’s short Skill cooldown allows for full uptime on 4pc VV. |
 Furina | The attacks from Furina’s Salon Members are small spherical AoEs; with Venti’s tight grouping, they can hit multiple enemies, increasing her damage in AoE scenarios. She also appreciates the Energy regen from his Burst when it absorbs Hydro, and her large DMG% buff increases his Talent damage. |
Electro
 Ineffa | Ineffa shines in Electro / Hydro setups thanks to her strong AoE output. She converts Electro-Charged into Lunar-Charged, a reaction that takes all Element appliers’ EM and CRIT stats into account. As Venti can apply Electro / Hydro via his Burst Absorption or Swirl, he can participate in triggering this special reaction. In these teams, a hybrid build that balances between EM and CRIT works best, but a full EM build to maximize Swirl damage is competitive as well. |
 Yae Miko | Yae Miko’s Burst hits 4 times in quick succession with high multipliers, which Venti facilitates via his Flat Energy refund and powerful grouping, allowing for more Bursts and more enemies hit by each Burst. The crowd control also helps prevent her from getting staggered while resetting her turrets, and all of her attacks hit enemies lifted by his Burst with ease. |
 Sethos | Venti’s tight grouping is particularly notable for Sethos, whose Charged Shots and Burst-converted Normal Attacks can hit multiple enemies along their flight path. He also greatly appreciates Venti’s Energy regen in both playstyles, and his flexible field time pairs well with Venti’s short Skill and Burst cooldowns. |
 Fischl | Fischl’s exceptional Electro application gives Venti a reliable source of aura to Swirl in Quicken and Electro-Charged teams, turning her frequent single-target hits into a source of AoE Electro application. |
Ororon | Ororon and Venti both shine in Electro-Charged teams. Venti keeps enemies close together to make the most out of Ororon’s Hypersense AoE, and Ororon appreciates the Energy regen when his Burst absorbs Electro, as his ER needs can be high. |
 Lisa | Lisa is known for having severe Energy issues and being easily staggered, two problems Venti is well-suited to alleviate with his Energy refund and strong crowd control. All of her attacks can easily hit enemies lifted in Venti’s Burst, and his tight grouping helps her quickly generate Conductive stacks. At C4, she gains some pseudo-quadratic scaling for her Burst discharges, lending further value to Venti’s strong grouping. |
Cryo
 Ganyu | Venti is Ganyu’s preferred Anemo support in Freeze for a few reasons. His crowd control helps prevent her from being staggered while lining up Charged Shots, and his tight grouping facilitates her Burst’s pseudo-quadratic scaling and her Charged Shots’ Bloom AoE. His Energy refund also helps Ganyu Burst as often as possible with lower ER needs. |
 Ayaka | Ayaka does not have the same pseudo-quadratic scaling as Ganyu, but her Burst greatly appreciates the grouping Venti provides. Venti’s Flat Energy refund alleviates her high ER needs. |
 Shenhe | Shenhe is a potent support option for Cryo DPS units and synergizes well with Venti. He can proc Shenhe’s Quill with his Burst’s Absorption, and his grouping helps enemies stay in range of her Burst field for better uptime on its buffs. She also greatly appreciates the Flat Energy from Venti’s Burst. |
 Escoffier | Despite preferring a Pure Cryo / Hydro team party for her full RES Shred, Escoffier can still use Venti for his strong grouping capability in multi-wave mobbing content. His Energy regen is also useful to lower Escoffier’s ER requirements and allow her to run more offensive stats. |
Other
 Faruzan | Premiere Anemo buffer extraordinaire, Faruzan brings great efficacy to Venti’s Anemo DPS build. Though she can’t benefit from his Burst’s Energy refund, she appreciates the additional Anemo Particles from his Skill. Pre-C6 Faruzan is best used in Triple Anemo teams to help offset her monstrous ER requirements, where Venti can slot in to provide particles, grouping, and a 12% Anemo DMG buff from 4pc Scroll. |
 Wanderer | Wanderer and Venti, though not an obvious pairing, can be a very effective one. Venti’s tight grouping enables Wanderer’s Normal Attacks to hit multiple enemies, a significant DPS gain in AoE scenarios. The additional Anemo Particles from Venti’s Skill help offset Faruzan’s large ER requirements, and Wanderer appreciates them as well at C2, where he prefers to Burst every rotation. Venti should hold 4pc Scroll in Wanderer teams to further buff his damage. |
 Kazuha | Venti and Kazuha can be used together as a flexible Anemo core capable of dealing tremendous damage with reactions. With Venti on 4pc VV, Kazuha can run 4pc Thundering Fury in an Electro-Charged or Aggravate composition and spam his Skill. |
 Zhongli | Zhongli is notable in Venti’s Anemo DPS team compositions due to the 20% Universal RES Shred he provides, which includes Anemo RES. |
Electro-Charged and Overvape

Electro-Charged allows Hydro and Electro auras to exist at the same time, which means Venti can proc double Swirls for increased damage (though it should be noted that Hydro Swirl does not deal AoE damage, unlike other Elements). As Venti’s main source of damage in these teams is Swirl and Electro-Charged, he prefers a Reaction DPS build.
By absorbing Pyro into Venti’s Burst (which may require careful aura management and is easiest to achieve with Bennett’s self-aura), he can proc additional reactions like Overloaded and Vaporize. Teams with such interaction tend to work best in AoE, and are colloquially known as Overvape or “Soup” teams.
Notable Teammates
See the general teambuilding section above for more detailed synergy descriptions.
Electro


Hydro


Pyro


Flex
This archetype’s flex slot can be occupied by a variety of characters, as well as any of the previously-mentioned Hydro, Electro, or Pyro units. Listed below are a few popular choices.

Example Teams
This is not a comprehensive list of teams. The inclusion or exclusion of any given team does not necessarily reflect its power level.

A team with purely off-field damage dealers. There’s not a dedicated on-field unit, so you’re free to swap between units and use Skills and Bursts when they come off cooldown. This team can run without a dedicated sustain unit due to the combined sustain utility of Xingqiu and Beidou.
This team has no set rotation and mainly aims to keep uptime on Fischl’s, Beidou’s, and Xingqiu’s abilities while continuously weaving in Normal Attacks to trigger Beidou’s Stormbreaker and Xingqiu’s sword rain attacks.

A potent Double Hydro Lunar-Charged team with Ineffa doing impressive personal damage via her A1 Passive and reaction damage. Venti can still deal decent damage even with a CRIT build thanks to Lunar-Charged scaling with both EM and CRIT.
Sample Rotation
Kokomi E > Ineffa E (Q) > Furina ED Q > Venti EQ > Kokomi Q 7[N3D] > Venti E N1

A standard Electro-Charged team with Ororon holding 4pc Scroll. The following rotation is flexible and can be adjusted (e.g. if Kokomi needs more field time to heal).
Sample Rotation
Kokomi ED > Miko 3[E] > Ororon EQ > Venti EQ > Kokomi Q 2[N2D] > Miko Q 3[E] 2[N2C] N1C > Venti E N1

An Anemo Overvape team in which Venti can absorb Pyro from Bennett’s Burst field’s self-aura, leading to a number of different reactions. To facilitate this, dash towards Venti’s Burst after casting. Excellent in AoE content.
Sample Rotation
Bennett EQ > Ayato Q > Fischl E > Venti EQ > Ayato E N15 > Bennett E > Fischl Q > Venti E > Ayato E N15
Quicken

Electro Swirls are capable of triggering Aggravate off of a Quicken aura, increasing their damage significantly. Since Quicken also benefits other Electro and Dendro damage dealers, it’s a very strong archetype for Venti. Note that excessive Dendro application can make it difficult to proc Swirl; be cautious with teammates like Nahida, and make sure you have enough Electro application to compensate.
Notable Teammates
See the general teambuilding section above for more detailed synergy descriptions.
Electro


Dendro


Flex
The flex slot can be occupied by any of the aforementioned Electro units or the units listed below. Double Dendro is not recommended with Venti, as it can cause difficulties maintaining Electro aura for Swirl.
Example Teams
This is not a comprehensive list of teams. The inclusion or exclusion of any given team does not necessarily reflect its power level.

A classic Double Electro team with Yae Miko. Yaoyao or Kirara can be substituted for Baizhu. This team has many possible rotations and is pretty flexible as long as you maintain a consistent Quicken aura on enemies with Fischl’s Oz, Yae’s Sesshou Sakura, and Dendro application, while Bursting as often as possible with Venti.
Sample Rotation
(Miko 3[E] > Venti Q >)¹ Fischl E N1 > Baizhu EQ N1 > Venti E N1 > Miko Q 3[N1E]² N2CJ N2D > Fischl N1 Q > Baizhu E N2 > Venti E N1 > Miko 3[N1E]² 2[N2CJ] > Venti EQ
¹First rotation only
²With C6 Fischl; if Fischl is not C6, do 3[E]

A team featuring Kazuha, who spams his Skill on-field with 4pc Thundering Fury. Baizhu or Kirara can be substituted for Yaoyao, but may cause issues with desynchronized rotations (Baizhu) or poor Dendro application (Kirara). The rotation is pretty flexible as long as you maintain a consistent Quicken aura on enemies with Fischl’s Oz and Yaoyao’s Skill/Burst.
Sample Rotation
Fischl (E/Q) > Venti N1 EQ > Yaoyao E N2 > Kazuha tEP Q N3 tEP > Venti E N1 > Kazuha tEP

An accessible Aggravate team featuring on-field Lisa. Baizhu or Yaoyao can be substituted for Kirara, although using Yaoyao leads to desynchronized rotations. The rotation is flexible provided you maintain uptime on the Quicken aura with Fischl’s Oz and Kirara’s Skill/Burst.
Sample Rotation
(Lisa tE >) Venti E > Fischl E/Q > Kirara shE > Lisa (tE/N1) Q (tE/N1) C > Venti EQ > Fischl Q/E > Kirara shE Q > Lisa tE hE 2[N2C]

A highly effective Sethos team. Kirara can be substituted for Baizhu. Party members use Normal Attacks to fill downtime and trigger Fischl’s C6.
Sample Rotation (Charged Shot)
Fischl E N2 > Baizhu EQ N1 > Venti EQ > Sethos C E 3C > Fischl N2 Q > Baizhu E N2 > Venti E N2 > Sethos C E 3C > Venti E N2
Sample Rotation (Burst)
Fischl E N1 > Baizhu EQ > Venti EQ > Sethos (C)¹ EQ 6[N2D] N2 > Fischl N1 Q > Baizhu E N2D N2 > Venti E N2 > Sethos (C)¹ EQ 6[N2D] N2
¹with C6
Freeze

Freeze teams and Venti thrive under the same conditions, as enemies that can be Frozen are often the same ones that can be grouped. Frozen enemies are also less resistant to his Stormeye’s pull. It’s recommended to run 2 Cryo units for Cryo Resonance, though Double Hydro can be an option in teams with Furina.
As Freeze prevents enemies from attacking, a defensive unit such as a shielder or healer may not be needed. Freeze teams tend to favor an Anemo DPS build, especially with strong buffers like Shenhe, Mona, or Furina.
Notable Teammates
See the general teambuilding section above for more detailed synergy descriptions.
Cryo


Hydro


Example Teams
This is not a comprehensive list of teams. The inclusion or exclusion of any given team does not necessarily reflect its power level.

A typical Freeze Ganyu team with Layla for shielding. Venti can hold Favonius to help with Mona’s high ER requirements, since his Burst tends to absorb Cryo.
Sample Rotation
Ganyu EQ > Venti EQ > Layla Q (N1)¹ E > Mona (N1) E Q > Ganyu 2[C] (1 if slow) > Venti E N1/D > Ganyu C
¹Optional for more reliable Favonius proc

An Ayaka Freeze team with good Freeze uptime and survivability from Kokomi’s jellyfish. Venti’s Energy refund helps with Shenhe’s and Ayaka’s ER requirements.
Sample Rotation
Shenhe Q E > Venti EQ > Kokomi E > Ayaka D N1 EQ N1 > Shenhe E > Venti E > Ayaka D 2[N2C] N2 D E N3

A Freeze team with Furina. Charlotte holds TTDS and 4pc NO/TotM, funnels particles to Ayaka, and uses her strong Burst healing to stack Fanfare. A Favonius weapon on Venti or Furina helps alleviate ER requirements.
Sample Rotation
Furina ED Q > Ayaka ED > Venti EQ > Charlotte Q E > Ayaka Q D N2C E D N2C > Venti E > Ayaka D N2C
General Support
Venti pairs well with a number of on-field DPS characters who do not fit into any of the above archetypes, but nonetheless appreciate his grouping, Energy regen, and 4pc VV/Scroll buffing capabilities. These are typically characters belonging to Swirlable Elements (Pyro, Hydro, Electro, Cryo) or on-field Anemo DPS in teams with Faruzan.
Notable Teammates
See the general teambuilding section above for more detailed synergy descriptions.


Example Teams
This is not a comprehensive list of teams. The inclusion or exclusion of any given team does not necessarily reflect its power level.
Venti is able to snapshot Bennett’s buff in these teams, and lends grouping, buffing, and AoE damage to Lyney’s potent single-target damage potential. The flex slot can be filled by a third Pyro or another buffer/shielder. Zhongli is particularly notable for Venti’s damage, as he also shreds Anemo RES.
Anemo DPS and Reaction DPS builds both perform well in this team.

Venti pairs well with the powerful Hydro core of Neuvillette and Furina. There are many possibilities for the flex slot, typically an additional buffer and/or an off-field DPS. In the latter category, Electro characters work particularly well since Venti can reliably Swirl both Hydro and Electro to buff the entire team’s damage.
This team generally favors an Anemo DPS build, though Reaction DPS can be competitive if the flex unit is Electro and there are several targets.

A Mavuika Forward Melt team with Citlali. Venti’s grouping really shines here, as Mavuika’s Flamestrider Charged Attacks still reliably hit enemies who have been lifted by Venti’s Burst. His Burst’s Absorption can help with maintaining a Cryo aura on enemies, but careful aura management is required to keep him from absorbing Pyro.
Venti can snapshot Bennett’s Burst buff, making an Anemo DPS build viable in this team, though a Reaction DPS build also performs well.
Wanderer works surprisingly well with Venti, and can use his tight grouping to hit multiple enemies with his Normal Attacks and his crowd control to avoid getting staggered. Venti particularly benefits players who lack Faruzan’s C6, as Triple Anemo compositions help considerably with her monstrous ER requirements.
This team almost always favors an Anemo DPS build, though Venti generally does not snapshot Bennett’s buff to preserve that uptime for Wanderer. Since this team lacks a source of interruption resistance, some players may prefer slotting in Thoma instead for comfort.
Credits
madeofseaglass, quinslay, nociii, aciewacie, polomo, cuzimori, fluffy milk bun, acerbus114, idkanonymized, alehannita
Team images made with the KQM portrait generator.