Updated for Version “Luna IV”
Neuvillette is a 5★ Hydro Catalyst character in Genshin Impact who deals damage through his enhanced Charged Attacks with a flexible on-field playstyle. Learn about Neuvillette’s best builds, Talent priority, best weapons, best artifacts, and best teams in this quick guide.
Note that the information given may change if new discoveries are made. More extensive testing is in progress.
Join our Discord to participate in the theorycrafting process.
Table of Contents
Infographic
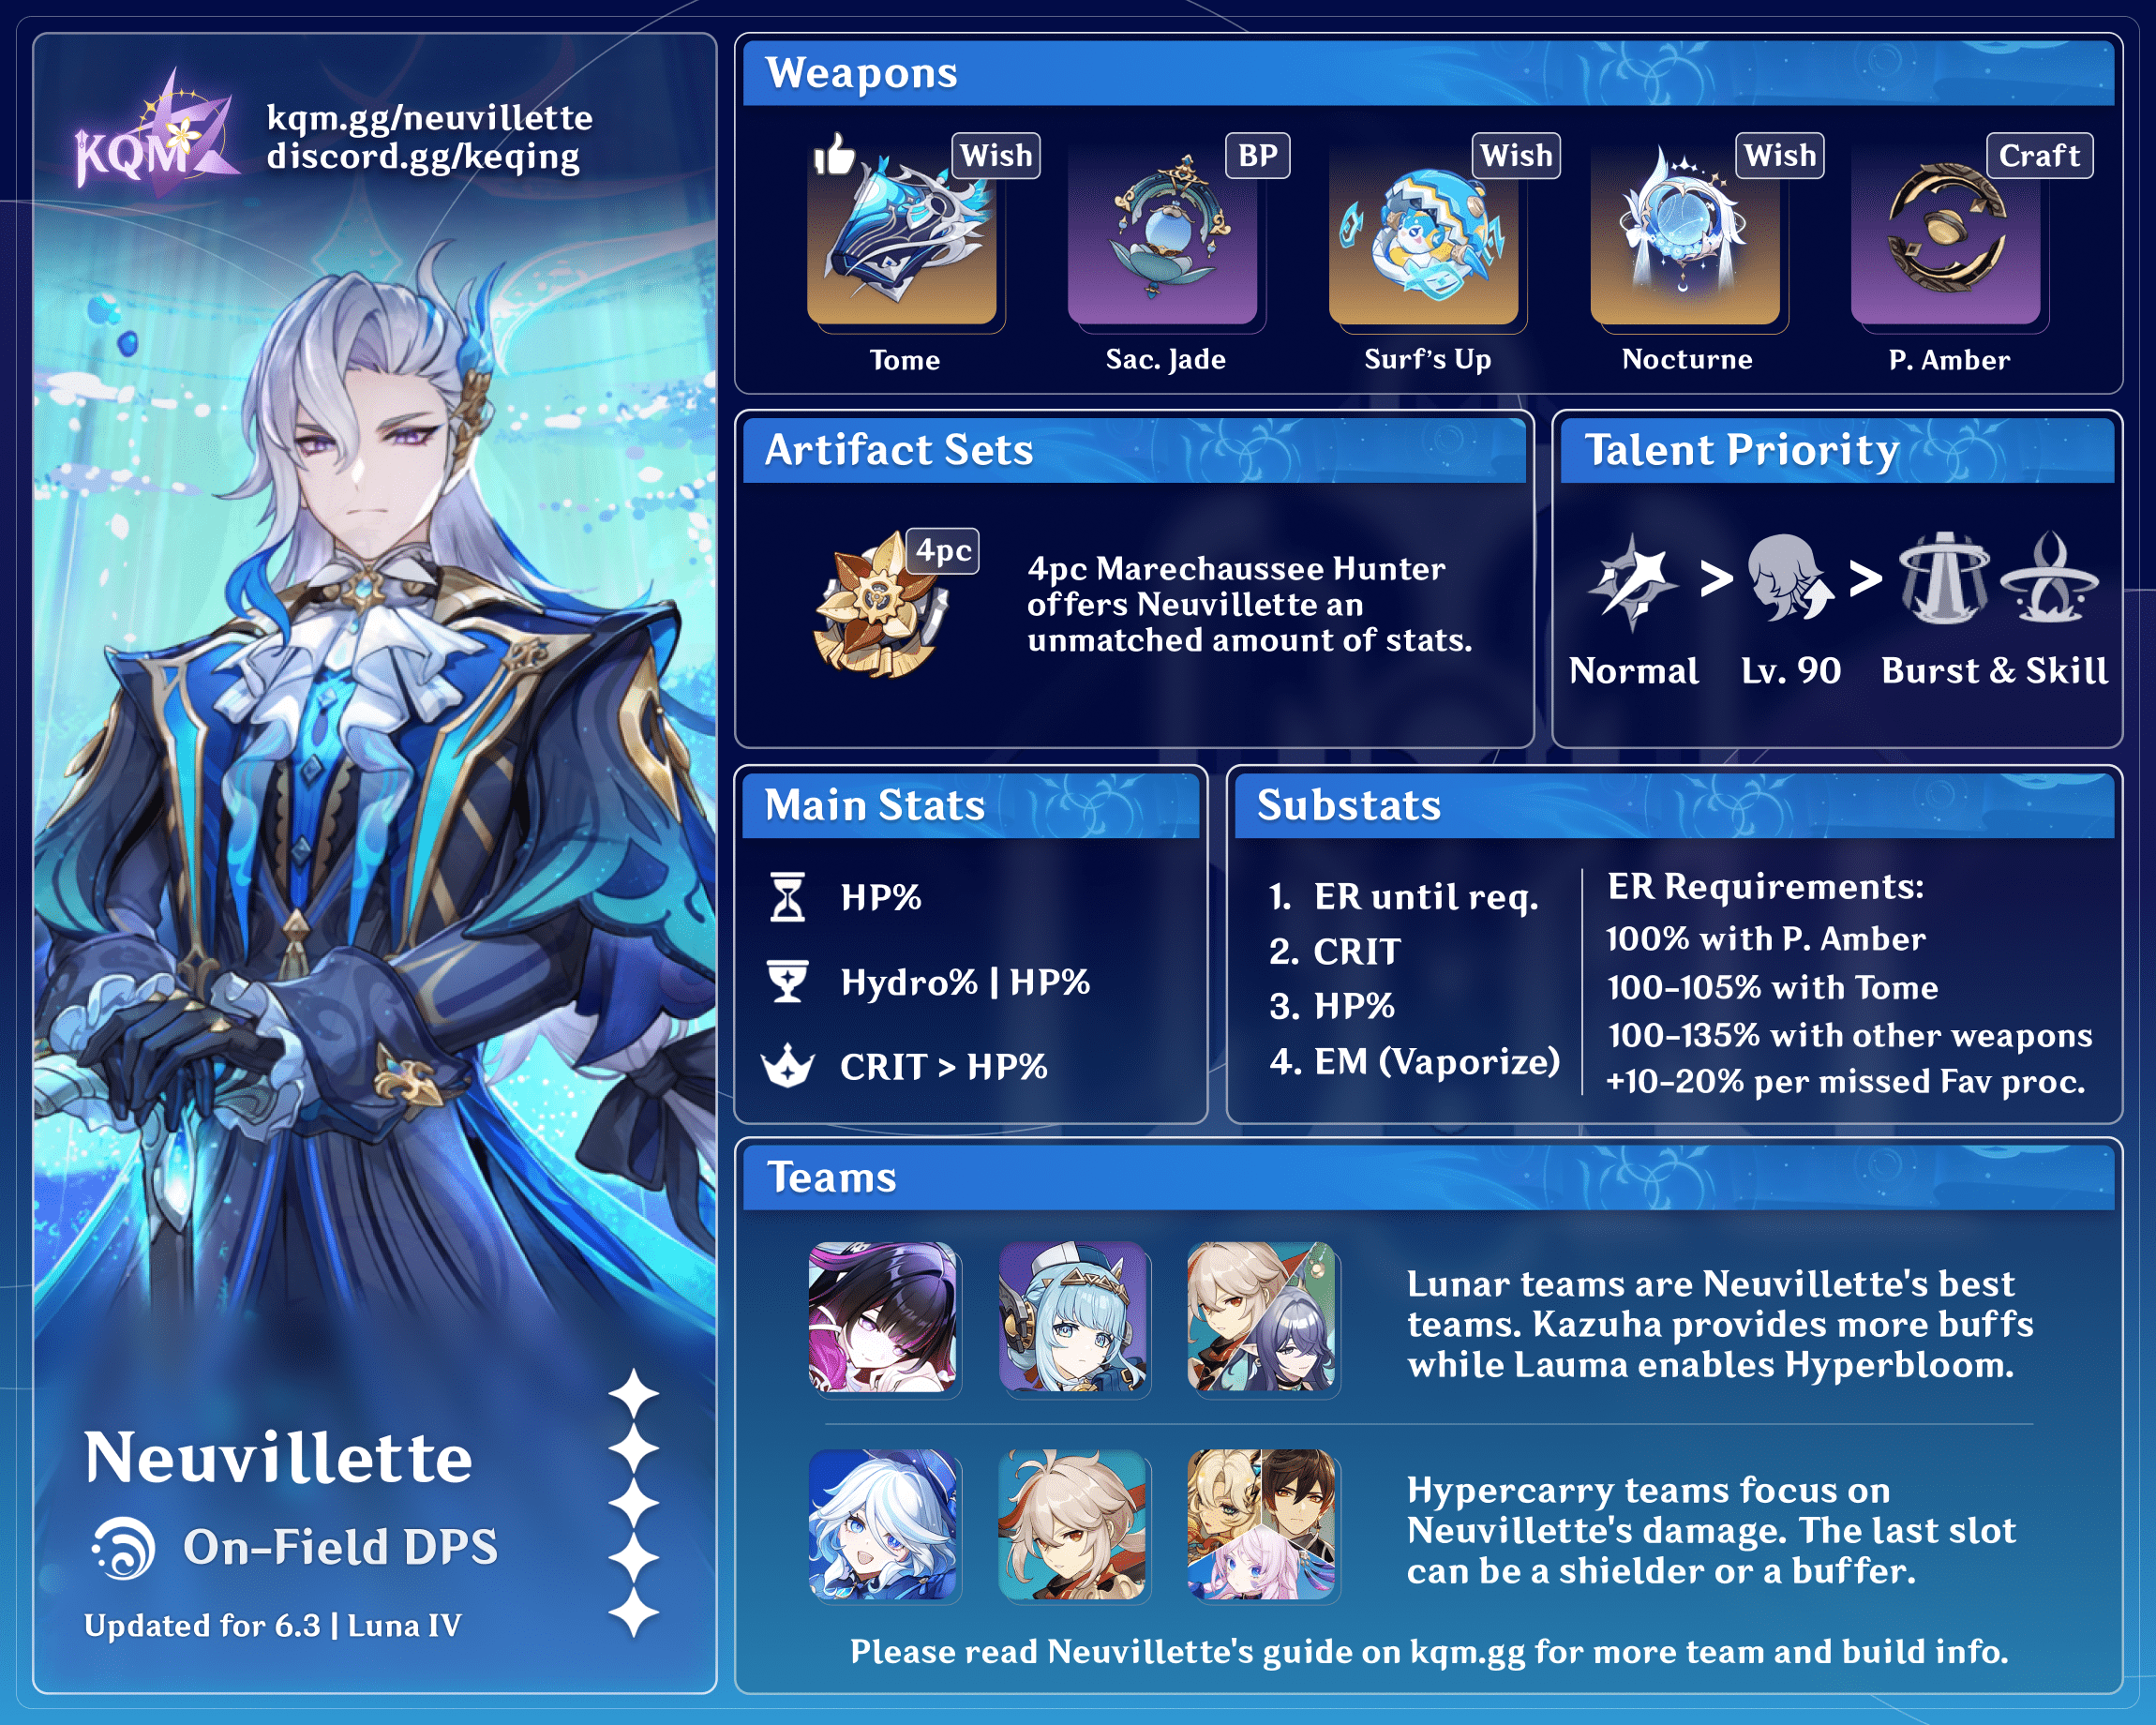
Credits to: cuppacote, auntyplays, euphorysm, caramielle, haafr, clevernt, and KQM Staff
Character Overview
Playstyles
On-Field DPS
Neuvillette is an on-field Hydro DPS who primarily deals damage through his enhanced Charged Attacks, which his Skill and Burst make more accessible. He can slot into a variety of teams as an on-field damage dealer, though his A1 Passive incentivizes using teammates of different Elements.
On-Field Driver
Neuvillette can play as an on-field driver in teams that don’t focus solely on his damage. Instead, these teams center around him supplementing his teammates’ damage with his enhanced Charged Attacks and applying Hydro to enable reactions.
Talents
Level and Talent Priority
Normal Attack ≥ Character Level ≫ Burst = Skill
Neuvillette’s enhanced Charged Attacks make up the majority share of his damage, so leveling his Normal Attack Talent should be prioritized. His Skill and Burst contribute significantly less damage and are mainly used to generate Sourcewater Droplets, so they can be leveled afterwards. Since Neuvillette scales with HP, Level 90 is relevant to his damage.
For those who have spare Masterless Stella Fortunas and enjoy playing Neuvillette, he is also a great pick to level to 95 or 100.
Talent Overview
 Normal Attack | As Water Seeks Equilibrium
Talent Description
Normal Attack
With light flourishes, Neuvillette commands the tides to unleash a maximum of 3 attacks, dealing Hydro DMG.
Charged Attack Empowerment: Legal Evaluation
While charging up, Neuvillette will gather the power of water, forming it into a Seal of Arbitration. In this state, Neuvillette can move and change facing, and also absorb any Sourcewater Droplets in a certain AoE.
Every Droplet he absorbs will increase the formation speed of the Seal, and will heal Neuvillette.
When the charging is stopped, if the Symbol has yet to be formed, then a Charged Attack will be unleashed. If it has been formed, then a Charged Attack: Equitable Judgment will be unleashed.
Charged Attack
Consumes a fixed amount of Stamina to attack opponents with a rupturing blast of water, dealing AoE Hydro DMG.
Charged Attack: Equitable Judgment
Unleashes surging torrents, dealing continuous AoE Hydro DMG to all opponents in a straight-line area in front of him.
Equitable Judgment will not consume any Stamina and lasts 3s.
If Neuvillette’s HP is above 50%, he will continuously lose HP while using this attack.
Plunging Attack
Gathering the might of Hydro, Neuvillette plunges towards the ground from mid-air, damaging all opponents in his path. Deals AoE Hydro DMG upon impact with the ground.
Neuvillette’s Normal Attacks and regular Charged Attacks are largely unimportant compared to his Equitable Judgment Charged Attacks. These long-ranged enhanced Charged Attacks are his main source of damage, dealing continuous, AoE, HP-scaling damage to all enemies in range after an initial wind-up. They do not consume any Stamina, and if Neuvillette’s HP is above 50%, will continuously drain his HP over their duration.
Upon starting the Charged Attack, Neuvillette can absorb up to 3 nearby Sourcewater Droplets. If he does so, the initial 4s wind-up is reduced down to 1s, and the Droplets heal off the hefty HP drain from his CAs. As such, it is vital that he casts his Skill and Burst every rotation to generate the Sourcewater Droplets needed for all CAs.
While Neuvillette can absorb any Sourcewater Droplets, including those not generated by himself, he already generates sufficient Droplets on his own. Therefore, it is currently not recommended to select teammates for the sole purpose of generating additional Droplets.
 Elemental Skill | O Tears, I Shall Repay
Talent Description
Summons a Raging Waterfall that will deal AoE Hydro DMG to opponents in front of Neuvillette based on his Max HP. After hitting an opponent, this skill will generate 3 Sourcewater Droplets near that opponent.
Arkhe: Pneuma
At certain intervals, when the Raging Waterfall descends, a Spiritbreath Thorn will descend that will pierce opponents, dealing Pneuma-aligned Hydro DMG.
Neuvillette’s Skill deals AoE Hydro damage to opponents in front of him and creates 3 Sourcewater Droplets. It’s primarily used to generate both Energy and Sourcewater Droplets, and does not make up a significant portion of his damage.
This Skill summons a Spiritbreath Thorn that deals Pneuma-aligned Hydro damage, with a 10s cooldown. This damage can be used to weaken Ousia-aligned enemies.
 Elemental Burst | O Tides, I Have Returned
Talent Description
Unleashes waves that will deal AoE Hydro DMG based on Neuvillette’s Max HP. After a short interval, 2 waterfalls will descend and deal Hydro DMG in a somewhat smaller AoE, and will generate 6 Sourcewater Droplets within an area in front.
Neuvillette’s Burst deals AoE Hydro damage and, after a short interval, deals an additional 2 instances of damage and generates 6 Sourcewater Droplets. Similarly to his Skill, Neuvillette’s Burst makes up a small portion of his damage; however, the amount of Sourcewater Droplets it generates makes it mandatory in the vast majority of his rotations.
 Ascension 1 Passive | Heir to the Ancient Sea’s Authority
Talent Description
When a party member triggers a Vaporize, Frozen, Electro-Charged, Bloom, Hydro Swirl, Hydro Crystallize or a Lunar-Crystallize reaction on opponents, 1 stack of Past Draconic Glories will be granted to Neuvillette for 30s. Max 3 stacks. Past Draconic Glories causes Charged Attack: Equitable Judgment to deal 110%/125%/160% of its original DMG.
The stacks of Past Draconic Glories created by each kind of Elemental Reaction exist independently.
A Base DMG Multiplier for Neuvillette’s Charged Attacks that increases their damage multiplicatively for every unique Hydro reaction that is triggered, up to 3 stacks. This translates to increased damage for each non-Hydro teammate of a unique Element.
Although the damage difference between different numbers of stacks is significant, it’s not necessarily worth building his teams around maximizing the number of stacks.
 Ascension 4 Passive | Discipline of the Supreme Arbitration
Talent Description
For each 1% of Neuvillette’s current HP greater than 30% of Max HP, he will gain 0.6% Hydro DMG Bonus. A maximum bonus of 30% can be obtained this way.
An appreciated but minor increase to Neuvillette’s damage. Since absorbed Sourcewater Droplets only heal Neuvillette at the beginning of his CA, he will gradually lose this Hydro DMG Bonus over the course of the attack without external healing.
Constellations
 Constellation 1 | Venerable Institution
Constellation Description
When Neuvillette takes the field, he will obtain 1 stack of Past Draconic Glories from the Passive Talent “Heir to the Ancient Sea’s Authority.
Additionally, his interruption resistance will be increased while using the Charged Attack Empowerment: Legal Evaluation and the Charged Attack: Equitable Judgment
Neuvillette’s C1 is both a respectable DPS increase and a valuable QoL improvement. It lets him gain an A1 stack by simply taking the field, giving him increased flexibility as he can maximize the passive’s buff in teams with two characters of the same Element. His C1 also increases Neuvillette’s resistance to interruption when casting his enhanced Charged Attacks, which lets his teams run a buffer or off-field damage dealer in place of a defensive teammate.
However, while Neuvillette’s C1 can be a respectable improvement to both DPS and QoL, its value will vary depending on Neuvillette’s team. If his A1 Passive is already maximized, it may not be a damage increase, and when already paired with units who provide crowd control or interruption resistance, its resistance to interruption becomes unnecessary.
 Constellation 2 | Juridical Exhortation
Constellation Description
The Passive Talent “Heir to the Ancient Sea’s Authority” will be enhanced: Each stack of Past Draconic Glories will increase the CRIT DMG of Charged Attack: Equitable Judgmen
You must first unlock the Passive Talent “Heir to the Ancient Sea’s Authority.”
A relatively straightforward damage increase, adding a 14% CRIT DMG bonus for Neuvillette’s enhanced CAs per stack of his A1. This also increases the value of C1’s additional A1 stack.
 Constellation 3 | Ancient Postulation
Constellation Description
Increases the Level of Normal Attack: As Water Seeks Equilibrium by 3.
Maximum upgrade level is 15.
A decent damage increase, increasing the levels of Neuvillette’s most important Talent.
 Constellation 4 | Crown of Commiseration
Constellation Description
When Neuvillette is on the field and is healed, 1 Sourcewater Droplet will be generated. This effect can occur once every 4s.
Obtaining this Constellation without going to C6 is not recommended, as pre-C6 Neuvillette is unable to take advantage of the additional Sourcewater Droplets.
 Constellation 5 | Axiomatic Judgment
Constellation Description
Increases the Level of O Tides, I Have Returned by 3.
Maximum upgrade level is 15.
A minor damage increase, as Neuvillette’s Burst only makes up a small portion of his total damage.
 Constellation 6 | Wrathful Recompense
Constellation Description
When using Charged Attack: Equitable Judgment, Neuvillette can absorb nearby Sourcewater Droplets in an AoE. Each absorbed Droplet will increase the duration of Charged Attack: Equitable Judgment by 1s.
Additionally, when Equitable Judgment hits opponents, it will fire off 2 additional currents every 2s, each of which will deal 10% of Neuvillette’s Max HP as Hydro DMG. DMG dealt this way will count as DMG dealt by Equitable Judgment.
Neuvillette’s C6 allows him to extend his Charged Attack’s duration by 1s by absorbing nearby Sourcewater Droplets once his Charged Attack nears its end. This makes his C4 useful as the additional Droplets allow him to extend his CA’s duration by 2–3s total. Said Charged Attacks will now also deal 2 additional instances of damage every 2s for a further increase in DPS.
It’s hard to evaluate the damage gain from this Constellation as it forces changes in rotation that can cause extensions or worsen buff uptime. Teams with characters whose abilities or buffs have short durations (e.g., Kazuha) will fare worse than teams with longer ability durations (e.g., Zhongli and Furina).
However, the additional Charged Attack currents alone are already an improvement to Neuvillette’s DPS, and C6 Neuvillette does enough damage on his own that it is almost always worth adjusting his rotations to take advantage of the increase in Charged Attack duration.
Rotations
C = Charged Attack
E = Elemental Skill
Q = Elemental Burst
Neuvillette can perform 2–4 Charged Attacks per rotation. Here are Neuvillette’s most common rotation variations.
| 4 Charged Attacks | Adds an extra CA to the rotation. Recommended for teams where Neuvillette deals the vast majority of the damage. Usually a variation of E > Team > C E C Q > Team > 2[C]. |
| 3 Charged Attacks | Easier for managing buff and ability uptimes. The exact combo is mostly unimpactful, but it is commonly a variation of Q > Team > C E C > Team > C E. |
Artifacts
ER Requirements
It is absolutely vital that Neuvillette has enough ER to Burst every rotation so that he has enough Sourcewater Droplets to use 3-4 Charged Attacks.
Calcs for ER requirements can be found here (up to date for Version Luna IV)
 R5 Prototype Amber |  R1 Tome of the Eternal Flow |  Other Weapons | |
| Teams With Furina | 100% | 100% | 100–130% |
| Teams With Columbina | 100% | 100% | 110–125% |
| Teams With Fischl/Ororon | 100% | 100% | 100–135% |
| Other Double Hydro Teams | 100% | 100–105% | 100–135% |
| Other Solo Hydro Teams | 100% | 100–105% | 115–135% |
The values above are for rotations with 2 Skills per Burst, as rotations with a single Skill are not recommended before C6 due to impractical ER needs. Team Favonius procs are assumed; increase ER requirements by 10–20% per missed proc.
Use the Energy Recharge Calculator to determine exact requirements for your team and rotation.
Artifact Stats
 Sands |  Goblet |  Circlet |
| HP% | Hydro DMG Bonus or HP% | CRIT Rate, CRIT DMG or HP% |
Stat Priority: ER% (until requirement) > CRIT = HP% > Flat HP
While HP% | Hydro DMG% | CRIT is very often the best choice of main stats, builds with an HP% Goblet, HP% Circlet, or even both are still viable as the optimal pick leads by a small margin. With Tome of the Eternal Flow, an HP% Goblet can also be equal to, or marginally better than a Hydro DMG% Goblet depending on team buffs. Note that suboptimal HP% main stats need correspondingly high-quality substats to be competitive; additionally, Triple HP% main stats will perform worse regardless of substats.
In Ascendant Gleam teams, an HP% Goblet also increases the Lunar Reaction DMG Bonus Neuvillette provides. This doesn’t make it worth running over Hydro Goblet if one is available, but it’s an added bonus.
Artifact Sets
Calcs for artifact set comparisons can be found here (up to date for Version 5.8).
 4pc Marechaussee Hunter | Marechaussee’s Charged Attack DMG% and hefty CRIT Rate make it Neuvillette’s BiS by a sizable margin. Furthermore, stacks on the 4-piece effect are obtained quickly due to the HP drain from Neuvillette’s Charged Attack. It is highly recommended to farm or strongbox this set. |
  4pc Heart of Depth, 4pc Night of the Sky’s Unveiling | 4pc Heart of Depth provides Hydro DMG% and Charged Attack DMG%, but is worse than Marechaussee. 4pc Night provides 30% CRIT Rate but only in Double Nod-Krai teams, and is also significantly worse than Marechaussee. Both are usable placeholders while farming 4pc Marechaussee. |
 2pc Mixed Sets | 2pc Bonuses: Marechaussee Hunter, Hydro DMG Bonus, HP% Any of these 2-piece combinations will perform similarly to 4pc Heart of Depth; pick whichever has the better substats. |
 Other 4pc Sets | Retracing Bolide, Wanderer’s Troupe, Nymph’s Dream These all perform similarly to Heart of Depth. Note that 4-piece Bolide requires a high uptime shielder. |
Weapons
Calcs for weapon comparisons can be found here (up to date for Version 5.8).
Tome of the Eternal Flow | Neuvillette’s signature weapon and his BiS, Tome of the Eternal Flow offers a hefty amount of CRIT DMG as well as some HP% and CA DMG%. Additionally, it provides Energy regeneration that negates the need for ER in most scenarios. Tome performs significantly better than all other weapons, with the exception of Sacrificial Jade. |
 Sacrificial Jade | Obtained from the Battle Pass, it is Neuvillette’s second-best weapon. It offers CRIT Rate and HP%, but its passive restricts field time to a maximum of 10s at a time. Even at R1, Sacrificial Jade is a respectable enough improvement over its alternatives that it may be a worthwhile purchase. R5 Sacrificial Jade is the only weapon that even comes close to R1 Tome and can even rival it in some Vaporize and Furina Hypercarry teams. |
 Recommended 5-Star Options | Surf’s Up, Nocturne’s Curtain Call, Reliquary of Truth, Lost Prayer to the Sacred Winds, Cashflow Supervision CRIT stat sticks that perform slightly better than Prototype Amber — with the exception of Surf’s Up and Nocturne’s Curtain Call, which are ahead of the rest and on par with a similarly refined Sacrificial Jade. None are worth pulling specifically for Neuvillette, but they can be used if already available. |
 Ash-Graven Drinking Horn | An event weapon from Version 5.0. Ash-Graven is Neuvillette’s best free weapon at low ER requirements (~120% or lower). It offers the same HP% secondary stat as Prototype Amber, but its passive offers damage rather than Energy regeneration. Every 15s, Neuvillette’s attack will trigger one instance of AoE damage. The hit scales with his HP, making it surprisingly decent. |
Prototype Amber | Prototype Amber provides plenty of HP% and heals, and is Neuvillette’s best free weapon at moderate or high ER requirements (~125% or higher). It performs better the more Neuvillette can take advantage of the Energy provided by its passive, but is limited by his teams’ tendency to run an abundance of Favonius weapons. Nonetheless, at higher ER requirements, it pulls ahead of several of the above weapons (e.g., Ash-Graven, Lost Prayer). Although the small and infrequent healing from Prototype’s passive is largely useless to Neuvillette himself, it helps stack Fanfare with Furina. It can also be beneficial for Neuvillette’s teammates, as his teams often lack healers. |
 Other 5-Star Options | Jadefall Splendor, Everlasting Moonglow, Kagura’s Verity Stat sticks that all perform similarly. These weapons provide Neuvillette with some CRIT or HP% and small buffs from their passives, but they are generally worse than Prototype Amber. |
Teams
Rotation Notation
- N = Normal Attack
- C = Charged Attack
- A = Aimed Shot
- P = Plunging Attack
- E = Elemental Skill
- tE = Tap Skill
- hE = Hold Skill
- Q = Elemental Burst
- D = dash (cancel)
- J = jump (cancel)
- W = walk (cancel)
- > = switch character
- ( ) = these actions are optional; please refer to the notes below
- [ ] = repeat these actions the specified number of times
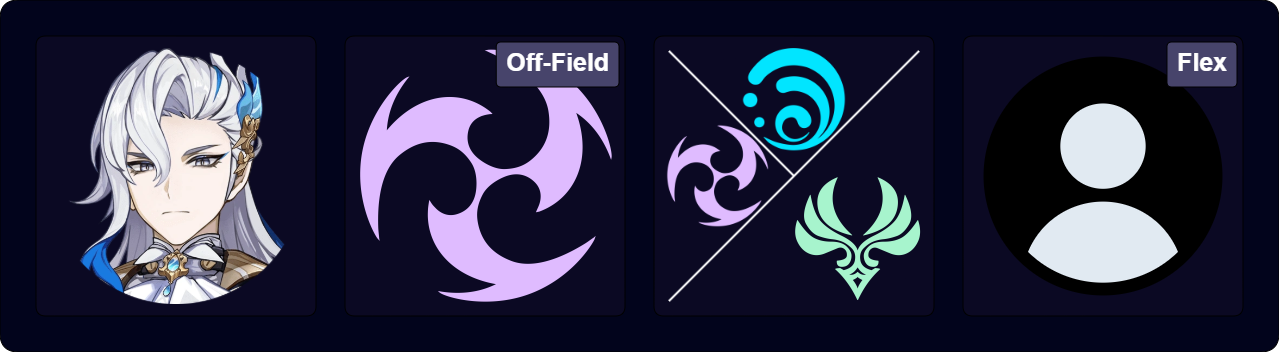
Teambuilding
- As an on-field Hydro character with solid personal damage, Neuvillette has access to a wide variety of teams and playstyles.
- While Neuvillette’s self-sustain lets him forgo a healer in most teams, he is susceptible to getting knocked over while casting his Charged Attacks and often wants a teammate who can provide some interruption resistance.
- It is recommended to do 3 or 4 Charged Attacks per rotation in almost all teams. Often he will do 2 Charged Attacks when first taking the field before swapping out, and later swap back in to do 1–2 more.
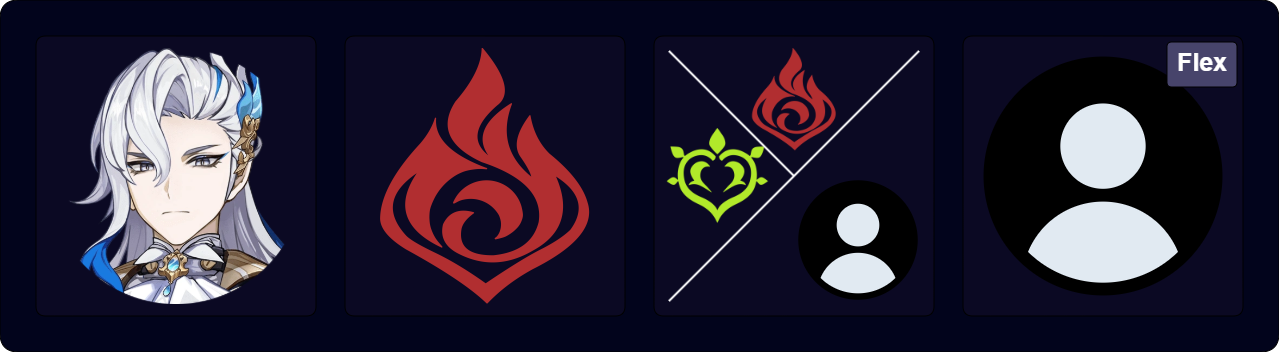
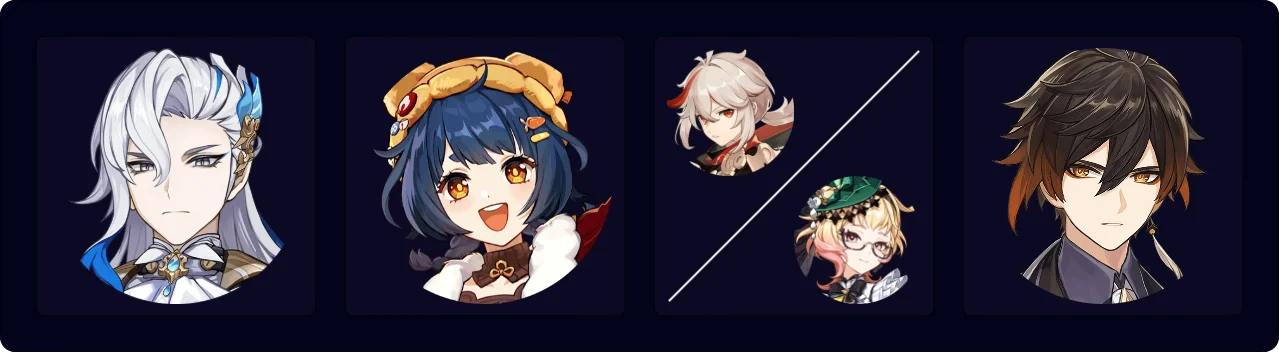
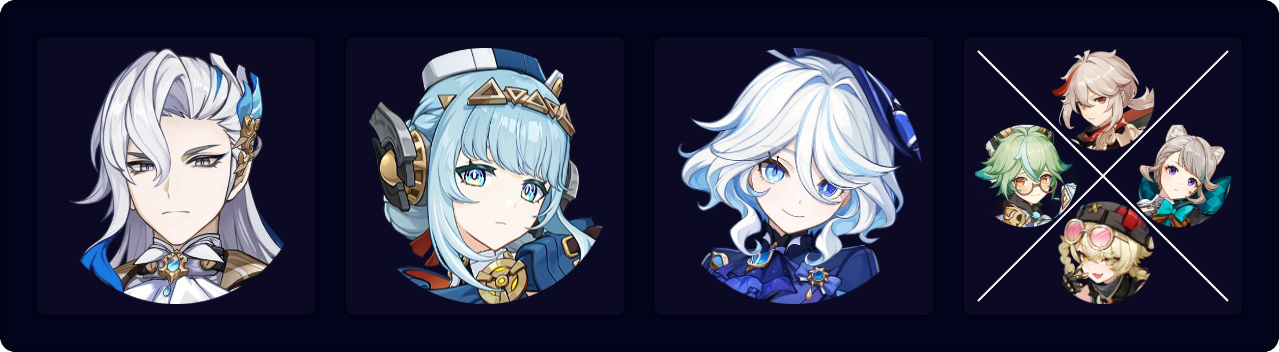
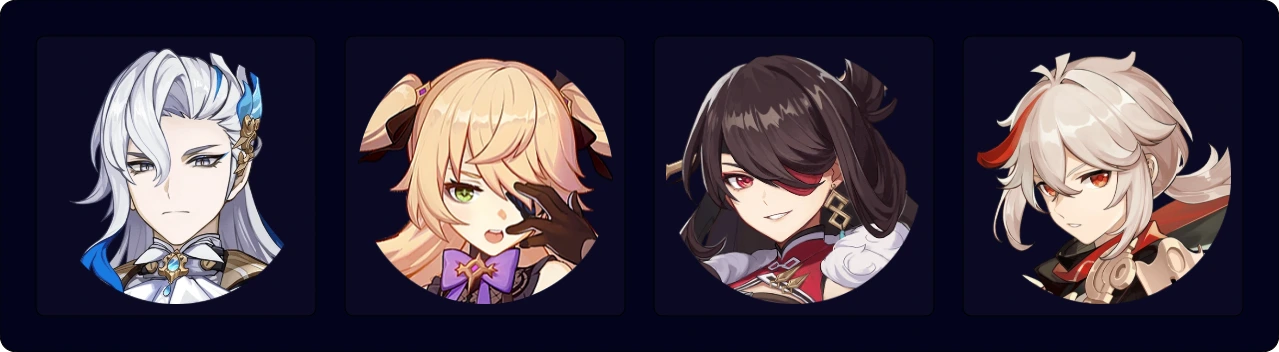
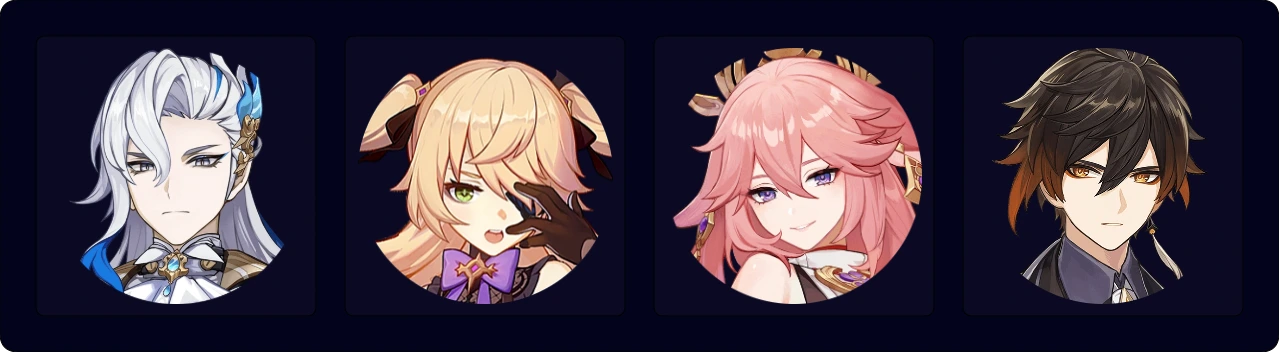
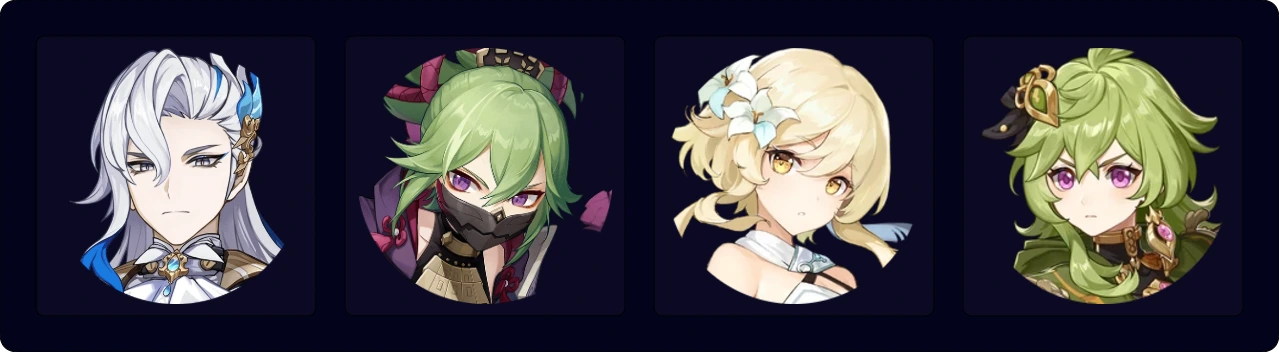
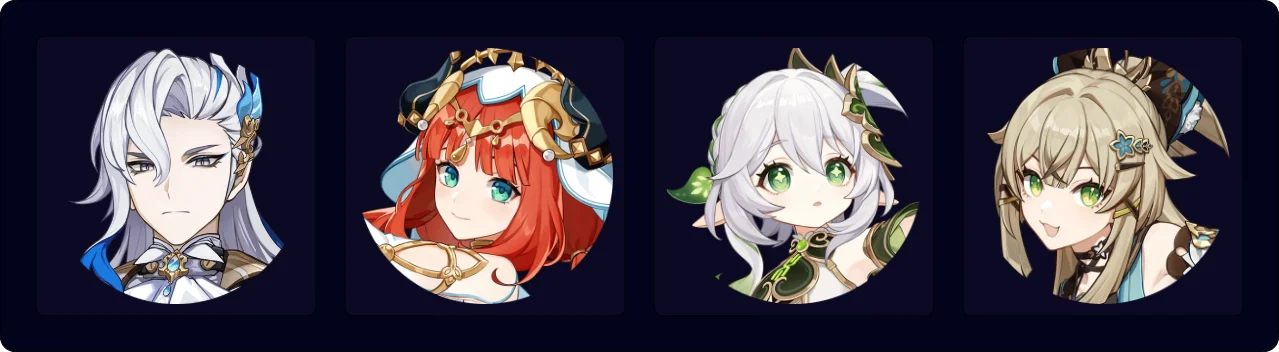
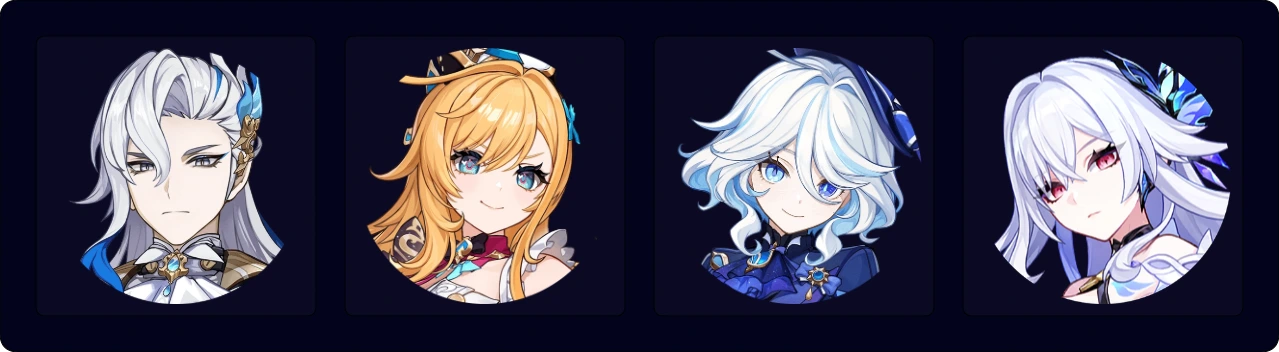
Hypercarry
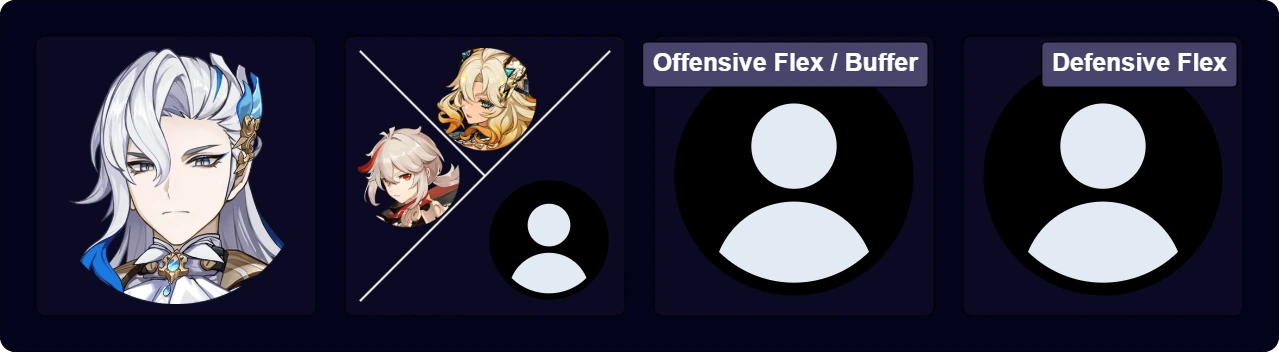
While no longer Neuvillette’s best teams with the release of Nod-Krai, hypercarry is still a strong playstyle for Neuvillette. These teams center around buffing Neuvillette’s personal damage, and scale well with Constellations and investment into Neuvillette.
Furina is hypercarry Neuvillette’s best support thanks to her DMG Bonus, Hydro particles, and HP% from Hydro Resonance. Apart from her, Kazuha and Xilonen are also recommended due to their ability to not only shred Hydro RES, but also provide appreciated DMG% buffs. An offensive teammate can contribute additional buffs and their own personal damage, and a defensive teammate can provide appreciated interruption resistance and survivability. Ideally, both should accommodate Neuvillette’s field time requirements.
Having teammates who can stack Neuvillette’s A1 Passive is preferable for maximizing DPS, though not required. His C1 makes this less of a concern, and additionally lets the defensive teammate be swapped out for a more offensive unit.
Notable Teammates
 Furina | Furina is one of the premier buffers available for Neuvillette. She brings a hefty DMG Bonus and respectable personal damage. Neuvillette’s HP fluctuations easily stack her Fanfare on his own, but a healer can bring added comfort. |
Xilonen | Another excellent buffer, Xilonen provides Hydro RES Shred that is slightly lower but longer duration than 4pc VV, and does not need to be refreshed in multi-wave content. She also activates the full 4pc Scroll effect for a large DMG Bonus buff, and her healing stacks Fanfare in Furina teams. |
 Kazuha | The best Anemo support for hypercarry Neuvillette, and one of his best buffers overall. Kazuha is highly recommended thanks to his DMG Bonus, the RES Shred from 4pc VV, and grouping capabilities. |
Other Anemo Units With 4pc Viridescent Venerer
 Venti, Sucrose, Lynette, Lan Yan, Heizou | If Kazuha is unavailable, other Anemo units can serve as alternatives. Lan Yan offers a shield but requires Sacrificial Fragments or C6 for good uptime. Lynette’s Taunt helps prevent interruption and she stacks some Fanfare. C6 Sucrose offers DMG%, while Venti provides some flat Energy and is a good option in multi-wave content that requires constant grouping. |
 Jean, Sayu, Xianyun, Jahoda | Xianyun, Jean, Sayu, and Jahoda become viable options when running Furina, though they perform worse than Kazuha. In addition to 4pc VV Shred, their healing stack Fanfare faster, offer gameplay comfort, and increase Furina’s personal damage. |
Offensive Flex Units / Buffers
 Mavuika | Mavuika deals off-field damage with her Skill, can hold 4pc Scroll for 40% DMG Bonus, and provides a massive nuke via her Burst. She is a powerful offensive flex for Neuvillette’s teams, albeit at the price of being unable to run as an on-field DPS in her own team — often the more optimal choice. |
Durin | Durin is a solid off-field DPS at C0, and becomes a great Neuvillette support with Constellations. His C1 provides a Quill-like buff that buffs roughly half of Neuvillette’s damage, while his C2 provides 50% Hydro DMG Bonus as long as Vaporize is triggered. |
Ororon | Ororon deals good personal damage and is able to activate the full 4pc Scroll effect to buff the team with 40% Hydro and Electro DMG Bonus. His Burst Taunt also provides some QoL, and he can battery with Favonius Warbow and a modest Energy refund. |
 Fischl | Fischl offers sizable personal damage and an unmatched rate of Electro application entirely from off-field. Her battery capabilities also lower the team’s ER requirements. However, her Electro application can make Swirl setups annoying in Solo Hydro teams. |
 Kachina, Pyro Traveler | Kachina and Pyro Traveler can both activate the full 4pc Scroll effect to provide a large DMG Bonus for Neuvillette, making them great supports. Pyro Traveler also provides an extra 6% DMG Bonus with their C1, but only unlocks near the end of the Natlan Archon Quest. Kachina is given to all players for free at the beginning of the Archon Quest. |
 Lisa | Lisa is a highly accessible buffer who offers valuable DEF Shred. She can either hold Prototype Amber to stack Fanfare and forgo her Hold Skill, or wield Hakushin Ring for a teamwide Hydro DMG Bonus. |
 Childe | Childe’s Utility Passive increases his party members’ NA Talent level by 1 and is one of the few impactful buffs available to Neuvillette. He also enables Hydro Resonance for +25% HP and can help set up Hydro Swirls for VV Shred and other buffs. Support Childe opts for more unconventional builds, such as equipping Favonius Bow, if it benefits Neuvillette. |
  Chiori, Albedo | Chiori and Albedo function similarly; both offer off-field damage with low field time. Chiori deals more damage than Albedo outside of Double Hexerei teams, while Albedo can compensate by buffing Neuvillette with 4pc Archaic and Favonius Sword. He also offers a modest CA DMG Bonus in Double Hexerei teams. |
 Yae Miko | Similarly to Fischl, Yae Miko provides respectable personal damage from off-field, swapping in to deploy her totems and then back out. Due to her high ER requirements, she may opt to Burst every other rotation or forgo Bursting entirely. |
 Yelan | Neuvillette is unable to make much use of Yelan’s Burst, as it only triggers on Normal Attacks. However, due to the limited amount of HP buffs available, the +25% HP from Hydro Resonance, Yelan’s ramping DMG% buff, and extra Hydro Particles still makes her a decent option. |
 Xingqiu | Xingqiu is a passable poverty option at C2+ if no one better is available. He provides Hydro Resonance, Hydro particles, some Hydro RES Shred at the price of Neuvillette having to N1C, and decent interruption resistance. |
Defensive Flex Units
Citlali | Citlali consolidates powerful buffing with shielding. She both activates the full 4pc Scroll effect for 40% DMG Bonus and provides 20% Hydro RES Shred with her A1. Her shield has the same uptime as Zhongli’s, but with far lower scaling. |
 Zhongli | Zhongli provides the same Hydro RES Shred as Citlali, but can only activate the first 4pc Scroll stack. Instead, he provides unmatched comfort with a far stronger shield. He can hold 4pc Archaic Petra for a larger DMG% buff, but it is difficult to activate in practice. |
   Baizhu, Charlotte, Mika | Options in Furina teams. Baizhu’s and Charlotte’s healing stacks Fanfare, and Baizhu’s pseudo-shields offer interruption resistance, though their strength and uptime may be lacking. Mika is another option with similar healing. |
  Layla, Kirara | Layla offers a strong shield and a minor buff to Neuvillette’s Charged Attacks with her C4, while Kirara provides 12% DMG Bonus at C6. |
Example Teams
This is not a comprehensive list of teams. The inclusion or exclusion of any given team does not necessarily reflect its power level. Check out the Neuvillette Rotation Sheet for many more example rotations and team alternatives.
Note that Ineffa, Columbina, and Lauma teams can be found in the Lunar-Charged and Hyperbloom sections, and Charlotte/Escoffier — Furina teams can be found in the Freeze section.
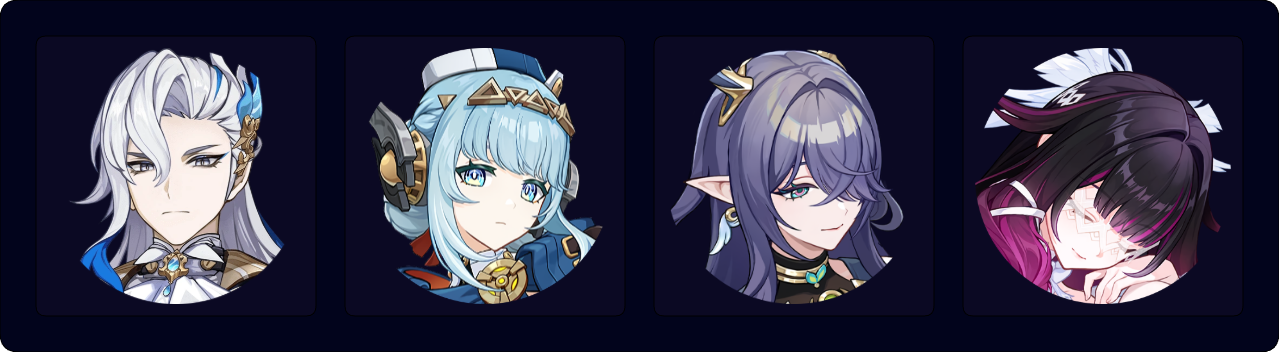
Sample Rotation (Xilonen)
Neuvillette E > Furina ED N1 > Xilonen EQ N2 > Kazuha tEPQ > Furina Q > Neuvillette C E C Q > Xilonen E N2 > Kazuha tEP > Neuvillette 2[C]
Sample Rotation (Zhongli)
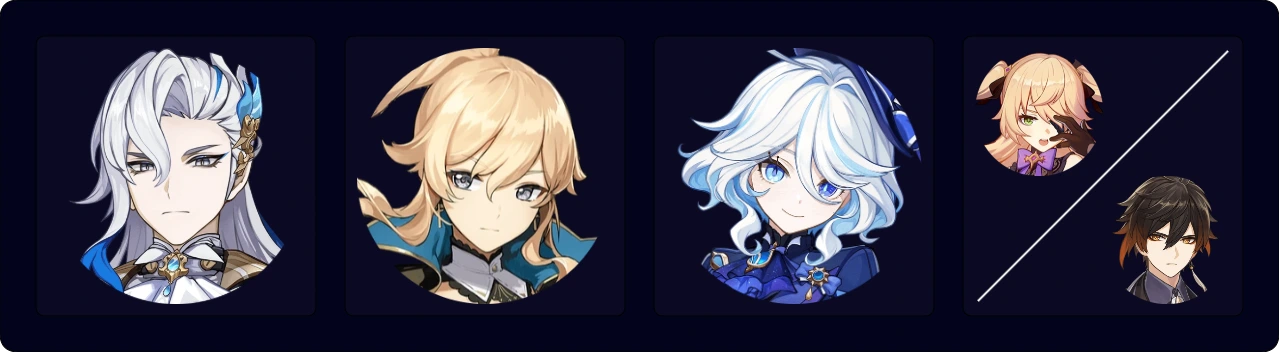
Neuvillette E > Furina ED > Kazuha tEPQ > Zhongli hED > Furina Q > Neuvillette C E C Q > Kazuha tEP > Neuvillette 2[C]
Sample Rotation (Lisa)
With Prototype Amber on Lisa:
Neuvillette E > Furina ED > Kazuha hEPQ > Furina Q > Lisa Q > Neuvillette C E C Q > Kazuha tEP > Neuvillette 2[C]
Without Prototype Amber on Lisa:
Neuvillette E > Furina ED > Kazuha Q > Lisa hEQ > Kazuha tEP > Furina Q > Neuvillette C E C Q > Kazuha tEP > Neuvillette 2[C]
Sample Rotation (Mavuika)
Neuvillette E > Xilonen Q > Furina ED Q > Mavuika EQ CD > Xilonen E N2 > Neuvillette C E C Q > Xilonen E N2 > Neuvillette 2[C]
Sample Rotation (Durin)
Neuvillette E > Furina E > Xilonen EQ N2 > Durin E N1 Q > Furina Q > Neuvillette C E C Q > Xilonen E N2 > Neuvillette 2[C]

Sample Rotation (Kazuha):
Neuvillette E > Furina ED > Ororon EQ > Kazuha tEPQ > Furina Q > Neuvillette C E C Q > Kazuha tEP > Neuvillette 2[C]
Sample Rotation (Lynette):
Neuvillette E > Furina ED > Ororon EQ > Furina Q > Lynette EQ1 > Neuvillette C Q E C > Lynette E N1 > Neuvillette 2[C]
1 If Lynette is pre-C4, do Lynette EQ before Furina Q
Sample Rotation (Lan Yan)
Neuvillette E > Furina ED > Ororon EQ > Furina Q > Lan Yan E N1 (Q)1 > Neuvillette C Q E C > Lan Yan E N1 > Neuvillette 2[C]
1Use Lan Yan’s Burst for grouping if needed.
Sample Rotation (Xilonen)
Neuvillette E > Furina ED N1 > Xilonen EQ N2 > Lynette E N1 Q > Furina Q > Neuvillette C E C Q > Xilonen E N2 > Lynette E N1 > Neuvillette 2[C]
Sample Rotation (Kachina)
Neuvillette E N1 > Furina ED > Kachina E > Lynette Q N1 E > Furina Q > Neuvillette C E C Q > Kachina Q > Lynette E N1 > Neuvillette 2[C]
Sample Rotation (Kachina)
Neuvillette E N1 > Kazuha Q > Kachina E > Fischl E > Kazuha tEP > Neuvillette C Q E C > Kazuha tEP > Fischl Q > Neuvillette 2[C]
Sample Rotation (Zhongli)
Neuvillette E N1 > Kazuha Q > Zhongli hED > Fischl E > Kazuha tEP > Neuvillette C Q E C > Kazuha tEP > Zhongli hED > Fischl Q > Neuvillette 2[C]
Sample Rotation (Fischl)
Neuvillette E > Furina ED Q > Jean EQ > Fischl E > Neuvillette C Q E C > Jean (N1) E > Fischl Q > Neuvillette 2[C]
Sample Rotation (Zhongli)
Neuvillette E > Furina ED Q > Zhongli hED > Jean EQ > Neuvillette C Q E C > Zhongli hED > Jean (N1) E > Neuvillette 2[C]
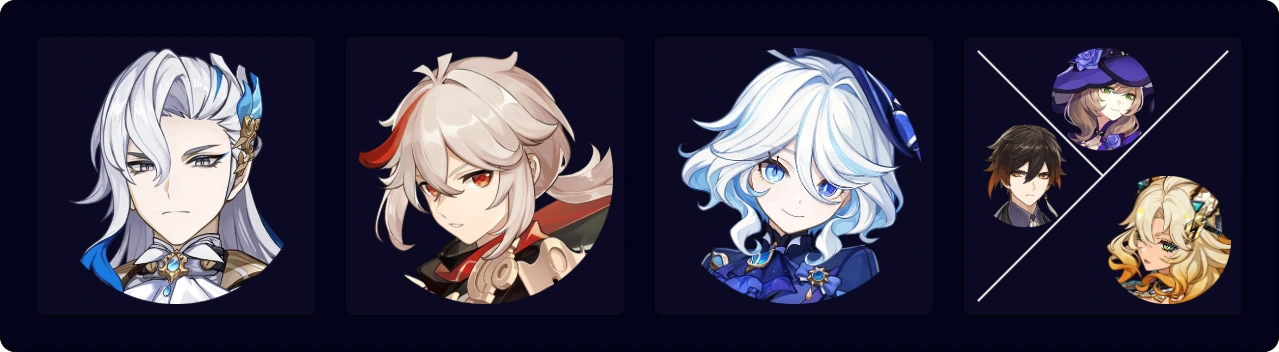
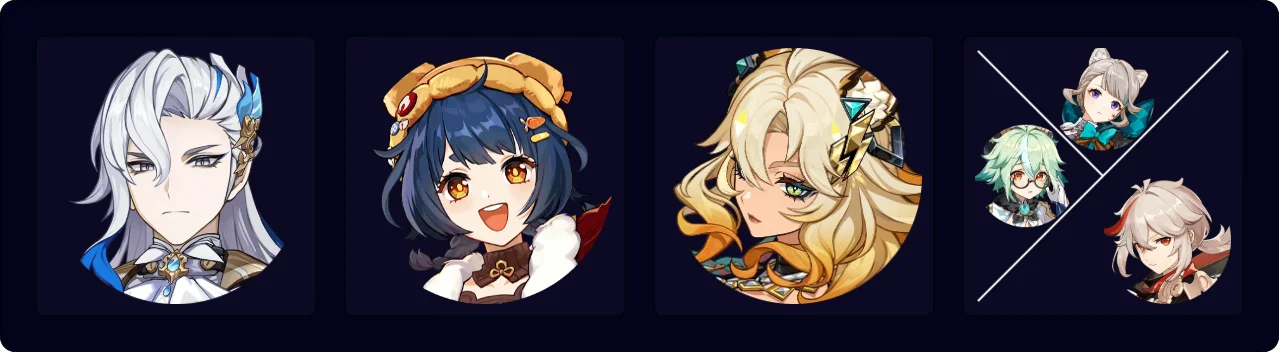
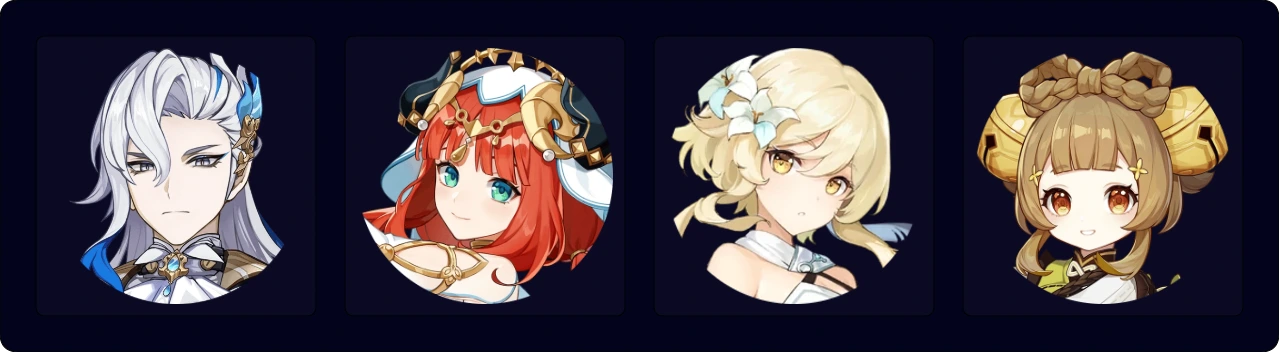
Vaporize
Neuvillette can take advantage of Forward Vape to amplify his already sizable personal damage, and his best Forward Vaporize teams even perform on par with his premier Hypercarry teams at C0. In addition to an off-field Pyro applier, bringing Nahida or an Anemo unit such as Kazuha can be beneficial to ensure Pyro aura via Burning or Pyro Absorption, respectively.
Neuvillette can also play in Reverse Vaporize, where he applies Hydro to let Xiangling Vaporize her Pyronado hits. However, this is both a miserably low DPS playstyle for Neuvillette and a subpar pairing for Reverse Vaporize Xiangling; thus, it will not be covered here.
Notable Teammates
Pyro Units
 Xiangling | Xiangling offers unmatched Pyro application in Forward Vape, and can provide buffs with supportive artifact sets. Neuvillette’s long rotations and Favonius Lance also keep her ER requirements reasonable even as Solo Pyro. Since Xiangling’s Burst forces Neuvillette to play in melee range, interruption resistance becomes valuable. |
 Dehya, Mavuika, Durin | Dehya offers some interruption resistance and Pyro application, and Mavuika offers a bit more Pyro application, the full 4pc Scroll buff, and her Burst’s DMG% buff. Durin offers the same Pyro application as Mavuika but needs C1 at minimum to provide significant buffs. Instead of granting buffs, he deals solid personal damage. All three can help enable Vaporize but are better played as flex picks, as they require both a Dendro unit like Nahida and an Anemo unit to absorb Pyro. |
Flex Units
Xilonen | Xilonen provides hassle-free and reliable Hydro RES Shred that does not need to be refreshed in multi-wave, and is reliable even where Anemo units would struggle. She also activates the full 4pc Scroll effect for a large DMG Bonus, and her healing stacks Fanfare in Furina teams. |
 Zhongli, Citlali | Shielder options that also provide buffs. Both shred Hydro RES without requiring Swirl setups, and can equip 4pc Scroll (if Hydro reactions are possible). Zhongli only activates the first 4pc Scroll stack, but offers a stronger shield, while Citlali trades shield strength for the full 4pc Scroll buff. |
   Lauma, Nahida, Emilie | When paired with a Pyro unit, Nahida’s 1.5U Dendro application lets her sustain Burning for extra Vaporize consistency. Her Burst also provides Neuvillette with an EM buff. Lauma trades some Dendro application for far better buffs, with up to 25% Hydro and Dendro RES Shred, a Quill-like buff plus a fixed 15% CRIT Rate and 100% CRIT DMG for Burgeon. Emilie lacks buffs, but instead provides impressive off-field damage, and also enables Burning. Her slower Dendro application makes her less consistent than Nahida, but also makes it easier to stack Neuvillette’s A1 after the first rotation. |
Kazuha, Sucrose, Lynette | Kazuha provides DMG% and RES Shred to maximize Neuvillette’s damage; he can also absorb Pyro to help with Elemental application. Sucrose trades DMG% for a hefty EM buff, but her performance is highly variable due to her Burst’s inconsistent absorption mechanics. For players without an available Kazuha and who don’t want to reset with Sucrose, Lynette is a recommended replacement thanks to her ability to absorb and apply Pyro, and her Burst’s Taunt. |
 Kachina, Pyro Traveler | Accessible 4pc Scroll holders for players without an available Xilonen. Pyro Traveler also provides 6% DMG Bonus at C1 but only unlocks after the Natlan Archon Quest, while Kachina is given for free after the intro. |
 Furina | Although Furina can interfere with Neuvillette’s Vaporize, her sizable DMG Bonus and personal damage can make up for it. Neuvillette’s HP fluctuations easily stack her Fanfare, but a healer can bring added comfort. |
 Childe | Childe’s Utility Passive increases his party members’ NA Talent Level by 1 and is one of the few impactful buffs available to Neuvillette. He also enables Hydro Resonance for +25% HP and can help set up Hydro Swirls for VV Shred and other buffs. |
Chiori, Albedo | Chiori and Albedo both deal damage from off-field without hindering Vaporize. Chiori deals more damage than Albedo outside of Double Hexerei teams, while Albedo compensates by buffing Neuvillette with 4pc Archaic and his Burst’s EM buff. He also offers a modest CA DMG Bonus in Double Hexerei teams. |
 Yelan | Neuvillette is unable to make much use of Yelan’s Burst, as it only triggers on Normal Attacks. However, due to the limited amount of HP buffs available, the +25% HP from Hydro Resonance still makes her a viable option. Neuvillette also appreciates Yelan’s ramping DMG% buff and battery capabilities. |
Example Teams
This is not a comprehensive list of teams. The inclusion or exclusion of any given team does not necessarily reflect its power level. Check out the Neuvillette Rotation Sheet for many more example rotations and team alternatives.
Sample Rotation (Kazuha)
Neuvillette E N1 > Xilonen E N2 > Kazuha tEP > Xiangling Q N1 E > Neuvillette C Q E C > Xilonen E N2 > Xiangling E > Kazuha Q(tEP)1 > Neuvillette 2[C]
1Optional, helps ER requirements but the timing is tight for Neuvillette’s last CA
Sample Rotation (Sucrose)
Neuvillette E N1 > Xilonen E N2 > Sucrose N1 ED (ED) > Xiangling Q ED > Neuvillette C Q E C > Xilonen E N2 > Sucrose ED(Q)1 > Xiangling N2 ED > Neuvillette 2[C]
1Only use Sucrose’s Burst if it will absorb Pyro
Sample Rotation (Lynette)
Neuvillette E N1 > Xilonen E N2 > Lynette E N1 > Xiangling Q E > Neuvillette C Q E C > Xilonen E N2 > Xiangling E > Lynette EQ > Neuvillette 2[C]
Sample Rotation (Lauma)
Neuvillette E > Lauma N1 Q hE > Xiangling Q E > Furina ED Q > Neuvillette C E C Q > Lauma N1 hE > Xiangling E N2 > Neuvillette 2[C]
Sample Rotation (Nahida)
Neuvillette E > Nahida E (N1) Q > Xiangling Q E > Furina ED Q > Neuvillette C E C Q > Nahida E N1C > Xiangling E (N1) > Neuvillette 2[C]
Sample Rotation (Kazuha)
Neuvillette E N1 > Zhongli hED N1 > Kazuha tEP > Xiangling Q E > Neuvillette C Q E C > Kazuha tEPQ > Zhongli N1 tE > Xiangling N2 E > Neuvillette 2[C]
Sample Rotation (Emilie)
Neuvillette E / Neuvillette E N2D N11 > Zhongli hED N1 > Emilie E > Xiangling Q E > Neuvillette C Q E C > Zhongli tE N1 > Xiangling N2 E > Neuvillette 2[C]
1Normal attack with Neuvillette on the second rotation onwards to clear any lingering Dendro aura
Sample Rotation (Kachina)
Neuvillette E N1 > Kachina E > Lynette E N1 > Xiangling Q ED > Neuvillette C Q E C > Lynette EQ > Xiangling N2 ED > Neuvillette 2[C]
Sample Rotation (Zhongli)
Neuvillette E N1 > Zhongli hED N1 > Lynette E N1 > Xiangling Q ED > Neuvillette C Q E C > Lynette EQ > Xiangling N2 ED > Neuvillette 2[C]
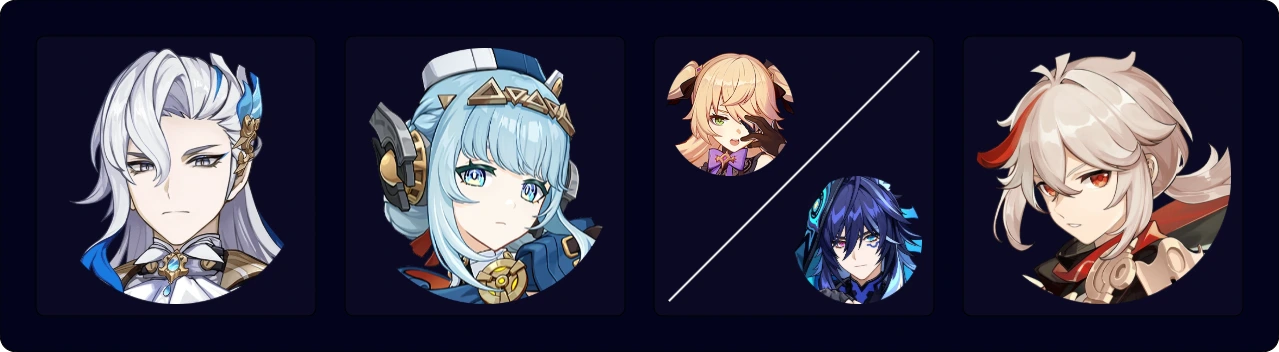
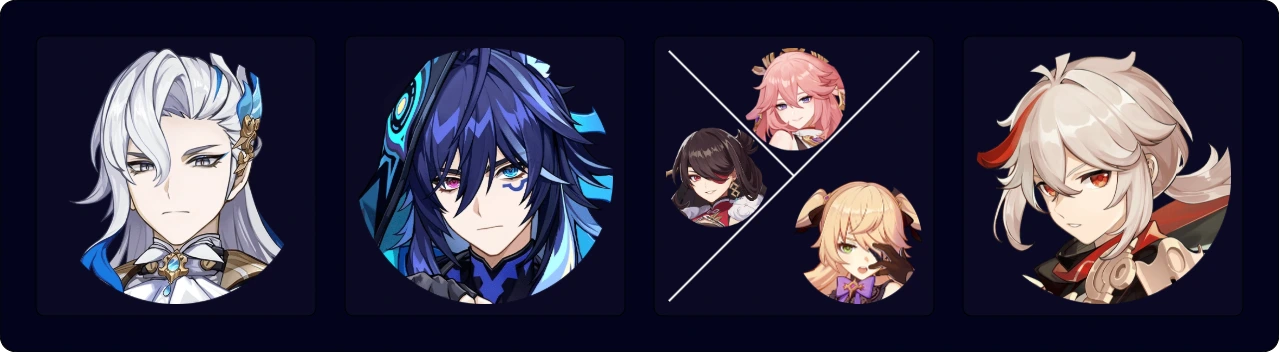
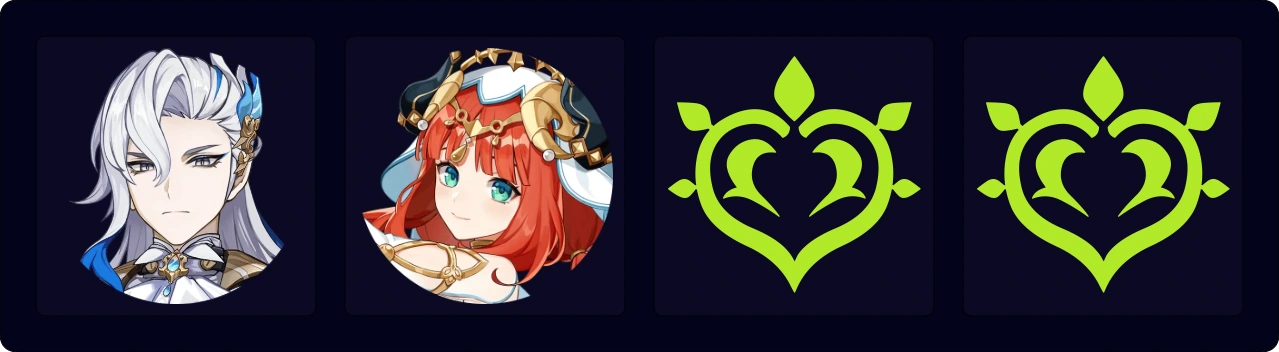
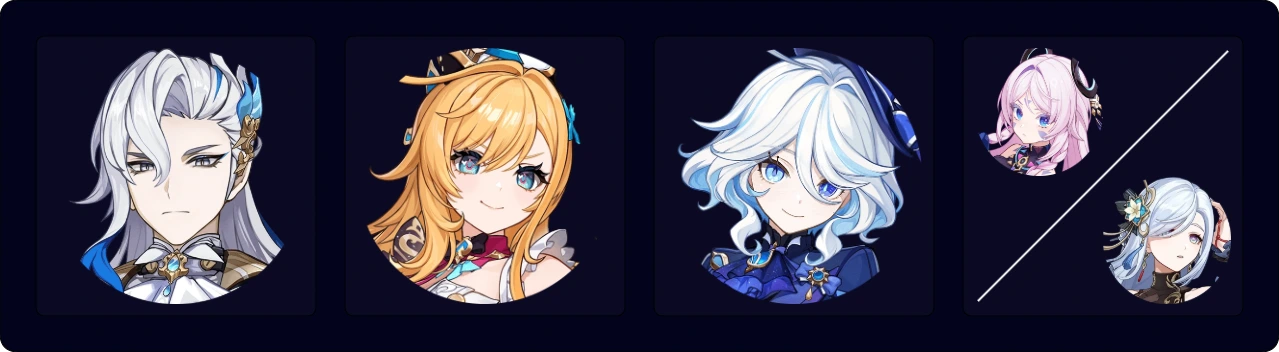
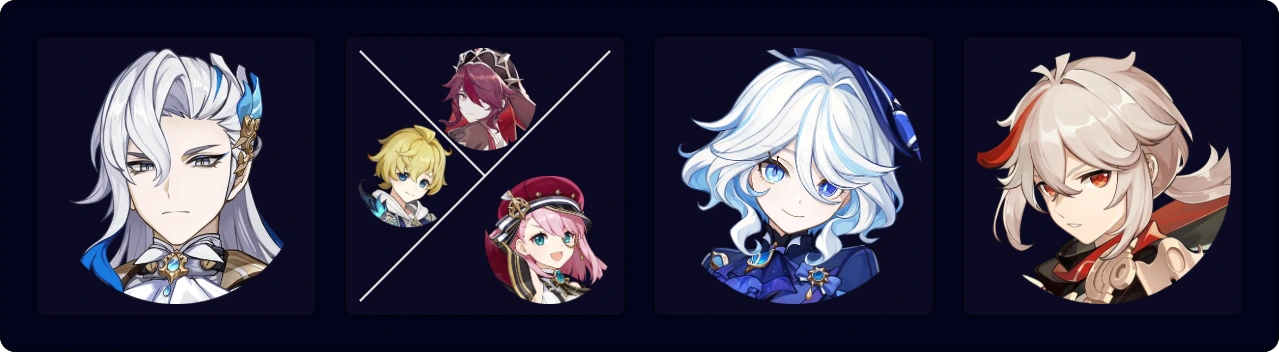
Lunar-Charged / Electro-Charged
Neuvillette can act as an on-field driver in an Lunar-Charged team with Ineffa, dealing damage with his enhanced Charged Attacks while applying Hydro for Lunar-Charged. Thanks to Ineffa’s high damage and Columbina’s buffs, these are currently among his best teams, along with other Lunar Reaction teams. The multi-target scenarios in which Electro-Charged and Lunar-Charged teams thrive let him take advantage of his AoE, and since Lunar-Charged scales with CRIT and not just EM, it synergizes with Neuvillette’s regular build.
Ineffa is mandatory, but the team is otherwise flexible. It can include an Anemo unit to shred enemy RES and help stack Neuvillette’s A1, another off-field Electro damage dealer, or a Hydro unit for Hydro Resonance and buffing. Columbina is an excellent option thanks to her Lunar Reaction buffs, Hydro particles, and personal damage, but she is also highly contested.
Neuvillette can also act as an on-field DPS in Electro-Charged teams with Fischl or Ororon. While Electro-Charged teams deal far less damage than Lunar-Charged, they still offer fun gameplay and decent damage. Note that despite being referred to as Electro-Charged teams, these teams are not focused around the reaction’s damage, and thus Neuvillette should not build EM.
Notable Teammates
Electro Units
 Ineffa | Ineffa deals excellent personal damage, batteries, and offers a shield for C0 Neuvillette. Her Skill provides off-field Electro application with great uptime. She also enables Lunar-Charged which replaces Electro-Charged. The main advantage of Lunar-Charged is that it scales equally with CRIT and EM, and uses the stats from all participating characters. As such, Neuvillette doesn’t have to pick between building for Talent damage or LC, and can instead take full advantage of both. Ineffa also offers an EM buff to increase Neuvillette’s LC damage. |
Ororon | Ororon is a strong buffer for Neuvillette thanks to his ability to activate the full 4pc Scroll effect for 40% Hydro DMG Bonus. His Burst Taunt provides some QoL, and he can battery with Favonius Warbow and a modest Energy refund. He also deals decent personal damage, especially in AoE. |
Fischl | Fischl’s sizable personal damage, batterying capabilities, and unmatched rate of off-field Electro application make her a recommended pick for this playstyle. With a second Hexerei character, Fischl also provides 90 EM for herself and the on-fielder, doubled at C6. |
 Yae Miko | Similarly to Fischl, Yae Miko provides respectable personal damage from off-field, swapping in to deploy her totems and then back out. While she often opts to Burst every other rotation due to her high-cost Burst, when paired with Fischl her ER requirements can be low enough to make Bursting every rotation worth it. |
 Beidou | Beidou offers strong off-field Electro damage that excels in multi-target scenarios and being paired with Fischl alleviates her ER requirements. Since her Burst is triggered by Charged Attacks, Neuvillette is an excellent driver for her. The increased interruption resistance is also a nice QoL. |
| Lisa | Lisa is a highly accessible buffer, offering valuable DEF Shred. She can either hold Prototype Amber to increase Fanfare or wield Hakushin Ring. Double Electro teams lower her ER requirements. However, she loses some value in Lunar-Charged teams since the reaction ignores enemy DEF. |
Anemo Units
 Kazuha | Kazuha offers an Elemental DMG% buff and can hold 4pc VV to shred enemy Hydro and Electro RES to maximize the team’s damage output. His grouping is also a nice QoL, especially in the AoE scenarios Electro-Charged teams favor. In Lunar-Charged teams, Kazuha loses some value: his DMG Bonus only benefits Neuvillette’s Talent damage and not Ineffa’s LC damage. However, since Neuvillette still makes up the majority of the team’s damage, Kazuha remains the best-in-slot option. |
  Sucrose, Lynette | Alternatives to Kazuha. Sucrose offers teamwide EM at C0, and DMG% at C6 but struggles to consistently buff Hydro DMG%. Lynette offers ATK% and some defensive utility with her Taunt. Both offer grouping, but are less reliable than Kazuha. Sucrose and — to a lesser extent — Lynette gain more value in Lunar-Charged teams. Sucrose provides a high EM buff for the team and Ineffa’s Lunar-Charged damage. Lynette’s ATK% buff is smaller and only benefits Lunar-Charged damage, but also helps Ineffa reach her A4 buff cap, and increases her EM buff. |
Jahoda | Jahoda activates Ascendant Gleam with Ineffa, which enables teamwide Lunar Reaction DMG Bonus and the full 4pc Silken Moon effect, and her healing stacks Fanfare with Furina. Her A4 also provides a 100 EM buff for whomever she heals. Jahoda’s C6 provides a CRIT buff for Lunar Reaction damage, but it’s rarely worth the field time to activate it in Neuvillette’s teams. |
 Lan Yan, Venti | Other Anemo units that can hold 4pc VV for Hydro and Electro RES Shred. Lan Yan provides a shield though she needs Sacrificial Fragments or C6 for sufficient uptime and it’s largely unnecessary in Lunar-Charged with Ineffa, while Venti provides unmatched grouping in AoE and Energy. |
Jean, Sayu, Xianyun | Xianyun, Jean and Sayu are options in Furina teams, though they perform worse than Kazuha. In addition to 4pc VV Shred, their healing stacks Fanfare faster, offers comfort, and increases Furina’s personal damage. |
Hydro Units
Columbina | Columbina is not so much a support for Neuvillette as she is the best buffer for his teams with Ineffa — which happen to be his highest damage teams overall. She provides Lunar Reaction DMG Bonus, Lunar Reaction Base DMG Bonus, more Lunar-Charged ticks, and activates Ascendant Gleam. On top of that, she also deals decent personal damage, enables Hydro Resonance, and batteries Neuvillette. |
Furina | Furina brings respectable personal damage and a hefty DMG Bonus. Neuvillette’s HP fluctuations easily stack her Fanfare on his own, but a healer can bring added comfort. While Furina’s DMG Bonus doesn’t benefit Lunar-Charged damage, she still remains one of his best-in-slot teammates thanks to her buffs for Neuvillette and her personal damage. |
 Aino | Aino is a decent second Hydro for Lunar-Charged teams: she activates Ascendant Gleam to buff Ineffa with the Lunar Reaction DMG Bonus and full 4pc Silken Moon effect, and Hydro Resonance to buff Neuvillette. Her C1 and C6 offer 80 EM and 35% Lunar Reaction DMG Bonus respectively, but both are for the on-fielder only and thus don’t benefit Ineffa. |
 C1+ Mona | Post-buff Mona becomes a decent second Hydro at C1+ for players with neither Furina nor Columbina. Her C1 provides 24% off-field Lunar Reaction DMG Bonus for Ineffa, and her C2 provides 80 EM teamwide. With a second Hexerei character like Sucrose, she can also extend her Omen debuff by doing Normal Attacks, which alleviates some of her uptime issues in Neuvillette teams. |
Yelan | Neuvillette is unable to make much use of Yelan’s Burst, as it only triggers on Normal Attacks. However, with the limited amount of HP buffs available, the +25% HP from Hydro Resonance, Yelan’s ramping DMG% buff, and extra Hydro Particles still make her a decent option. |
Flex Units
Xilonen | Xilonen offers hassle-free Hydro and Electro RES Shred, which has slightly longer uptime than 4pc VV and also does not need to be refreshed in multi-wave. She also provides a large DMG Bonus with 4pc Scroll to further buff Neuvillette. |
Kachina | Kachina also activates 4pc Scroll’s full buff and can serve as a free alternative to Xilonen, buffing both the team’s Hydro and Electro units. |
Zhongli, Citlali | Zhongli’s long-lasting shield and RES Shred make him an excellent comfort option in teams that appreciate resistance to interruption. Citlali offers a weaker shield, but instead buffs with the full 4pc Scroll effect and provides the same Hydro RES Shred. |
Chiori, Albedo | Chiori and Albedo function similarly; both offer off-field damage with low field time. Chiori deals more damage than Albedo outside of Double Hexerei teams — especially with Columbina, since Lunar-Crystallize Moondrift counts as a Geo Construct. Albedo compensates by buffing Neuvillette with 4pc Archaic and Favonius Sword, and offers a modest CA DMG Bonus with a second Hexerei teammate. |
Example Teams
This is not a comprehensive list of teams. The inclusion or exclusion of any given team does not necessarily reflect its power level. Check out the Neuvillette Rotation Sheet for many more example rotations and team alternatives.
Sample Rotation (Kazuha)
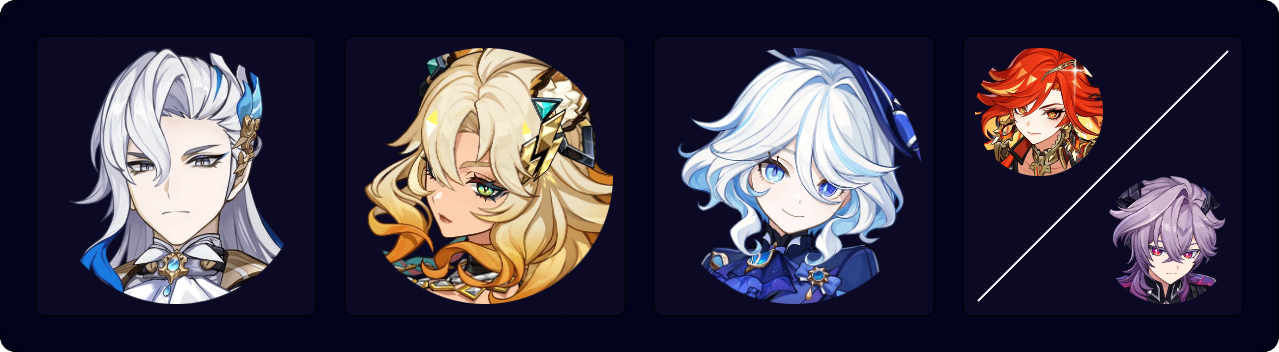
Neuvillette E N1 > Columbina E Q > Ineffa E(Q)1 > Kazuha tEPQ > Neuvillette C E C Q > Kazuha tEP > Neuvillette 2[C]
1Burst if available
Sample Rotation (Sucrose)
Neuvillette E N1 > Columbina E Q > Ineffa E(Q)1 > Sucrose ED Q / N2² > Neuvillette C Q E C > Sucrose ED / N2³ > Neuvillette 2[C]
1Burst if available
²Burst if available, N2 otherwise
³Skill if available, N2 otherwise
Sample Rotation (Lynette)
Neuvillette E N1 > Columbina E Q > Ineffa E(Q)1 > Lynette E N1 Q N1 > Neuvillette C E C Q > Lynette E N1 > Neuvillette 2[C]
1Burst if available
Sample Rotation (Kazuha)
Neuvillette E > Furina ED > Ineffa E(Q)1 > Kazuha tEPQ > Furina Q > Neuvillette C E C Q > Kazuha tEP > Neuvillette 2[C]
1Burst when available
Sample Rotation (Sucrose)
Neuvillette E > Furina ED > Ineffa E(Q)1 > Sucrose N1 ED Q / N2² > Furina Q > Neuvillette C Q E C > Sucrose ED / N2 > Neuvillette 2[C]
1Burst when available
²Burst if available, N2 otherwise
³Skill if available, N2 otherwise
Sample Rotation (Lynette)
Neuvillette E N1 > Furina ED > Ineffa E(Q)1 > Furina Q > Lynette EQ > Neuvillette C Q E C > Lynette E N2 > Neuvillette 2[C]
1Burst when available
Sample Rotation (Jahoda)
Neuvillette E > Furina ED > Ineffa E(Q)1 > Jahoda Q N1 > Furina Q > Neuvillette C E C Q > Jahoda tE N2 > Neuvillette 2[C]
1Burst when available
Sample Rotation (Ororon)
Neuvillette E N1 > Kazuha Q > Ororon Q N1 > Kazuha tEP > Ineffa N1 E > Neuvillette C Q E C > Kazuha tEP > Ororon E N1 > Neuvillette 2[C]
Sample Rotation (Fischl)
Neuvillette E N1 > Kazuha Q > Fischl Q > Kazuha tEP > Ineffa N1 E > Neuvillette C Q E C > Kazuha tEP > Fischl E > Neuvillette 2[C]
Sample Rotation (Aino)
Neuvillette E N1 > Ineffa E(Q)1 > Aino EQ > Sucrose ED Q / N2² > Neuvillette C Q E C > Sucrose ED / N2² > Neuvillette 2[C]
1Burst if available
²Burst/Skill if available, N2 otherwise
Sample Rotation (Mona)
Neuvillette E N1 > Ineffa E(Q)1 > Mona Q N1 > Sucrose ED Q / N2² > Mona N1 E N1 > Neuvillette C E C Q > Sucrose ED / N2² > Neuvillette 2[C]
1Burst if available
²Burst/Skill if available, N2 otherwise
Sample Rotation (Yelan)
Neuvillette E N1 > Ineffa E(Q)1 > Yelan Q N1 E > Sucrose N1 ED Q / N2² > Neuvillette N1C Q E C > Sucrose ED / N2² > Yelan E N1> Neuvillette 2[C]
1Burst if available
²Burst/Skill if available, N2 otherwise
Sample Rotation (Fischl)
Neuvillette E N1 > Kazuha Q > Ororon EQ > Kazuha tEP > Fischl E > Neuvillette C Q E C > Kazuha tEP > Fischl Q > Neuvillette 2[C]
Sample Rotation (Beidou)
Neuvillette Q > Kazuha Q > Beidou EQ > Kazuha N1 tEP N1 > Ororon Q > Neuvillette E 2[C] N1 > Kazuha tEP N1 > Ororon E > Beidou E > Neuvillette E C
Sample Rotation (Yae Miko)
Neuvillette E > Kazuha Q > Yae Miko 3[E] > Kazuha tEP > Ororon EQ > Neuvillette C Q E C > Kazuha tEP > Yae Miko 3[E] > Neuvillette 2[C]
Sample Rotation
Neuvillette Q > Kazuha Q > Beidou EQ > Kazuha tEP > Fischl E > Neuvillette E N1 2[C] > Kazuha tEP > Fischl Q > Beidou E > Neuvillette E C
Sample Rotation
Neuvillette Q > Zhongli hED > Yae Miko 3[E] > Fischl E > Neuvillette 2[C] E > Zhongli hED > Fischl Q > Yae Miko (Q)¹ 3[E] > Neuvillette C E C
¹Optionally cast Yae Miko’s Burst. The timing for this is tight.
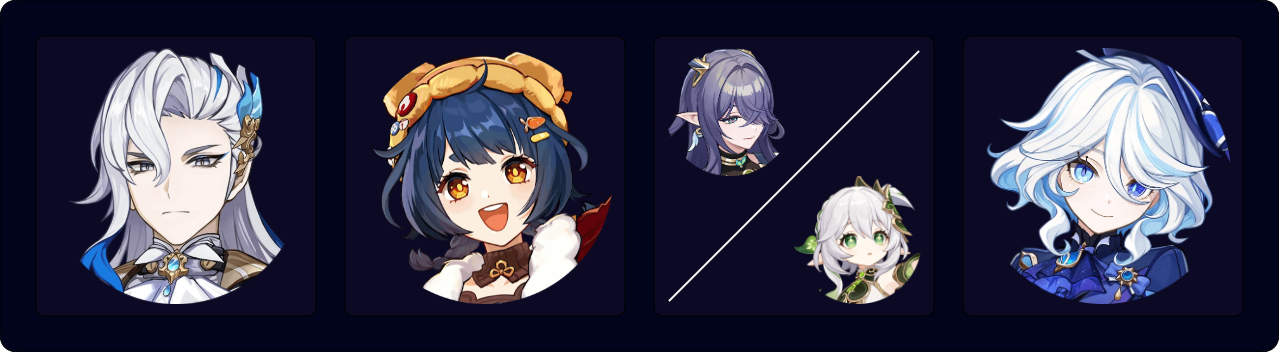
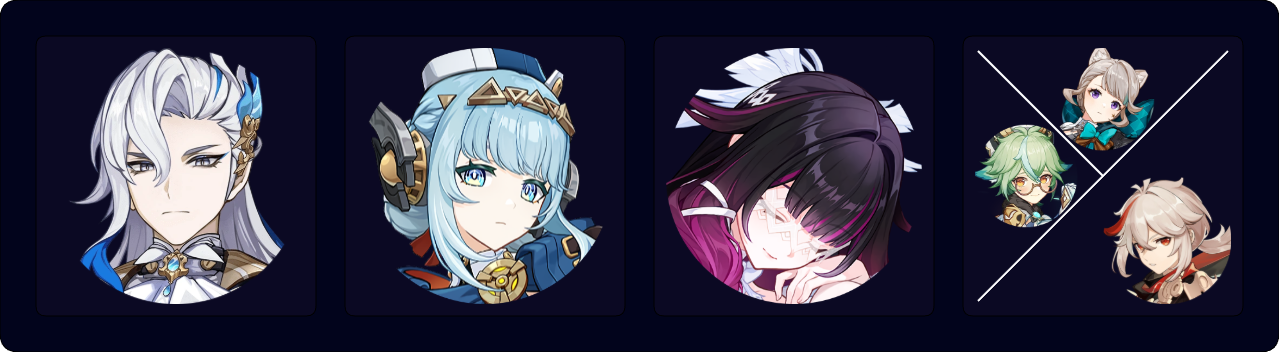
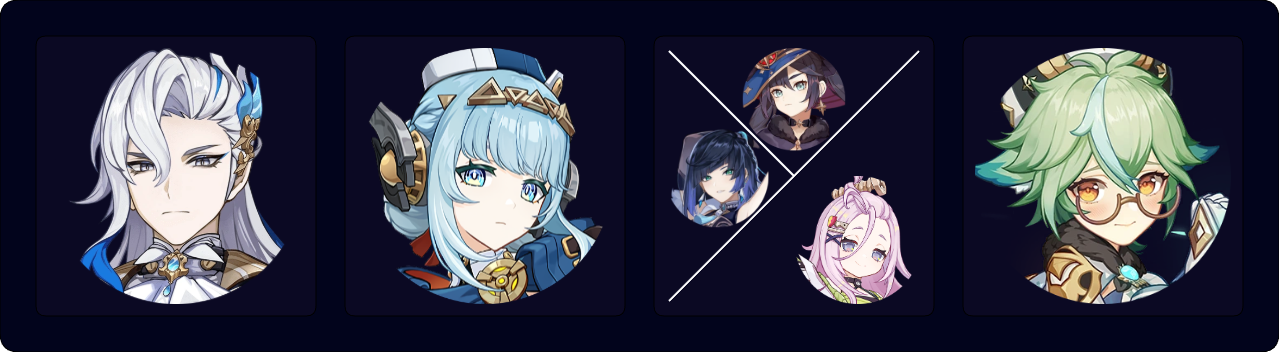
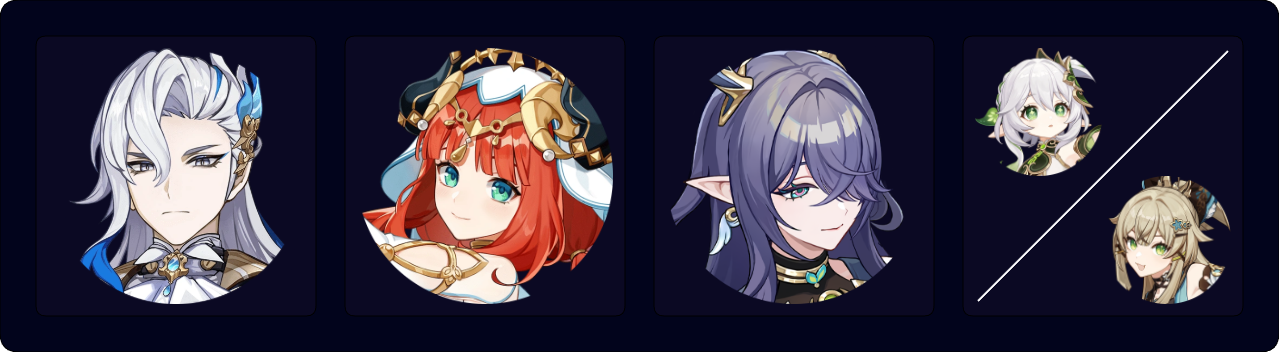
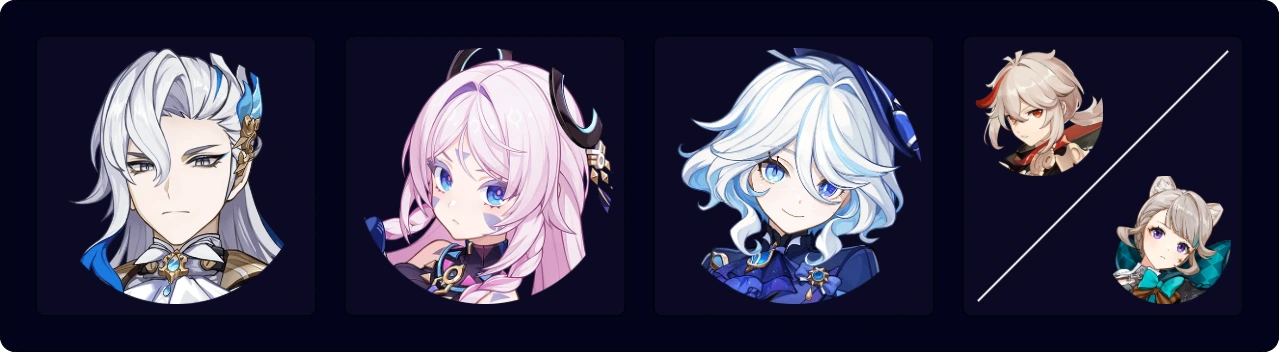
Hyperbloom / “Lunar Hyperbloom”
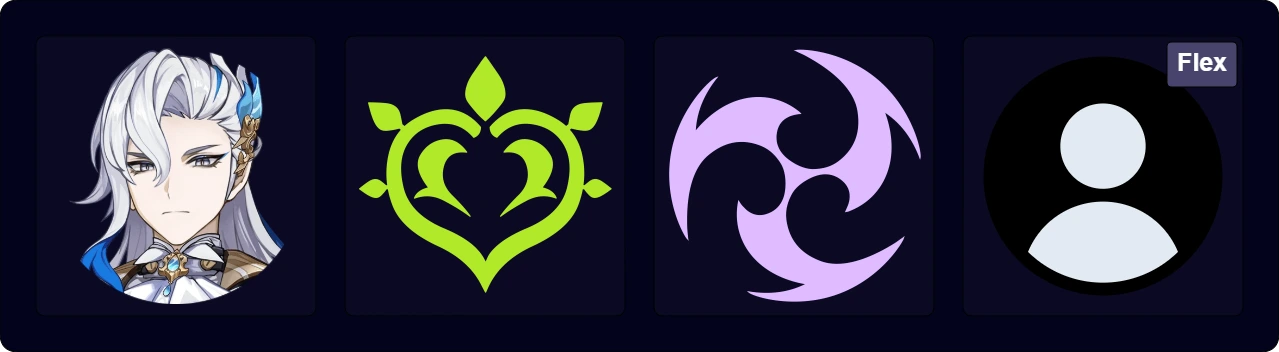
Neuvillette can act as an on-field Hydro applier in Hyperbloom teams, generating Dendro Cores for an Electro unit to trigger Hyperbloom. Since he does not deal reaction damage, Neuvillette keeps his regular build and contributes respectable personal damage instead. His AoE Charged Attacks also help balance out the team’s otherwise more single-target nature.
With the release of Lauma, Ineffa, and Columbina, Neuvillette’s “Lunar Hyperbloom” teams outperform even his hypercarry teams. Their only downside is that they monopolize several contested units, but even Hyperbloom teams with only Lauma or Ineffa still outperform most teams other than Lunar-Charged.
As Neuvillette lacks off-field Hydro application, he should be played with Dendro and Electro units who can apply their Elements from off-field. Note that while there may be some downtime in Hydro application, this is minor and does not make a second Hydro unit necessary. However, a second Hydro can still be a great pick for Hydro Resonance, other buffs and utility, and increased Lunar-Charged uptime in teams where Ineffa is the Electro trigger.
Notable Teammates
Dendro Units
 Lauma | Lauma is easily Neuvillette’s best Dendro teammate thanks to her up to 25% Hydro and Dendro RES Shred and plenty of Bloom-related buffs. She provides a Quill-like buff for Hyperblooms, and gives them a fixed 15% CRIT Rate and 100% CRIT DMG in Solo Nod-Krai teams. Although running other Nod-Krai characters disables Lauma’s Bloom CRIT buff, this is worth it to run both Ineffa and Columbina. However, it’s not worth running only Columbina alone, while Ineffa — Lauma alone is generally on par with Lauma’s Solo Nod-Krai teams. |
 Nahida | Nahida provides unmatched off-field Dendro application through her Skill, and its long duration means she won’t interfere with Neuvillette’s field time requirements. It’s not recommended to Burst with her as Neuvillette is unable to take advantage of its EM buff. |
 Dendro Traveler | Available to all players, Dendro Traveler offers off-field Dendro application with high uptime, and their Burst’s large AoE provides good coverage. However, since their Dendro application is tied to their high-cost Burst, they struggle with high ER requirements as a solo Dendro unit. |
 Collei | Collei is another accessible option, and provides mobile off-field Dendro application that can be increased by Sacrificial Bow. Her ER requirements are also fairly manageable in solo Dendro teams. However, the shorter durations of her Skill and Burst may feel clunky in some teams, and their range limits Neuvillette. |
Electro Units
Ineffa | Ineffa is a great pick for Neuvillette’s Hyperbloom teams. She consolidates shielding for C0 Neuvillette, solid personal damage from Lunar-Charged, and great particle generation. While Ineffa’s Electro application is slower than Raiden or Kuki, this is largely a non-issue. The loss of Hyperblooms is limited, she compensates with her LC damage, and Neuvillette’s Hyperbloom teams aren’t reliant only on Hyperbloom for damage. |
 Raiden | Raiden is an excellent off-field Hyperbloom trigger with a long duration on her Skill and low field time requirements. In addition, her Skill offers an Elemental Burst DMG Bonus for her teammates. Since her Skill can be triggered from a distance, it lets Neuvillette take full advantage of his range. |
 Kuki Shinobu | Similarly to Raiden, Shinobu is an off-field Hyperbloom trigger. Her Skill offers off-field healing and Electro application, but its limited duration means she will have to swap in to refresh at least once per rotation. Its limited AoE also restricts Neuvillette’s range. |
Flex Units
Furina | Furina does not buff Hyperbloom damage, but her hefty DMG Bonus is still very valuable for Neuvillette’s damage. She also provides her own respectable personal damage and helpful Hydro application. Neuvillette’s HP fluctuations easily stack her Fanfare. The extra Hydro application from Furina is valuable in teams with Ineffa, where it helps increase LC uptime. |
Xilonen | Xilonen offers hassle-free Hydro RES Shred, which has slightly longer uptime than 4pc VV and does not need to be refreshed in multi-wave. She also provides a large DMG Bonus with 4pc Scroll as long as she can trigger Hydro Crystallize once per rotation. |
Zhongli, Citlali | Zhongli’s long-lasting shield and RES Shred make him an excellent comfort option in teams that appreciate resistance to interruption. Citlali offers a weaker shield, but instead buffs with the full 4pc Scroll effect and provides the same Hydro RES Shred. |
Kachina | Kachina is another Natlan support that can activate 4pc Scroll’s full buff, and can serve as a free alternative to Xilonen as long as Hydro Scroll is possible. |
  Layla, Kirara | Layla or Kirara can slot in to provide defensive utility for players who need it. However, Kirara will not provide an A1 stack since you are already running Dendro; thus, Layla is usually a better option. Layla also offers a minor buff to Neuvillette’s Charged Attacks with her C4, while Kirara offers 12% DMG Bonus with her C6. |
 Fischl, Yae Miko | Fischl and Yae Miko are both off-field damage dealers who contribute significant DPS while triggering few Hyperblooms. Fischl has the additional benefit of lowering the team’s overall ER requirements. |
 Dehya, Pyro Traveler | Dehya and Pyro Traveler both apply Pyro slowly enough to trigger Burgeon without interfering with Dendro Core production, and can slot into Neuvillette’s Hyperbloom teams as flex picks. Pyro Traveler can also buff Neuvillette with the full 4pc Scroll DMG Bonus and their C1’s 6% DMG Bonus, while Dehya trades buffs for interruption resistance. |
Lisa | Lisa can slot in to buff Neuvillette’s damage without stealing too many Hyperblooms. She offers valuable DEF Shred and can hold Hakushin Ring or Favonius Codex. |
Yelan | Neuvillette is unable to make much use of Yelan’s Burst, as it only triggers on Normal Attacks. However, due to the limited amount of HP buffs available, the +25% HP from Hydro Resonance combined with Yelan’s ramping DMG% buff and extra Hydro Particles still makes her a viable option. |
Example Teams
This is not a comprehensive list of teams. The inclusion or exclusion of any given team does not necessarily reflect its power level. Check out the Neuvillette Rotation Sheet for many more example rotations and team alternatives.
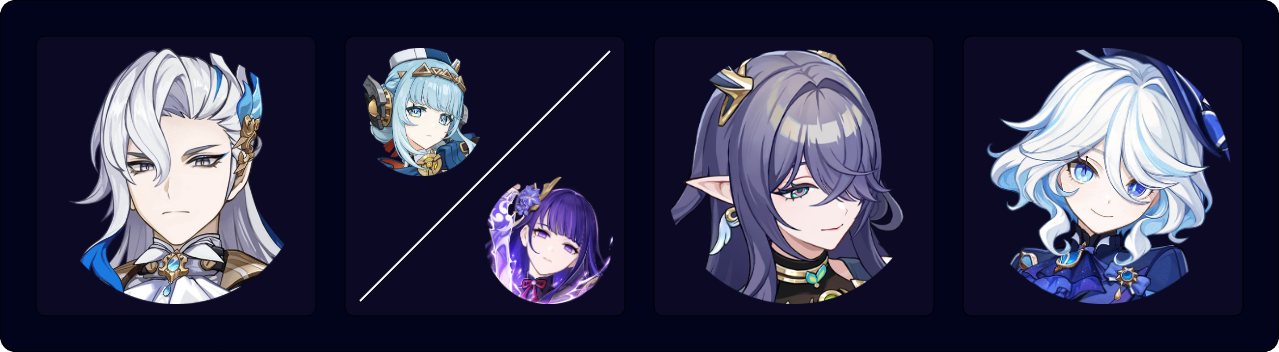
Sample Rotation
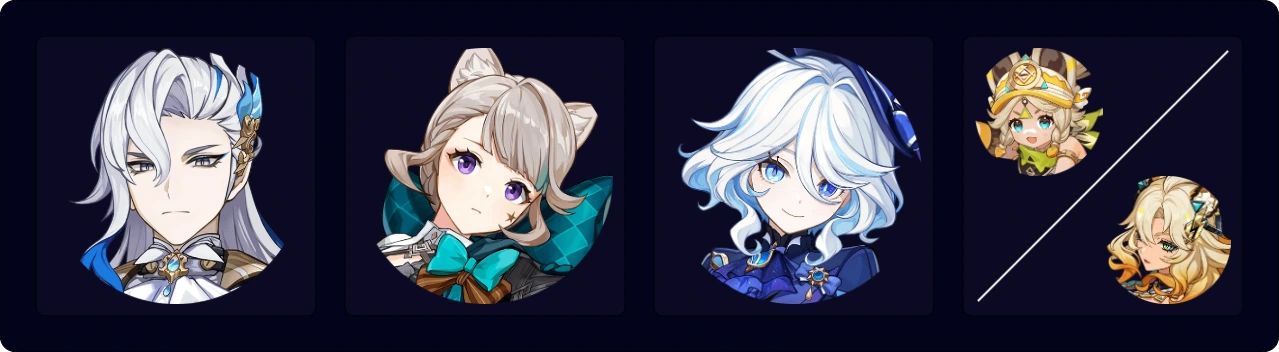
Neuvillette E N1 > Columbina E N2 > Ineffa E N1 > Lauma N1 Q N1 hE N1 > Columbina N1 Q > Neuvillette C E C Q > Lauma hE N1 > Ineffa Q > Neuvillette 2[C]
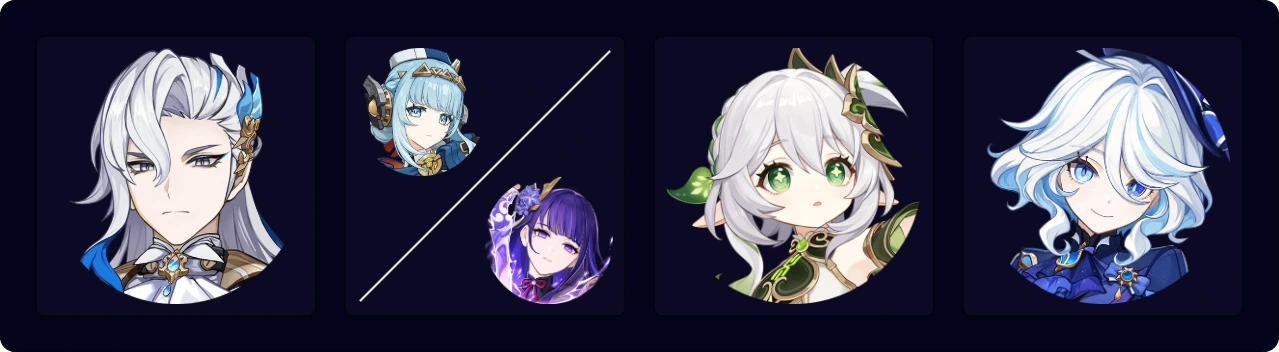
Sample Rotation (Raiden)
Neuvillette E > Furina ED > Raiden E N1 > Lauma N1 Q hE > Furina Q > Neuvillette C E C Q > Lauma hE > Neuvillette 2[C]
Sample Rotation (Ineffa)
Neuvillette E > Furina ED > Ineffa N1 E > Lauma N1 Q hE > Furina Q > Neuvillette C Q C E > Ineffa Q > Lauma hE > Neuvillette 2[C]
Sample Rotation (Ineffa)
Neuvillette E > Furina ED > Nahida E Q > Ineffa E > Furina Q > Neuvillette C Q E C > Nahida E N1 > (Ineffa Q) > Neuvillette 2[C]
Sample Rotation (Raiden)
Neuvillette E > Furina ED > Raiden E > Nahida N2 E N2 Q > Furina Q > Neuvillette C E C Q > Nahida E C > Neuvillette 2[C]

Sample Rotation
Nahida hE (Q)¹ > Raiden E > Fischl E > Neuvillette E C Q C > Fischl Q > Neuvillette C E C
¹Nahida’s Burst is optional but can be used if Neuvillette’s Skill is still on cooldown.
Sample Rotation
Raiden E > Nahida E Q > Kirara shEQ > Neuvillette (N1) E C Q C > Kirara shE > Neuvillette E 2[C]
A more affordable alternative that comes with several caveats. The team’s short Skill durations can feel clunky, and Collei’s limited range forces Neuvillette close to enemies.
Sample Rotation
Neuvillette E > Traveler EQ > Shinobu E > Collei Q E > Neuvillette C E Q C > Traveler E > Shinobu E > Collei Q E > Neuvillette 2[C]
Nilou Bloom
Nilou Bloom remains a strong team that excels in multi-target scenarios — especially with the release of Lauma — and Neuvillette’s AoE Charged Attacks let him slot right in. Ideally, he should be paired with two Dendro units, one of whom will be responsible for the majority of the team’s Dendro application. Due to Bountiful Cores’ self-damage, players may need to run a dedicated healer or shielder as the second Dendro unit, as Neuvillette’s own healing may not be able to keep up during his extended field time.
While EM becomes a more valuable stat to have in Nilou Bloom teams, Neuvillette’s build does not change — any EM from substats is merely an added bonus.
Note that while Neuvillette’s lack of off-field presence is a non-issue in Double Hydro–Double Dendro teams, he should not be used in Triple Hydro teams as they require an on-field Dendro unit.
Notable Teammates
Mandatory Units
 Nilou | Nilou is a requirement for the Bountiful Bloom playstyle. It’s not recommended to use non-Nilou Bloom teams. |
Core Dendro Units
 Lauma | Lauma is easily Neuvillette’s best Dendro teammate thanks to her up to 25% Hydro and Dendro RES Shred and plenty of Bloom buffs. She both provides a Quill-like buff for Blooms, and gives them a fixed 15% CRIT Rate and 100% CRIT DMG. Note that running other Nod-Krai characters disables Lauma’s Bloom CRIT buff. Unlike Hyperbloom, Bloom teams lack strong Nod-Krai teammate options to make up for the damage loss. |
Nahida | Nahida’s Skill provides high off-field Dendro application and its pseudo-grouping is appreciated in Bloom teams. Its long duration also frees up field time for her teammates. In Nilou Bloom teams, Neuvillette can take full advantage of Nahida’s 250 EM buff, and external EM buffs have increased value since he does not build EM himself. |
Dendro Traveler | Dendro Traveler is available to all players, and offers off-field Dendro application with high uptime and a large AoE. Having a second Dendro teammate also helps alleviate their high ER requirements. |
Collei | Collei is another accessible option, with mobile off-field Dendro application that can be increased with Sacrificial Bow. Having another Dendro teammate helps prevent downtime in Dendro application; however, her Burst and Skill’s short range still limit Neuvillette’s mobility. |
Secondary Dendro Units
Baizhu | Baizhu offers strong, party-wide healing and his Burst’s small shields provide appreciated interruption resistance, in addition to a modest Bloom DMG Bonus. His lacking Elemental application also becomes a non-issue when played alongside one of the above Dendro units. |
Kirara | Kirara offers a flexible shield that absorbs Dendro damage with 250% effectiveness, with the option to stack it for extra survivability. While she does not offer healing, having a shield is a nice QoL improvement for Neuvillette. |
 Yaoyao | Yaoyao provides healing for the on-field unit through her Skill and access to emergency party-wide healing through her Burst. While she does not offer any interruption resistance, she trades this for minor off-field Dendro application. |
 Other Dendro | Nahida, Dendro Traveler, and Collei are all solid options as second Dendro if survivability is not a concern. |
Example Teams
This is not a comprehensive list of teams. The inclusion or exclusion of any given team does not necessarily reflect its power level. Check out the Neuvillette Rotation Sheet for many more example rotations and team alternatives.
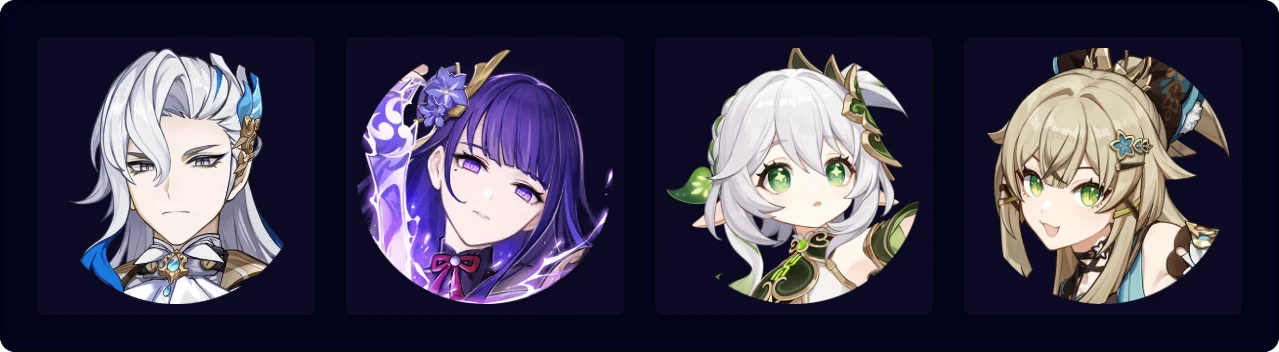
Sample Rotation (Nahida)
Nilou E N2 E > Lauma N1 Q hE > Nahida hE N1 Q > Neuvillette E C Q C > Lauma N1 hE > Neuvillette C E C > Nahida N1C
Sample Rotation (Kirara)
Nilou E N2 E > Lauma N1 Q hE > Kirara Q shE > Neuvillette N1 E C Q C > Lauma hE > Kirara shE > Neuvillette C E C

Sample Rotation
Neuvillette E > Nilou setup > Nahida E Q > Baizhu (N1) E Q > Neuvillette C Q E C > Baizhu E (N1) > Neuvillette 2[C]
Sample Rotation
Neuvillette E > Nilou setup > Nahida E Q > Kirara shEQ¹ > Neuvillette C Q E C > Kirara shE¹ > Neuvillette 2[C]
¹Kirara remains in her Skill state briefly (Short-Hold Skill) for better particle generation and shield durability.
Sample Rotation
Neuvillette E (N1) > Nilou setup > Yaoyao E > Dendro Traveler E N1 Q > Neuvillette C Q E C > Dendro Traveler E N1 > Neuvillette 2[C]
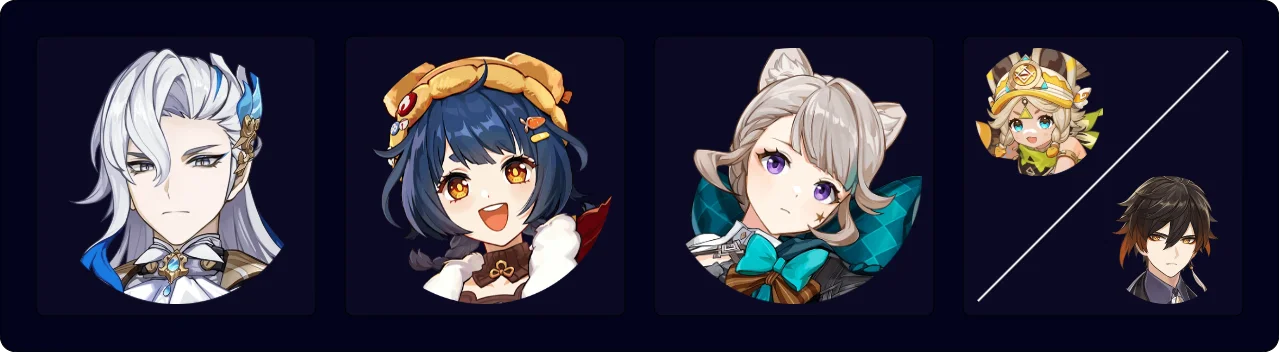
Freeze
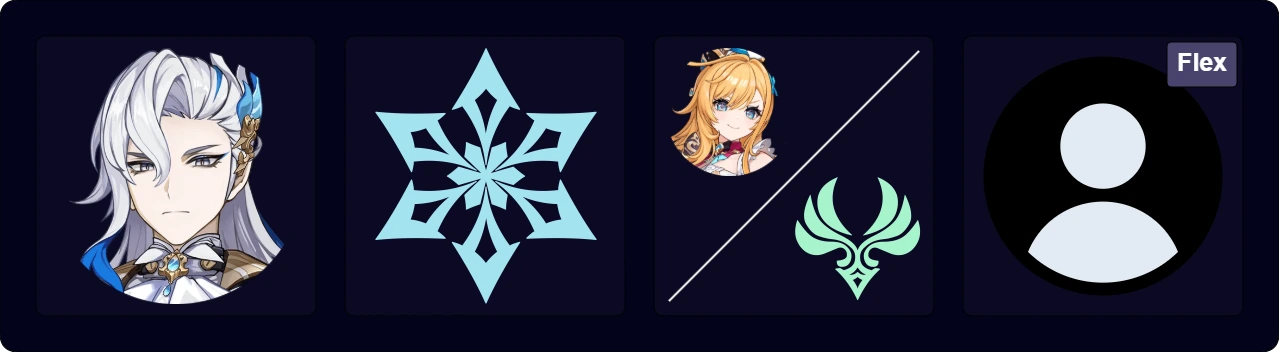
Freeze teams take advantage of Neuvillette’s AoE Hydro application, which makes him more than able to maintain Freeze when paired with one or more Cryo units. His strong personal damage makes him a more offensive alternative to the commonly used Hydro appliers, and the crowd control from Freeze can allow players to run Neuvillette without a shielder even at C0. Additionally, while “traditional” Freeze teams are held back by unfreezable enemies, this is far less of an issue for Neuvillette: he neither runs 4pc Blizzard Strayer nor has any issues dealing with mobile enemies.
Instead, Neuvillette’s Freeze teams are limited by a massive performance gap between his premium teammates and other more accessible options. While his teams with Escoffier, Furina or Citlali perform on par with his Hypercarry teams (or even outperform in single-target and with C0 Neuvillette, if using all three), other compositions trail far behind.
Notable Teammates
Cryo Units
 Escoffier | The backbone of Neuvillette’s premium Freeze teams; Escoffier offers a massive 55% Cryo and Hydro RES Shred, deals high personal damage, and provides healing to help stack Fanfare with Furina. This lets her compensate for C0 Neuvillette only getting one A1 stack due to running only Hydro and Cryo teammates. Even with C1 Neuvillette, his strongest Escoffier teams still perform on par with his 3-stack teams. |
 Skirk | Skirk can slot into Neuvillette’s pure Hydro–Cryo teams as a powerful quickswap DPS. She swaps in to use her Burst nuke in between Neuvillette’s field times, and even deals similar damage to Neuvillette himself. The only downside is playing Skirk as an on-field DPS in her own team is often the more optimal choice. |
Citlali | Citlali offers off-field Cryo application and buffs with her Hydro RES Shred and 4pc Scroll’s full DMG Bonus. She also provides a shield, which can be helpful to prevent interruption as Neuvillette’s teams have limited Freeze uptime. |
  Charlotte, Mika | Charlotte is a great pick for Freeze teams with Furina. Her strong healing helps stack Furina’s Fanfare, and both her Skill and Burst offer off-field Cryo application. Mika is another Cryo healer alternative who performs similarly. |
 Shenhe | Shenhe is the premier Cryo buffer, offering Cryo DMG Bonus, Cryo RES Shred, and her Icy Quill effect. While she primarily buffs her Cryo teammates, her Hold Skill also provides a Charged Attack DMG Bonus for Neuvillette himself. She is especially recommended in teams with Escoffier where her Cryo buffs are taken full advantage of. |
 Rosaria | Rosaria’s Burst lets her deal respectable personal damage from off-field, while her Skill’s particle generation lets her battery the team. She also offers a CRIT Rate buff through her A4. While Neuvillette himself does not benefit from 4pc Noblesse, Rosaria can still hold it to buff other teammates. |
 Ganyu | By forgoing her Charged Attacks and focusing on her Burst, Ganyu can deal damage and apply Cryo entirely from off-field. She also offers some minor defensive utility with her Skill’s Taunt, and increases the damage of Cryo teammates by providing a 20% Cryo DMG Bonus through her A4. |
 Diona, Layla | Diona and Layla can both slot in to provide Cryo Resonance and defensive utility for players who need it. Layla offers a strong shield and higher personal damage, with her C4 offering a minor buff to Neuvillette’s Charged Attacks. Diona trades damage for extra survivability with both healing and a decent shield. |
Anemo Units
Kazuha | Kazuha can both hold 4pc VV to shred Hydro and Cryo RES and provide a large Hydro and Cryo DMG Bonus with his A4. His Skill also provides appreciated on-demand grouping, and absorbing Cryo with his Burst helps increase Freeze uptime for improved CC. |
Venti, Sucrose, Lynette, Lan Yan | Any Anemo unit can hold 4pc VV for Hydro and Cryo RES Shred. Lan Yan provides a shield though she needs Sacrificial Fragments or C6 for sufficient uptime, while Lynette provides a moderate ATK% buff and some defensive utility with her Taunt. Sucrose offers DMG% at C6 but can struggle to consistently buff Hydro DMG. Venti provides unmatched grouping in AoE and Energy. |
Jean, Sayu, Xianyun | Xianyun, Jean and Sayu are options in Furina teams, though they perform worse than Kazuha. In addition to 4pc VV Shred, their healing stacks Fanfare faster, offers gameplay comfort, and increases Furina’s personal damage. |
Flex Units
Xilonen, Kachina | Xilonen offers hassle-free Hydro and Cryo RES Shred, which has slightly longer uptime than 4pc VV and does not need to be refreshed in multi-wave. She also provides a large DMG Bonus with 4pc Scroll to further buff Neuvillette. Kachina is a solid free alternative to her; she lacks the RES Shred but can still activate the full 4pc Scroll buff. |
Furina | Furina offers a hefty DMG Bonus and respectable personal damage. Her teams sacrifice Freeze uptime for higher damage ceilings. Neuvillette can easily stack her Fanfare with his HP fluctuations, but a healer can bring added comfort. |
Zhongli | Zhongli’s long-lasting shield is less needed against enemies that can be Frozen, but his RES Shred still makes him a solid comfort pick for players who appreciate resistance to interruption and extra survivability. Note that his pillar can Shatter Frozen enemies. |
  Yelan, Mona | Due to the lack of HP% buffs available, running a second Hydro teammate for Hydro Resonance is a decent option. While Neuvillette is unable to make much use of Yelan’s Burst, he still benefits from her ramping DMG% buff and Hydro Particles. Similarly, Mona is able to increase Neuvillette’s damage via her Omen’s large DMG Bonus. |
  Dahlia, Xingqiu | Other second Hydro alternatives for players who lack the above options. Xingqiu offers interruption resistance, some personal damage, and a modest Hydro RES Shred at C2. Dahlia lacks buffs that benefit Neuvillette, but offers a full shield. Thanks to his A1, his shield HP is decent in Neuvillette’s Freeze teams. With C4, Dahlia also covers all of Neuvillette’s field time. |
Example Teams
This is not a comprehensive list of teams. The inclusion or exclusion of any given team does not necessarily reflect its power level. Check out the Neuvillette Rotation Sheet for many more example rotations and team alternatives.
Sample Rotation (Citlali):
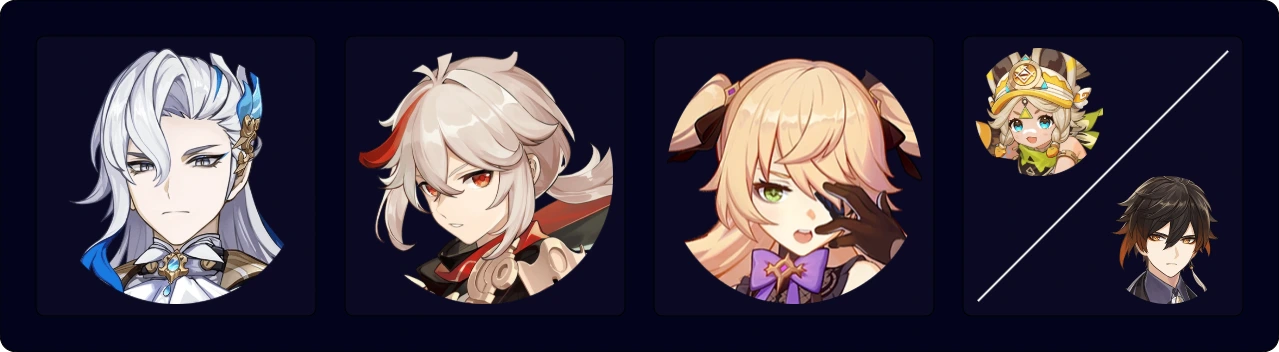
Neuvillette E > Furina ED > Citlali E N1 > Escoffier EQ > Furina Q > Neuvillette C Q E C > Citlali N2 > Neuvillette 2[C]
Sample Rotation (Shenhe):
Neuvillette E > Furina ED > Shenhe hEQ1 > Escoffier EQ > Furina Q > Neuvillette C E C Q > Shenhe tE N2 > Neuvillette 2[C]
1 Shenhe can do Q hE to funnel her particles to Escoffier.
Sample Rotation:
Neuvillette E > Furina ED > Escoffier Q / N2 Q N2¹ > Skirk hEQ > Escoffier E N2 > Furina Q > Neuvillette C E C Q > Skirk hEQ > Neuvillette 2[C]
¹Second rotation onward to fill time for Skirk’s Burst cooldown.
Sample Rotation (Kazuha):
Neuvillette E > Furina N1 ED N1 > Kazuha tEPQ > Citlali EQ > Furina Q > Neuvillette C E C Q > Kazuha tEP > Neuvillette 2[C]
Sample Rotation (Lynette):
Neuvillette E > Furina N1 ED N1 > Lynette Q E / Q N11 > Citlali EQ > Furina Q > Neuvillette C E C Q > Lynette E N1 > Neuvillette 2[C]
1Use Lynette’s Skill if she is C4+, otherwise N1.
Sample Rotation (Charlotte):
Neuvillette E > Furina ED > Kazuha tEPQ > Furina Q > Charlotte EQ N11 > Neuvillette C E C Q > Kazuha tEP > Neuvillette 2[C]
1Catch particles.
Sample Rotation (Mika):
Neuvillette E > Furina ED > Kazuha tEPQ > Furina Q > Mika tEQ N1 > Neuvillette C E C Q > Kazuha tEP > Neuvillette 2[C]
Sample Rotation (Rosaria):
Neuvillette E > Furina ED > Kazuha tEPQ > Rosaria EQ > Furina Q > Neuvillette C E C Q > Kazuha tEP > Neuvillette 2[C]
Credits
Writer: caramielle.
Contributors: kolvii, Leifa, miannes, cuppacote, polomo, nikatosaurus, cozen., chasing_haze, irokei, haafr, pjeljr, caxia5, clevernt, luke_260
Team images courtesy of the KQM portrait generator.