Updated for Version “Luna I”
Lauma is a 5★ Dendro Catalyst character in Genshin Impact who supports Bloom-related teams through multiple buffs and deals decent Talent damage. Learn about Lauma’s best builds, best weapons, best artifacts, and best teams in this quick guide.
Note that the information given may change if new discoveries are made. More extensive testing is in progress.
Join our Discord to check on and participate in the theorycrafting process.
Table of Contents
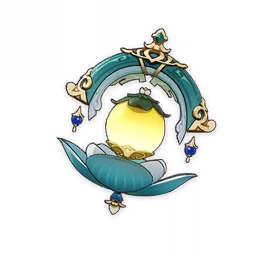
Infographic
Credits to: euphorysm, plumetra, and KQM Staff
Character Overview
Pros
- Powerful support for all pre-existing Bloom teams, adding Hydro and Dendro RES Shred as well as other Bloom-specific buffs.
- Easy to gear, with multiple strong 4-star weapon options, most of which are free.
- Can provide off-field Dendro application from her Skill, and on-field Dendro application from her Catalyst Normal Attacks.
Cons
- Current teams focused around her personal damage aren’t as impressive as her alternatives.
- Relatively weak early vertical investment, with C1 and signature weapon that don’t excessively impact team damage.
Playstyles
Off-Field Bloom Support
Lauma strengthens all party members’ Bloom reactions through her Ascension 1 Passive and Elemental Burst, deals solid damage from her Skill, and shreds Hydro and Dendro RES through her off-field Skill hits. Lastly, Lauma’s teams trigger Lunar-Bloom instead of the ordinary Bloom. Read below for more information.
Lunar-Bloom and Verdant Dew
TL;DR: Lunar-Bloom generates Dendro Cores that behave identically to Dendro Cores generated by regular Bloom. The reaction doesn’t deal damage on its own, but instead serves to accumulate Verdant Dew for Lauma’s own damage. Lauma consumes Verdant Dew to deal Lunar-Bloom damage that has its own unique scaling.
Lunar-Bloom is a unique reaction that replaces Bloom when Lauma is on the team. When Hydro and Dendro react, Lunar-Bloom occurs, which generates one Dendro Core. Triggering Lunar-Bloom also gives the party 1 stack of Verdant Dew with a cooldown of 2.5s. The party can store up to 3 stacks of Verdant Dew. Verdant Dew is consumed by Lauma’s Hold Skill to deal Lunar-Bloom damage.
The resulting Dendro Cores from Lunar-Bloom still deal regular Bloom damage once they rupture, which can be buffed by Bloom DMG Bonus. As these Cores do not deal “Lunar-Bloom damage”, Lunar-Bloom DMG Bonus will not affect their damage. Furthermore, the resulting Dendro Core can still be affected by Electro / Pyro to trigger Hyperbloom / Burgeon, or be converted into Bountiful Bloom Cores if Nilou is on the team.
At present, the only sources of Lunar-Bloom damage are Lauma’s Elemental Skill and C6, which are explained in her Talents section below. Lunar-Bloom damage uses Lauma’s own Elemental Mastery and can CRIT using Lauma’s own CRIT stats. Additionally, it takes into account Lunar-Bloom DMG% buffs, which can be obtained from weapons and some artifact sets. Lauma’s Lunar-Bloom damage ignores DEF and can’t hurt party members. Lastly, Lauma’s Moonsign Benediction Passive increases Lunar-Bloom’s Base DMG.
Moonsign
Characters hailing from Nod-Krai increase the party’s Moonsign Level by 1 level each, to a maximum of 2.
At Moonsign Level 1, the “Nascent Gleam” effects take place, while at Level 2, the “Ascendant Gleam” effects take place instead.
Moonsign Levels will give additional effects to certain artifacts, weapons, and characters’ Talents from Nod-Krai. This makes it a crucial point of Lauma’s teambuilding, as her A1 Passive provides buffs that suit different teams depending on her party’s Moonsign Level; check the Talents section for further details.
Additionally, when the party’s Moonsign is Ascendant Gleam, non-Nod-Krai characters increase Lunar Reaction DMG by up to 36% for all party members based on their own stats. This helps Lauma’s Lunar-Bloom damage by a bit.
Talents
Level and Talent Priority
Skill = Burst > Lv. 90
Lauma should be eventually leveled to 90 in order to maximize her regular Bloom and Spread damage in the relevant teams for these archetypes, but otherwise it’s not a high priority.
Talent Overview
 Normal Attack | Peregrination of Linnunrata
Talent Description
Normal Attack
Performs up to 3 attacks that deal Dendro DMG
Charged Attack
Lauma undergoes Spirit Envoy Metamorphosis, transforming into an envoy of the tranquil forest and consuming Stamina to charge forward for up to 10s. While in this state, Lauma’s interruption resistance is increased, and she can consume additional Stamina to perform up to two consecutive jumps.
When exiting the Spirit Envoy state, Spirit Envoy Metamorphosis will enter cooldown, during which time, Lauma’s Charged Attack will be transformed into Spiritcall Prayer: Consumes a certain amount of Stamina to deal AoE Dendro DMG to opponents in front of her after a short casting time.
Plunging Attack
Calling upon the might of Dendro, Lauma plunges towards the ground from mid-air, damaging all opponents in her path and dealing AoE Dendro DMG upon impact with the ground.
Lauma performs up to three Dendro Normal Attacks. While their scaling is unimpressive and exclusively ATK-scaling, since they have solid range they may be used when additional Dendro application is required.
Upon starting a Charged Attack, Lauma will undergo Spirit Envoy Metamorphosis, which greatly increases her mobility and enables a double jump. This is mainly used for exploration. Once she exits her Spirit Envoy Metamorphosis, it will go on cooldown and be replaced with a regular Catalyst Charged Attack. This means that Lauma’s Charged Attack is a double-edged sword as it takes a lot of Stamina and time for her to swap to her regular Charged Attack, and therefore it should be avoided in most combat scenarios.
 Elemental Skill | Runo: Dawnless Rest of Karsikko
Talent Description
Silently incants an ancient hymn, summoning a Frostgrove Sanctuary with different effects depending on whether you Tap or Hold.
Tap
Intone a Hymn of Hunting, dealing AoE Dendro DMG.
Hold
Can be unleashed when you have at least 1 Verdant Dew. Lauma consumes all Verdant Dew and intones a Hymn of Eternal Rest, dealing one regular instance of AoE Dendro DMG and another instance of AoE Dendro DMG that is considered Lunar-Bloom DMG. Each Verdant Dew consumed will give Lauma one stack of Moon Song. Each time you Hold to cast an Elemental Skill, a maximum of 3 Verdant Dew can be consumed in this way.
Additionally, when Lauma’s Elemental Skill or attacks from Frostgrove Sanctuary hit an opponent, that opponent’s Dendro RES and Hydro RES will be decreased for 10s.
Lauma has two versions of her Skill, a Tap and a Hold variant. Both will summon a Frostgrove Sanctuary, which will attack nearby enemies in a fairly big area centered around the active character every 2s, dealing AoE Dendro damage and shredding their Hydro and Dendro RES for 10s. Her Frostgrove Sanctuary applies Dendro once every hit, making it an important source of off-field Dendro application.
Lauma should use the Hold variant of her Skill. Her Tap Skill deals one instance of Dendro damage before creating the Dendro field, while her Hold Skill deals a stronger instance of Dendro damage followed by an instance of Lunar-Bloom damage that represents a large portion of Lauma’s personal damage. Lunar-Bloom damage can crit and uses Lauma’s own EM and CRIT stats. In order to use her Hold Skill, Lauma needs to have Verdant Dew. Verdant Dew is generated by triggering Lunar-Bloom once every 2.5s. All Verdant Dew will be consumed once Lauma uses her Hold Skill. Lastly, every stack of Verdant Dew consumed will give Lauma an equal amount of Moon Song stacks, which are used by her Elemental Burst.
 Elemental Burst | Runo: All Hearts Become the Beating Moon
Talent Description
Let the wishes of all beings become as moonlight that bathes the earth. Lauma incants a sacred song of the far north, gaining 18 stacks of Pale Hymn.
Additionally, if Lauma uses her Elemental Burst while she has Moon Song, or she gains Moon Song within 15s of using her Elemental Burst, she will consume all Moon Song stacks and gain 6 stacks of Pale Hymn for every Moon Song stack consumed. This effect can only be triggered once for each Elemental Burst used, including the 15 seconds following its use.
Pale Hymn
When nearby party members deal Bloom, Hyperbloom, Burgeon, or Lunar-Bloom DMG, 1 stack of Pale Hymn will be consumed and the DMG dealt will be increased based on Lauma’s Elemental Mastery. If this DMG hits multiple opponents at once, then multiple stacks of Pale Hymn will be consumed, depending on how many opponents are hit.
The duration for each stack of Pale Hymn is counted independently.
Lauma’s Elemental Burst gives the team a certain amount of Pale Hymn stacks, which increase the damage dealt by all Bloom reactions and Lunar-Bloom.
The initial amount of Pale Hymn stacks is 18, and every stack of Moon Song generated through her Hold Skill will grant 6 additional stacks of Pale Hymn once per Elemental Burst use, resulting in up to 18 additional instances of buffing.
 Ascension 1 Passive | Light for the Frosty Night
Talent Description
For the next 20s after Lauma uses her Elemental Skill Runo: Dawnless Rest of Karsikko, corresponding differing buff effects will be granted depending on the party’s Moonsign. The buffs provided by different Moonsign levels cannot stack.
Moonsign: Nascent Gleam
Bloom, Hyperbloom, and Burgeon DMG dealt by all nearby party members can score CRIT Hits, with CRIT Rate fixed at 15%, and CRIT DMG fixed at 100%. CRIT Rate from this effect stacks with CRIT Rate from similar effects that allow these Elemental Reactions to CRIT.
Moonsign: Ascendant Gleam
All nearby party members’ Lunar-Bloom DMG CRIT Rate +10%, CRIT DMG +20%.
Lauma gives different buffs to Bloom reactions / damage depending on the party’s Moonsign Level. Note that these buffs cannot stack with each other; you can only have one at a time.
When the party’s Moonsign is Nascent Gleam, so if Lauma is the sole Nod-Krai character, she will give 15% CRIT Rate and 100% CRIT DMG to Bloom, Hyperbloom, and Burgeon. This is overall a 15% increase to Bloom damage, which is a pretty good buff to have. The CRIT Rate buff stacks additively with similar buffs, like Nahida’s C2, but the CRIT DMG does not and will remain at 100%. Note that this buff does not affect Lauma’s Hold Skill Lunar-Bloom damage.
When the party’s Moonsign is Ascendant Gleam, so if two or more Nod-Krai characters are in the party, Lunar-Bloom’s CRIT Rate will be increased by 10% and its CRIT DMG by 20%. As of now, the only forms of Lunar-Bloom damage come from Lauma’s Hold Skill and C6. This makes teams with Ascendant Gleam ideal when the goal is to maximize Lauma’s own Lunar-Bloom damage, which scales notably well with her C2 and C6.
To summarize, Nascent Gleam teams will aim to maximize the damage of the traditional Bloom reactions (Hyperbloom, Burgeon, and Bloom), while Ascendant Gleam teams will shift toward maximizing the party’s Lunar-Bloom damage.
 Ascension 4 Passive | Cleansing for the Spring
Talent Description
Each point of Elemental Mastery Lauma has will give her the following bonuses:
- DMG dealt by her Elemental Skill is increased by 0.04%. The maximum increase obtainable this way is 32%.
- The cooldown of her Charged Attack Spirit Envoy Metamorphosis is reduced by 0.02%. The maximum reduction obtainable this way is 20%.
Lauma’s Elemental Skill will deal 0.04% more DMG for each point of EM she has, maxing out at 32%, and her Charged Attack’s Stamina consumption will be decreased by 0.02% for each point of EM, maxing out at 20%. The total amount of EM needed to maximize these buffs is 800. Since Lauma has an innate 200 Base EM, an EM ascension, and usually a fair bit more EM from her build, reaching this limit is quite trivial.
 Moonsign Benediction Passive | Nature’s Chorus
Talent Description
When a Bloom reaction is triggered by a party member, it will be converted into the Lunar-Bloom reaction, with every point of Elemental Mastery that Lauma has increasing Lunar-Bloom’s Base DMG by 0.0175%, up to a maximum of 14%.
Additionally, when Lauma is in the party, the party’s Moonsign will increase by 1 level.
Lauma replaces Bloom with Lunar-Bloom, and increases the Base DMG of Lunar-Bloom dealt by her team based on her EM. The maximum amount of Lunar-Bloom Base DMG Lauma can offer this way is 14%, which requires her EM to reach 800.
At the moment, this exclusively buffs Lauma as she’s the only character who can deal Lunar-Bloom damage. This buff does not apply to the standard Bloom damage dealt by Dendro Cores once they rupture, or when they’re converted into Hyperbloom / Burgeon / Bountiful Cores.
Constellations
 Constellation 1 | “O Lips, Weave Me Songs and Psalms”
Constellation Description
After Lauma uses her Elemental Skill Runo: Dawnless Rest of Karsikko or her Elemental Burst Runo: All Hearts Become the Beating Moon, she will gain Threads of Life for 20s.
During this time, when nearby party members trigger Lunar-Bloom reactions, nearby active characters will recover HP equal to 500% of Lauma’s Elemental Mastery. This effect can be triggered once every 1.9s.
Additionally, the Stamina cost for Lauma’s Spirit Envoy Form will be reduced by 40%, and its Max Duration will be extended by 5s.
This Constellation provides healing to nearby party members after Lunar-Bloom is triggered.
Overall, this Constellation can give more flexibility to her teams, as it may be possible to offset incoming damage from Bloom reactions and enemy attacks, and therefore run a more offensive teammate in some teams, but it doesn’t offer a direct increase to the party’s damage, making it just a fine comfort and quality-of-life Constellation, especially when there are many sustain teammates with good utility or damage output to use alongside Lauma.
Additionally, her exploration Charged Attack is improved, reducing its Stamina consumption and increasing its maximum duration.
 Constellation 2 | “Twine Warnings and Tales From the North”
Constellation Description
The Elemental Burst Runo: All Hearts Become the Beating Moon is enhanced:
- Pale Hymn effects are increased: All nearby party members’ Bloom, Hyperbloom, and Burgeon DMG is further increased by 500% of Lauma’s Elemental Mastery, and their Lunar-Bloom DMG is further increased by 400% of Lauma’s Elemental Mastery.
Moonsign: Ascendant Gleam: All nearby party members’ Lunar-Bloom DMG is increased by 40%.
Lauma’s Elemental Burst will further increase her buffing to Bloom-related reactions and Lunar-Bloom DMG based on her EM.
Additionally, Lunar-Bloom’s Base DMG being increased when the party is on Ascendant Gleam means this Constellation shines when buffing Lauma’s personal damage.
This Constellation is a good teamwide damage increase, and it is especially strong at supporting teams focused around Lauma’s Lunar-Bloom damage.
 Constellation 3 | “Seek Not to Tread the Sly Fox’s Path”
Constellation Description
Increases the Level of Runo: All Hearts Become the Beating Moon by 3.
Maximum upgrade level is 15.
A direct increase to Lauma’s buffing to Bloom and Lunar-Bloom DMG, making it overall a good Constellation for buffing, albeit the increase to Burst levels is less impactful with the fixed buff from her C2.
 Constellation 4 | “Nor Yearn for the Great Bear’s Might”
Constellation Description
When attacks from the Frostgrove Sanctuary summoned by her Elemental Skill Runo: Dawnless Rest of Karsikko hit opponents, Lauma will regain 4 Elemental Energy. This effect can be triggered once every 5s.
Lauma’s Frostgrove Sanctuary will generate 4 Energy every 5s, greatly reducing her ER requirements.
Constellation 5 | “If Truth May Be Subject to Witness”
Constellation Description
Increases the Level of Runo: Dawnless Rest of Karsikko by 3.
Maximum upgrade level is 15.
Increasing Lauma’s Elemental Skill Talent level improves her personal damage and her Hydro and Dendro RES Shred, making it overall a fine Constellation to have.
 Constellation 6 | “I Offer Blood and Tears to the Moonlight”
Constellation Description
When the Frostgrove Sanctuary attacks opponents, it will deal 1 additional instance of AoE Dendro DMG equal to 185% of Lauma’s Elemental Mastery. This DMG is considered Lunar-Bloom DMG. This instance of DMG will not consume any Pale Hymn stacks and will provide Lauma with 2 stacks of Pale Hymn, as well as refreshing the duration of Pale Hymn stacks gained in this manner.
This effect can occur up to 8 times during each Frostgrove Sanctuary. When using the Elemental Skill Runo: Dawnless Rest of Karsikko, all Pale Hymn stacks gained in this manner will be removed.
Additionally, when Lauma uses a Normal Attack while she has Pale Hymn stacks, she will consume 1 stack to convert this to deal Dendro DMG equal to 150% of her Elemental Mastery. This DMG is considered Lunar-Bloom DMG.
Moonsign: Ascendant Gleam: All nearby party members’ Lunar-Bloom DMG is elevated by 25%.
Lauma’s C6 makes her off-field Elemental Skill attack deal an additional instance of Lunar-Bloom damage up to 8 times. These instances of Lunar-Bloom damage do not consume Pale Hymn stacks, but instead generate 2 Pale Hymn stacks when they hit. Also, her Normal Attacks can now consume Pale Hymn to deal Lunar-Bloom damage. Lastly, if the party’s Moonsign Level is Ascendant Gleam, all party members’ Lunar-Bloom DMG is elevated by 25%. Note that this is a new multiplier separated from the normal Lunar-Bloom DMG Bonus: Lauma essentially has 25% higher output on her Lunar-Bloom damage with this buff.
Combos
Combo Notation
- tE = Tap Skill
- hE = Hold Skill
- Q = Elemental Burst
- > = switch character
- ( ) = these actions are optional; please refer to the notes below
| hE Q | Lauma’s default combo, summoning her Frostgrove Sanctuary, consuming Verdant Dew stacks to deal Lunar-Bloom damage through her Elemental Skill, and deploying her Elemental Burst to buff party members’ Bloom-related damage. |
| (tE/hE) > Team > Q hE | Lauma may use this combo when her Dendro application and RES Shred need to be deployed at the start of the first rotation. Lauma’s Elemental Burst can be deployed before her Hold Skill and it will still consume the Moon Song generated by the Hold Skill to give additional Pale Hymn stacks. |
Artifacts
ER Requirements
| C0 | C4 | |
| Double Dendro (one Skill per rotation) | 175–190% | 130–140% |
| Double Dendro (two Skills per rotation) | 130–160% | 100–115% |
| Solo Dendro | 155–210% | 115–155% |
These calcs assume either one Favonius weapon on a teammate (if there is a suitable teammate) or no Favonius weapons on the team (if there isn’t).
Note that due to some of Lauma’s teams having flexible rotations, her ER requirements can be a bit higher should she aim to use her Elemental Burst as soon as it comes off cooldown.
Use the Energy Recharge Calculator to determine exact requirements for your team and rotation. For more details on how Favonius weapons will affect your team, please use Ac1d’s Favonius Mastersheet.
Artifact Stats
 Sands |  Goblet |  Circlet |
| EM / ER | EM | EM > CRIT |
Stat Priority: ER (until requirement) > EM > CRIT
EM is still the most important stat once her ER requirements are met, as it increases her damage and buffs to Bloom-related damage. CRIT increases her Skill and Lunar-Bloom damage. As a pure Bloom support, Lauma can just build full EM, but she should build EM and CRIT in teams focused around her personal damage.
Artifact Sets
 4pc Silken Moon’s Serenade | Overall a good supportive set for Lauma and her most common artifact set, as it increases all party members’ EM and Lunar Reaction DMG. This set particularly shines when the party’s Moonsign Level is 2, as it provides all party members with 120 EM as opposed to 60 EM. Its 2pc effect of +20% ER is also great for Lauma. |
 4pc Deepwood Memories | Since the vast majority of Lauma’s teams will feature Dendro damage, Lauma or another teammate should hold this set for additional Dendro RES Shred. Lauma may use it when it isn’t suitable on any other teammate, but note that its 2pc effect does not increase most of her personal damage, which is Lunar-Bloom. |
 4pc Gilded Dreams (GD) | Overall a solid 4pc set for Lauma’s personal damage and buffing through its high amount of EM, letting her easily meet the EM stat goals of her Utility Passive and increase the buffing from her Elemental Burst. Usually, Lauma’s teams feature at most one additional Dendro character, so she gains either 100 or 150 from its 4pc effect. |
 2pc Mixed Sets | 2pc Set Bonuses: EM, ER Lauma appreciates EM to increase her personal damage and buffs, letting her meet the stat goals of her Utility Passive and improving her Elemental Burst buffs. ER is important to fulfill her ER requirements. 2pc mixed sets aren’t far behind 4pc GD, especially in Double Dendro teams, where 4pc GD only gives 180 EM compared to the 160 EM from 2pc EM + 2pc EM. |
 4pc Night of the Sky’s Unveiling | A good set for Lauma in teams with Moonsign Level 2, where she deals a large part of the team’s DPS. These teams aren’t extremely common at present, so this set is only a strong option in its niche. |
Weapons
 5★ Nightweaver’s Looking Glass | Lauma’s signature weapon and best-in-slot. She can easily maintain uptime on its passives, greatly increasing her EM and the team’s Bloom, Hyperbloom, Burgeon, and Lunar-Bloom damage. |
 4★ Etherlight Spindlelute | An event weapon from Version 6.0 that provides a decent amount of ER and EM, making it an all-round great pick for Lauma. This weapon isn’t much worse than her signature. |
 5★ A Thousand Floating Dreams, Starcaller’s Watch, Sunny Morning Sleep-In | Powerful EM stat sticks as long as Lauma can reach her ER requirements. A Thousand Floating Dreams’ EM buff is small but nice. |
 4★ Blackmarrow Lantern | This weapon offers a high amount of EM as its secondary stat. It shines in teams where Lauma has high ownership of Bloom reactions, or in teams focused around Lauma’s Lunar-Bloom damage. For players who were not able to obtain Etherlight Spindlelute, this is a viable free-to-play alternative. |
 4★ Fruit of Fulfillment | Fruit of Fulfillment is a craftable weapon from Sumeru. It offers the same secondary stat as Etherlight Spindlelute, but it offers less EM and requires Lauma to trigger Bloom, which may prove difficult in teams with high Dendro application. |
 4★ Favonius Codex | Favonius Codex can be used to reduce teammates’ ER requirements should this be needed. This makes it a viable weapon when Lauma’s Bloom-related damage buffs and her personal damage share are not as important as helping her Energy-hungry teammates, although these situations are rare. |
 4★ Prototype Amber | Prototype Amber does not offer any buffs to Lauma’s personal damage, but it reduces her ER requirements and lets her act as a pseudo-healer for the party. |
 4★ The Widsith | Its secondary stat of CRIT DMG and the chance of getting an EM buff make this a viable option for Lauma on average. Its DMG% and ATK% buffs aren’t as useful on Lauma, but they can be decent in Quickbloom teams. Still, this isn’t a good weapon for Lauma in general. |
 4★ Sacrificial Jade | A solid Battle Pass weapon for Lauma, mainly for Quickbloom teams as the additional CRIT Rate and EM increase Lauma’s Spread damage as well as her Lunar-Bloom damage. |
Teams
Combo Notation
- N = Normal Attack
- C = Charged Attack
- A = Aimed Shot
- P = Plunging Attack
- E = Elemental Skill
- tE = Tap Skill
- hE = Hold Skill
- Q = Elemental Burst
- D = dash (cancel)
- J = jump (cancel)
- W = walk (cancel)
- > = switch character
- ( ) = these actions are optional; please refer to the notes below
- [ ] = repeat these actions the specified number of times
Teambuilding
- Lauma is a great buffer for all Bloom-related reactions, which therefore become her main archetypes.
- Her main role is to act as an off-field buffer and damage dealer through her Skill and Burst, taking the field once or twice per rotation to consume Verdant Dew in order to deal Lunar-Bloom damage. However, she can also stay on-field longer to provide additional Dendro application through her Normal Attacks.
- An additional Nod-Krai character will change her A1 Passive to no longer buff the traditional Bloom / Hyperbloom / Burgeon reactions, and it will instead provide additional CRIT and further buffs to her Lunar-Bloom damage.
- Since her Lunar-Bloom damage doesn’t scale with ATK or traditional Dendro DMG% buffs, and her Frostgrove Sanctuary represents a smaller part of her total damage, such buffs aren’t important for Lauma.
Bloom

Bloom is one of Lauma’s main teams. Consistent Hydro and Dendro application is crucial to constantly deal Bloom damage. A second Dendro character enables Dendro Resonance to provide additional EM to all party members, and additional Dendro application is important for Dendro Core generation. Some form of sustain should be allocated in order to offset Bloom’s self-damage. Alternatively, Lauma’s C1 can take care of this issue.
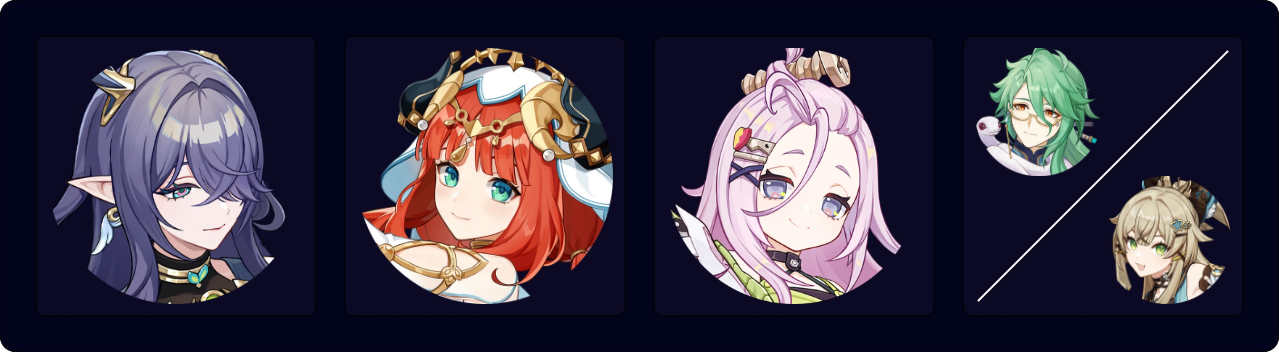
Notable Teammates
Hydro
Nilou | Nilou enhances regular Dendro Cores by turning them into Bountiful Cores, greatly increasing their damage and reducing their time to detonate. Note that her buffs to Bloom damage do not apply to Lauma’s Lunar-Bloom damage. |
 Xingqiu | Xingqiu has very notable single-target off-field Hydro application, and reduces incoming damage from attacks (note that this excludes Bloom damage), making him a well-rounded pick for single-target Hydro application. |
  Yelan / Furina | Yelan and Furina have respectable off-field Hydro application and a Universal DMG% buff, with Yelan’s being exclusive for the active character, while Furina’s is teamwide but requires some form of healing to stack up, and her HP drain can make the team more prone to dying without a good sustain. These Universal DMG% buffs don’t increase Transformative Reaction damage like Bloom, nor do they increase Lauma’s Lunar-Bloom damage. Nonetheless, they can be used in teams where a second on-field Hydro / Dendro unit has respectable Talent damage. |
 Kokomi / Barbara | Hydro healers with decent off-field Hydro application who can take the field to provide additional application and healing. |
Aino | Aino has off-field Hydro application and damage. More importantly, as a Nod-Krai character she increases the party’s Moonsign Level by 1, so Lauma’s Lunar-Bloom damage will gain additional CRIT stats from her A1 Passive and the team can fully benefit from 4pc Silken Moon’s Serenade, but the normal Bloom reactions will lose their ability to crit. This means that teams with Aino will have a heavier focus on Lauma’s Lunar-Bloom damage as opposed to party members’ Bloom damage. This is usually not worth it unless Lauma is highly invested. |
  Hydro On-Field Damage Dealers | Characters like Neuvillette or Ayato act as on-field Bloom triggers with good AoE. Neuvillette tends to have better personal damage from his Talents and better AoE, while Ayato can offer additional off-field Hydro application through his Elemental Burst. |
Dendro
Nahida | Nahida provides good off-field Dendro application and an EM buff to the active character through her Elemental Burst. Nahida’s C2 also allows Bloom reactions to crit; however, only the CRIT Rate buff stacks with Lauma’s A1 Passive. Additionally, she increases Lauma’s Lunar-Bloom CRIT Rate and CRIT DMG. |
  Baizhu / Yaoyao / Kirara | Dendro characters who provide defensive utility and application. Baizhu also provides a respectable buff to Bloom damage and Lauma’s Lunar-Bloom damage through his Elemental Burst. |
 Kaveh | Kaveh acts as an on-field driver for Bloom teams with small buffs to Bloom damage. His self-healing when taking Bloom damage lets him play without a dedicated healer. |
  Collei / Dendro Traveler | Off-field Dendro appliers who are permanently available for all players. |
Example Teams
This is not a comprehensive list of teams. The inclusion or exclusion of any given team does not necessarily reflect its power level.

A standard Nilou Bloom team where Kokomi acts as the primary healer. Kokomi should build a balanced amount of EM, ER, HP%, and Healing Bonus to both keep the party alive and deal Bloom damage, as she’ll have high Bloom ownership.
Nilou teams tend to have flexible and dynamic rotations that aim to swiftly reapply Hydro and Dendro to new waves of enemies. Fixed rotations like the ones listed below can perform worse in practice but are easier to remember and execute.
Sample Rotation (Nahida)
Nahida E Q > Kokomi N1 E > Nilou E N2 E¹ > Lauma hE Q > Kokomi Q combo
¹Using Nilou E N2 E is slightly faster than 4[E], but it can accidentally result in doing E N3, which is not desired.
Sample Rotation (Dendro Traveler)
Dendro Traveler EQ > Kokomi N1 E > Nilou E N2 E¹ > Lauma hE Q > Dendro Traveler E N2 > Kokomi Q combo
¹Using Nilou E N2 E is slightly faster than 4[E], but it can accidentally result in doing E N3, which is not desired.

A Nilou Bloom team featuring Kaveh as a self-sustaining on-field driver. Xingqiu provides high off-field Hydro application and additional defensive utility to Kaveh. Lauma’s Skill persists when new waves of enemies spawn, which makes Kaveh’s fixed field time and inability to swap out without losing his Elemental Burst’s conversion a much smaller downside. Due to Kaveh’s relatively low Bloom ownership, he will normally equip Favonius Greatsword, if available, to greatly reduce all party members’ ER requirements.
Sample Rotation
(Lauma N1)¹ > Nilou E N2 E² > Lauma Q N1 hE > Xingqiu EDQ N1 > Kaveh EQ N3D N4 E N4D N4 E > (Nilou Q)
¹First rotation only
²Using Nilou E N2 E is slightly faster than 4[E], but it can accidentally result in doing E N3, which is not desired.

A flexible Bloom team where Lauma can stay on-field to provide additional Dendro application from her Normal Attacks. A Dendro sustain is strongly recommended to keep the team healthy. The off-field Hydro character will have a large ownership of the team’s Bloom damage.
Sample Rotation (Baizhu)
Lauma hE¹ > Nilou E N2 E² > Baizhu EQ > Xingqiu EDQ N1 > Lauma N1 Q N1 hE 2[N3] > Baizhu E > Lauma 3[N3]
¹Use Lauma tE on the first rotation.
²Using Nilou E N2 E is slightly faster than 4[E], but it can accidentally result in doing E N3, which is not desired.
Sample Rotation (Yaoyao)
Lauma hE¹ > Nilou E N2 E² > Yaoyao E > Xingqiu EDQ N1 > Lauma Q 2[N3] hE 2[N3] > Yaoyao Q 6[N1J]³ E > Lauma N3
¹Use Lauma tE on the first rotation.
²Using Nilou E N2 E is slightly faster than 4[E], but it can accidentally result in doing E N3, which is not desired.
³Dash and jump cancels are interchangeable.
A Bloom team with a much heavier emphasis on Lauma’s Lunar-Bloom damage. She should equip Night of the Sky’s Unveiling to gain CRIT Rate and increased Lunar-Bloom damage, while Aino should equip 4pc Silken Moon’s Serenade to buff all party members’ EM and Lunar reactions. The Dendro fourth slot provides additional Dendro application and defensive utility by equipping 4pc Deepwood Memories.
Sample Rotation (Baizhu)
Lauma hE¹ > Nilou E N2 E² > Baizhu EQ > Aino EQ > Lauma Q N1 hE 2[N3] > Baizhu E Aino E > Lauma 2[N3] N1
¹Use Lauma tE on the first rotation.
²Using Nilou E N2 E is slightly faster than 4[E], but it can accidentally result in doing E N3, which is not desired.
Sample Rotation (Kirara)
Lauma hE¹ > Nilou (Q) E N2 E² > Aino EQ > Kirara Q shE > Lauma Q N3 hE 2[N3] > Aino E > Kirara shE > Lauma 2[N3]
¹Use Lauma tE on the first rotation.
²Using Nilou E N2 E is slightly faster than 4[E], but it can accidentally result in doing E N3, which is not desired.
Hyperbloom / Quickbloom / Burgeon

Hyperbloom teams excel at single-target content. Lauma’s Hydro and Dendro RES Shred can further support Hydro and Dendro damage dealers.
Burgeon teams have fewer teammate options but remain a strong archetype thanks to their good multi-target performance. Lauma’s AoE Dendro application synergizes greatly with this archetype.
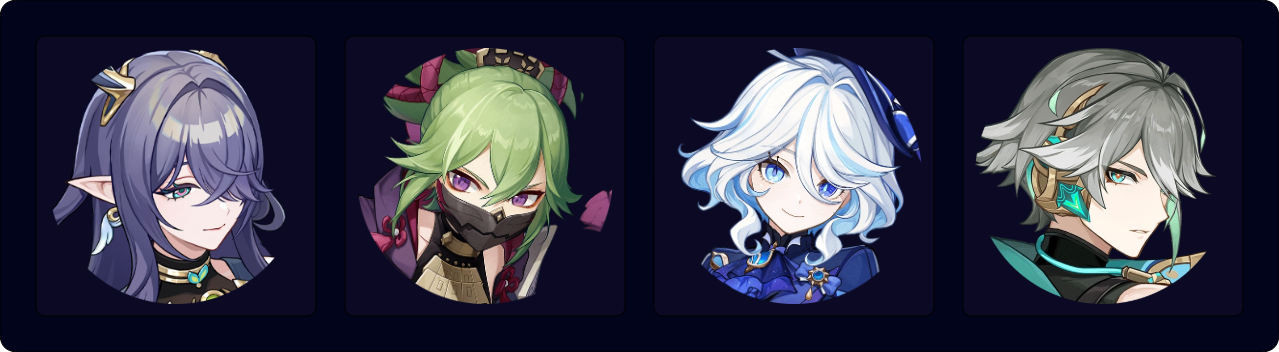
Notable Teammates
Electro
Electro teammates are indispensable for Hyperbloom teams. They can act as either Hyperbloom triggers, Talent damage dealers, or both.
 Raiden / Shinobu | The classic Hyperbloom triggers, Raiden and Shinobu, take full advantage of Lauma’s multiple buffs to Hyperbloom. They should maximize their EM stat. |
 Ineffa | Ineffa can act as a great Hyperbloom trigger and Lunar-Charged damage dealer while being mainly off-field. Her being on the team will increase the party’s Moonsign Level by 1, enabling the party to take full advantage of Silken Moon’s Serenade and Night of the Sky’s Unveiling; however, she will change the CRIT buffs from Lauma’s A1 Passive, so Hyperbloom damage will not be able to crit and Lauma’s Lunar-Bloom damage will be increased instead. |
 Fischl | Fischl is a strong off-field Electro damage dealer who can generate a high amount of Energy while taking little field time. Teams with Fischl will usually follow 25s rotations, alternating using her Skill and Burst to summon her companion Oz. |


Hydro
Hydro characters are also required for the archetypes of Hyperbloom, Quickbloom, and Burgeon. Their Hydro application is crucial for the team’s performance, while their personal damage is improved through Lauma’s Hydro RES Shred, which is a buff that is rare to obtain in these teams.
Neuvillette | Neuvillette is a versatile on-field Hydro damage dealer with flexible field time and solid damage. He can use Lauma’s Hydro RES Shred to deal increased damage while driving the off-field Electro Hyperbloom trigger. |
 Xingqiu / Yelan | Xingqiu and Yelan are the premier off-field Hydro appliers and damage dealers. Lauma’s Hydro RES Shred makes them naturally pair well together in Hyperbloom teams. |
 Aino | Aino has slightly less off-field Hydro application compared to Yelan and Xingqiu. As a Nod-Krai character, she increases the party’s Moonsign Level by 1. This means that teams with her will have a heavier focus on Lauma’s Lunar-Bloom damage as opposed to party members’ Hyperbloom damage, as Hyperbloom will no longer be able to crit. Additionally, she enables the full effect of 4pc Night of the Sky’s Unveiling for on-field damage dealers. |
 Furina | Furina provides a partywide Universal DMG% buff, which can be very powerful in teams that put heavy emphasis on other teammates’ Talent damage, in spite of this buff not applying to Lauma’s Lunar-Bloom damage or other Transformative Reactions. Her slower rate of Hydro application will result in more Quicken uptime, resulting in teams with her as a solo Hydro being labeled “Quickbloom” teams. |


Dendro


Pyro
Pyro characters act as Burgeon triggers; they should maximize their EM stat while fulfilling any ER requirements they have.

Example Teams
This is not a comprehensive list of teams. The inclusion or exclusion of any given team does not necessarily reflect its power level.

A Hyperbloom team for Neuvillette, featuring Furina to provide additional Hydro application and buff Neuvillette’s damage. Ineffa provides her shield and, thanks to the team’s high Hydro application, has great personal damage through Lunar-Charged and Hyperbloom. Meanwhile, Shinobu helps stack Fanfare faster, albeit resulting in a slightly weaker team and forcing Neuvillette to be in range of Dendro Cores due to her range. Neuvillette, Furina, and the Hyperbloom trigger all appreciate Lauma’s RES Shred.
Sample Rotation (Ineffa)
(Lauma N1)¹ > Neuvillette E > Furina ED > Ineffa E > Lauma N1 Q hE > Furina Q > Neuvillette C Q E C > Ineffa Q > Lauma hE > Neuvillette 2[C]
¹First rotation only.
Sample Rotation (Shinobu)
(Lauma N1)¹ > Neuvillette E N1 > Furina ED N1 > Shinobu E > Lauma N1 Q hE > Furina Q > Neuvillette C Q E C > Shinobu E (Q) > Lauma N1 hE > Neuvillette 2[C]
¹First rotation only.

A powerful Hyperbloom team with emphasis on the off-field Hydro damage dealers and Hyperbloom trigger. Lauma may equip Prototype Amber when paired with Raiden should healing be desired.
The team’s rotation is highly flexible and each teammate should use their abilities off-cooldown (or when their durations run out) to maintain high uptime. These rotations provided below are just examples to show how the team can rotate.
Sample Rotation (Raiden)
Lauma hE¹ > Xingqiu Q N1 > Raiden E N1 > Yelan E N1 Q N1 > Xingqiu ED N2 > Lauma N1 Q hE 2[N3] > Yelan (N2)² E > Lauma 3[N3]
¹Use Lauma tE on the first rotation.
²Use Yelan’s Normal Attacks until her Skill is back off cooldown.
Sample Rotation (Shinobu)
Lauma hE¹ > Xingqiu Q N1 > Shinobu E N1 > Yelan E N1 Q N1 > Xingqiu ED N2 > Lauma N1 Q hE 2[N3] > Yelan (N2)² E > Shinobu Q N1 > Lauma 3[N3]
¹Use Lauma tE on the first rotation.
²Use Yelan’s Normal Attacks until her Skill is back off cooldown.

A Burgeon team featuring Kokomi and Fischl. Fischl’s additional off-field Electro application results in more Blooms due to Electro removing Burning and triggering Quicken, which helps maximize Burgeon reactions without much Burning uptime, if any.
A Quickbloom Alhaitham team, using Furina’s slower rate of Hydro application to maintain better Quicken uptime, increasing Alhaitham and Lauma’s personal damage.
Sample Rotation
Shinobu E > Lauma hE¹ Q > Furina ED Q > Alhaitham hEP 2[N3D] > Shinobu Q > Lauma hE > Alhaitham Q > Shinobu E² > Alhaitham 3[N2C N3D] 2[N3D]
¹Use Lauma tE on the first rotation.
²If you can’t swap to Shinobu safely or can’t due to ping, you can instead use her Skill before Alhaitham’s Burst
Credits
Writer: pjeljr
Contributors: caramielle., acerbus114, lesterberne, lostguide, plumetra
Team images made with the KQM portrait generator.