Updated for Version 5.8

Collei is a 4★ Dendro Bow character in Genshin Impact who offers support in the form of off-field Dendro application and damage. Learn about Collei’s best builds, weapons, artifacts, and teams in this quick guide.
Note that the information given may change if new discoveries are made. More extensive testing is in progress.
The full-length guide is available here. It is heavily outdated.
Join our Discord to check on and participate in the theorycrafting process.
Table of Contents
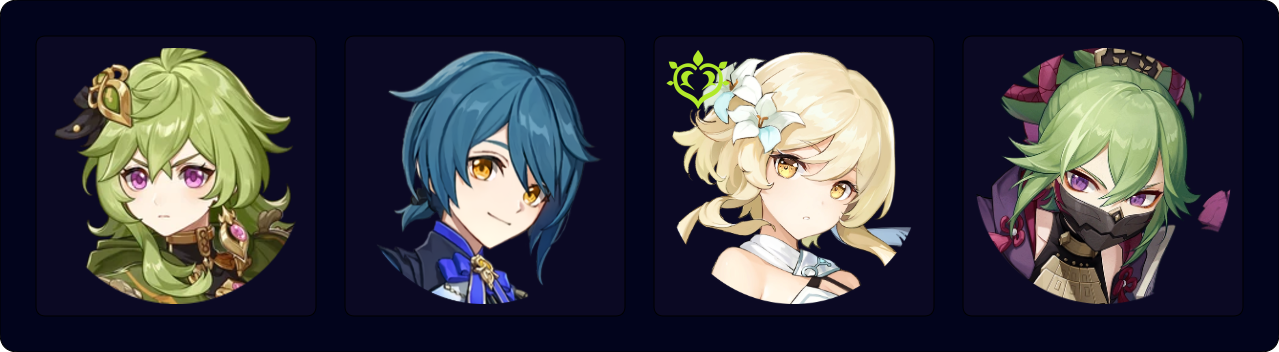
Infographic

Credits to: cuppacote, haafr., and KQM Staff
Character Overview
Pros
- Versatile off-field Dendro applier.
- Has an excellent F2P weapon choice — Favonius Warbow.
- Has flexible artifact options.
- Her cooldowns allow her to be used in a wide range of rotations.
- Can be obtained for free upon clearing Floor 4 of Spiral Abyss.
- Very cute.
Cons
- Somewhat dependent on Constellations 2, 4, and 6, which are massive quality-of-life improvements.
- Has high Energy requirements — up to 200% ER or more.
- Needs help from teammates and high investment for competitive personal damage.
Playstyles
Off-Field Dendro Applier / Support
Collei uses her Skill and Burst to apply Dendro to enemies, enabling reactions and supporting her teammates with the effects of her equipment. Constellations improve Collei’s support capabilities.
Talents
Level and Talent Priority
Level 90 is highly recommended to maximize Collei’s reaction damage, which matters especially in Quicken and Pure Bloom teams. In most cases, Talent damage can be overlooked, since Dendro application is the most meaningful part of Collei’s kit.
Character Level > Burst > Skill
Normal Attacks are not actively used in the majority of Collei’s teams.
Talent Overview
 Normal Attack | Supplicant’s Bowmanship
Talent Description
Normal Attack
Perform up to 4 consecutive shots with a bow.
Charged Attack
Performs a more precise Aimed Shot with increased DMG. While aiming, Dendro energy will accumulate on the arrowhead. A fully charged arrow will deal Dendro DMG.
Plunging Attack
Fires off a shower of arrows in mid-air before falling and striking the ground, dealing AoE DMG upon impact.
Collei’s Normal Attacks are not worth leveling in most cases. In a pinch, when you need just a little more Dendro application in a rotation or need to refresh Instructor, an Aimed Shot can be used to apply Dendro; but again, the damage this inflicts is negligible, and it will generally be a DPS loss.
 Elemental Skill | Floral Brush
Talent Description
Throws out a Floral Ring that deals 1 instance of Dendro DMG to targets it comes into contact with. The Floral Ring will return after a set time, dealing Dendro DMG once again.
The main benefit of using Collei’s Skill is the Dendro application it provides. It has a 12s cooldown. The boomerang applies Dendro twice — once on throw and once on return. The delay provided by this travel time spaces out Collei’s normally front-loaded application rate, allowing for more Dendro uptime on an enemy.
Collei’s Skill provides additional Dendro application via her A1 Passive if it’s triggered.
 Elemental Burst | Trump-Card Kitty
Talent Description
Throws the doll named Cuilein-Anbar, causing an explosion that deals AoE Dendro DMG, creating a Cuilein-Anbar Zone. Cuilein-Anbar will bounce around within this zone, dealing AoE Dendro DMG.
Between Collei’s Burst and Skill, the Burst has more Dendro application at C0. It has a special ICD of 3s, without a hit count. This means that her Burst only applies Dendro 3 or 4 times per rotation at C0, depending on whether her Burst was fully extended by her A4 Passive.
With a 60-cost Burst on a 15s cooldown, Collei can fit comfortably in teams with 15–20s rotations. In 12s-rotation teams, she’s forced to Burst every other rotation or even forgo her Burst entirely if it’s a DPS loss.
 Ascension 1 Passive | Floral Sidewinder
Talent Description
If one of your party members has triggered Burning, Quicken, Aggravate, Spread, Bloom, Hyperbloom, or Burgeon reactions before the Floral Ring returns, it will grant the character the Sprout effect upon return, which will continuously deal Dendro DMG equivalent to 40% of Collei’s ATK to nearby opponents for 3s.
If another Sprout effect is triggered during its initial duration, the initial effect will be removed. DMG dealt by Sprout is considered Elemental Skill DMG.
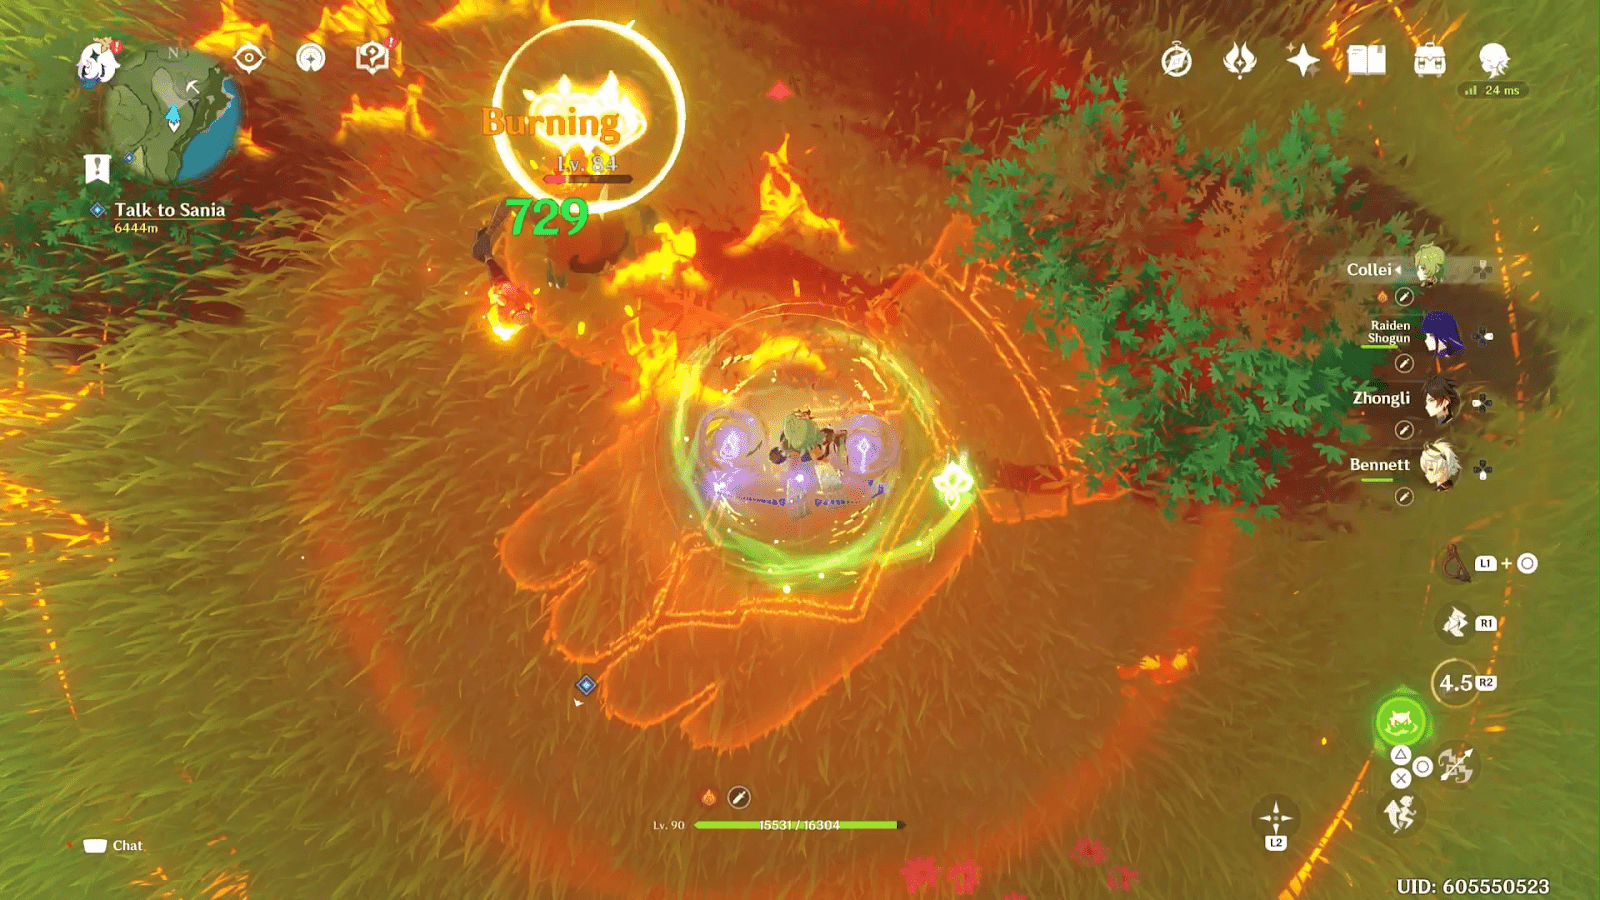
Collei needs to be close to the enemy in order for the Sprout to apply Dendro and deal damage. The range, however, is wider than it appears. The location of the hilichurl in the image below is the maximum distance — nearly reaching the edge of the inner circle of Bennett’s Elemental Burst zone.
 Ascension 4 Passive | The Languid Wood
Talent Description
When a character within the Cuilein-Anbar Zone triggers Burning, Quicken, Aggravate, Spread, Bloom, Hyperbloom, or Burgeon reactions, the Zone’s duration will be increased by 1s.
A single Trump-Card Kitty can be extended by up to 3s.
This extends her Burst duration by 50% with very little drawback — in any team Collei is on, her entire purpose is triggering and facilitating reactions.
Constellations
 Constellation 1 | Deepwood Patrol
Constellation Description
When in the party and not on the field, Collei’s Energy Recharge is increased by 20%.
Since Collei wants to be on-field to catch the particles from her Skill, her C1 doesn’t lead to an immediate 20% ER requirement reduction. In practice, this Constellation reduces her ER requirements by about 15%. Considering her usual ER needs, this is still a welcome improvement.
 Constellation 2 | Through Hill and Copse
Constellation Description
The Passive Talent Floral Sidewinder is changed to this:
The Floral Ring will grant the character the Sprout effect from Floral Sidewinder upon return, dealing 40% of Collei’s ATK as Dendro DMG to nearby opponents for 3s.
From the moment of using Floral Brush to the moment when this instance of Sprout effect ends, if any of your party members triggers Burning, Quicken, Aggravate, Spread, Bloom, Hyperbloom, or Burgeon reactions, the Sprout effect will be extended by 3s.
The Sprout effect can only be extended this way once. If another Sprout effect is triggered during its initial duration, the initial effect will be removed.
Requires you to have unlocked the Floral Sidewinder Passive Talent.
While the wording of the in-game description is confusing, all it’s saying is that triggering an Elemental Reaction while the Sprout is active can extend its duration by 3s once per Skill cast.
 Constellation 3 | Scent of Summer
Constellation Description
Increases the Level of Floral Brush by 3.
A negligible damage increase for Collei’s Skill.
 Constellation 4 | Gift of the Woods
Constellation Description
Using Trump-Card Kitty will increase all nearby characters’ Elemental Mastery by 60 for 12s (not including Collei herself).
Not a personal DPS boost, but a favorable buff for Collei’s teammates, who will usually benefit from it just by triggering reactions.
 Constellation 5 | All Embers
Constellation Description
Increases the Level of Trump-Card Kitty by 3.
Since most of Collei’s damage comes from her Burst, more levels for her Burst Talent are generally useful, but not noticeably impactful.
 Constellation 6 | Forest of Falling Arrows
Constellation Description
When the Floral Ring hits, it will create a miniature Cuilein-Anbar that will deal 200% of Collei’s ATK as Dendro DMG.
Each Floral Brush can only create one such miniature Cuilein-Anbar.
Collei gets one extra Dendro application per Skill, which, to be clear, is a decent boost in damage. Another good Constellation for Collei, though an uninteresting one for a C6.
Keep in mind that this may cause hiccups in Elemental application, such as with Fischl, if the intention is to Swirl Electro immediately after use.
Combos
Combo Notation
- E = Elemental Skill
- Q = Elemental Burst
| EQ | Standard support combo. Collei catches her own Skill particles to battery her Burst. |
| EQ > Team > E or Q E > Team > E | Combo for teams where rotations can reach 24s or more. The second Skill usage allows for more Dendro application. |
Artifacts
ER Requirements
Energy Requirement Range (Assumes 20s Rotation)
| Regular circumstances | 200% |
| Double Dendro | 180% |
| With Favonius Warbow | 170% |
| In Energy-rich teams (e.g. with Fischl or Raiden) or longer rotations | 160–170% |
| With Sacrificial Bow (assuming proc on first Skill hit) | 160% |
Collei’s C1 reduces her ER requirements by around 15%.
Use the Energy Recharge Calculator to determine exact requirements for your team and rotation. For more details on how Favonius weapons will affect your team, please use Ac1d’s Favonius Mastersheet.
Artifact Stats
General Build
 Sands |  Goblet |  Circlet |
| ER / EM / ATK% | Dendro DMG Bonus | CRIT Rate / CRIT DMG |
Stat Priority: ER (until requirement) > CRIT Rate (Favonius) ≥ CRIT DMG > EM = ATK%
Prioritize ER and completing a 4pc artifact set before going after offensive main stats and substats since Collei’s Dendro application and support capabilities are more important than her personal damage. Any Goblet may be used if it helps reach ER requirements.
Pure Bloom Support
Sands | Goblet | Circlet |
| EM / ER | EM | EM / CRIT Rate (Favonius) |
Stat Priority: ER (until requirement) > CRIT Rate (Favonius) > EM
Prioritize ER before building EM. Ensuring Dendro application uptime from Collei’s Burst is important for Bloom-oriented playstyles.
Artifact Sets
 4pc Deepwood Memories | The most important set for teams that deal mostly Dendro DMG, including all Bloom variants. If no one else on the team uses this set, give it to Collei. This is one of the few times where main stats matter less than having a 4pc set. If you have to use 4-star pieces, use them. |
 4pc Scroll of the Hero of Cinder City | 4pc Scroll is a useful set for buffing non-ATK scalers, even despite Collei not being able to fully activate its effect. Its 2pc bonus helps with Collei’s ER requirements if there is at least one Natlan character on the team that can trigger its effect. |
 4pc Instructor | 4pc Instructor can be useful in teams where the Dendro damage share of the team damage profile is negligible or if you already have a Deepwood / Scroll holder. Note that 4-star artifacts have lower stats in general, so an off-set ER Sands is recommended. |
 4pc Tenacity of the Millelith / 4pc Noblesse Oblige | Support sets valuable for ATK-scaling teammates. They can be used in Aggravate teams where the Dendro damage share of the team damage profile is negligible. Collei’s Sprout instances count as Skill damage, meaning her Skill can, with both boomerang hits and multiple Sprout instances, perpetuate the teamwide 20% ATK buff from Tenacity of the Millelith. Noblesse Oblige makes building ER even more important, and its 2pc bonus also improves Collei’s Burst damage. Noblesse is better for shorter rotations because of its 12s duration, while in 24s+ rotations Millelith is preferable. |
 4pc Gilded Dreams | The strongest set for Collei’s personal damage. Good if the team cannot utilize other support sets well — or if you’re actually trying to maximize Collei’s share of team damage (in which case another Deepwood Memories holder is needed). |
 4pc Flower of Paradise Lost | The strongest set for Pure Bloom teams in terms of Collei’s personal damage share. Although the FoPL domain is not very Resin-efficient, you can use this set if you have one from farming Desert Pavilion Chronicle. If not, Gilded Dreams should be enough. |
Weapons
 5★ Elegy for the End | Best-in-Slot in nearly all cases. This Bow gives Energy Recharge, Elemental Mastery, and ATK%, which are all buffs Collei benefits from. The EM and ATK% buff for the entire party is tremendous too. Elegy for the End may be the biggest leg-up Collei has over Dendro Traveler. |
 4★ Favonius Warbow | One can be acquired for free by completing Mondstadt’s story quest. It reduces the Energy needs of the entire team so they can focus slightly more on offensive stats when equipping artifacts and weapons. Moreover, it adds a ton of Energy Recharge to satisfy Collei’s Energy needs. Collei should build at least 30% CRIT Rate to trigger the weapon’s passive. |
 4★ Sacrificial Bow | Sacrificial Bow requires extra time on the field, which eats into rotation time from teammates. However, it offers plenty of Energy Recharge in exchange, an extra Skill to generate more particles (reducing Energy requirements), and up to 5 extra Dendro applications at C6 if you properly time Skill uses. |
 Other ER Bows | 4★ Fading Twilight, End of the Line Decent ER stat sticks if you’ve run out of Favonius Warbows. Fading Twilight was available in a limited-time event, while End of the Line is permanently available from fishing in Sumeru. End of the Line gives more ER than Sacrificial Bow (but no additional Skill usage). |
 CRIT Bows | 5★ Skyward Harp, Polar Star, Aqua Simulacra, Thundering Pulse, Hunter’s Path, The First Great Magic, Astral Vulture’s Crimson Plumage; 4★ Blackcliff Warbow, The Viridescent Hunt, Scion of the Blazing Sun Only relevant when you build Collei for personal damage. Their passive effects vary in usefulness depending on team and playstyle. Polar Star is generally going to be the best option, but it requires weaving in Normal and Charged Attacks. |
ATK% / EM Bows | Usable if your ER requirements are low enough. EM bows tend to perform best in Quicken / Pure Bloom, with the Stringless being the best generalist option. |
 3★ Raven Bow | Default 3-star EM stat stick. Can come in clutch if you have literally nothing else. |
Teams
Rotation Notation
- N = Normal Attack
- C = Charged Attack
- A = Aimed Shot
- P = Plunging Attack
- E = Elemental Skill
- tE = Tap Skill
- hE = Hold Skill
- Q = Elemental Burst
- D = dash (cancel)
- J = jump (cancel)
- W = walk (cancel)
- > = switch character
- ( ) = these actions are optional; please refer to the notes below
- [ ] = repeat these actions the specified number of times
Teambuilding
- Collei can fit into most teams that utilize Dendro reactions.
- The cooldowns of Collei’s Skill and Burst allow for rotations below 20s.
- Collei’s Burst AoE is fixed and (relatively) small, and maximizing boomerang and Sprout hits requires her to be close to enemies, which doesn’t work for some on-fielders and may lead to slight gameplay changes.
Quicken

Collei’s off-field Dendro application and short field-time requirements lend themselves well to Quicken teams. Most Quicken on-fielders appreciate the rotation flexibility that comes with Collei’s relatively short cooldowns, and her access to support equipment (notably Elegy for the End) and her C2, C4, and C6 push her support capabilities even further. Depending on the on-field DPS, Collei may use Deepwood Memories, Instructor, or other support artifact sets.
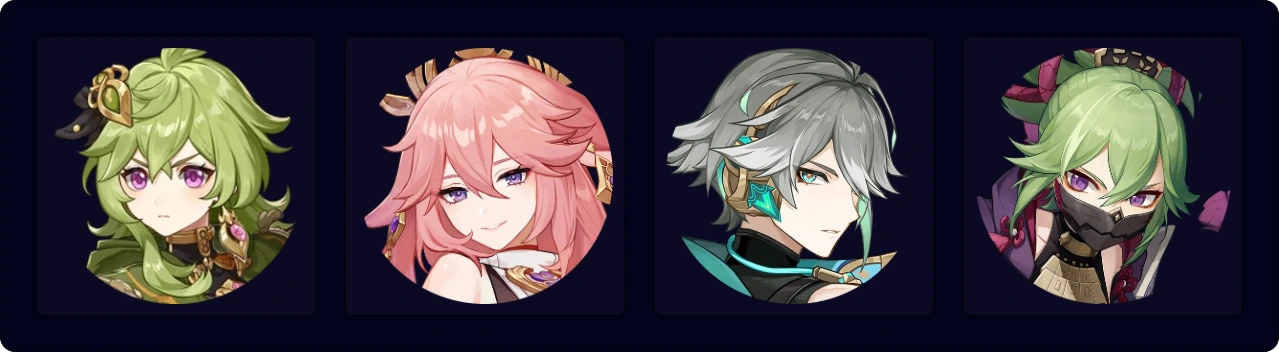
Notable Teammates
Electro
On-field and off-field damage dealers. They enable Quicken and provide personal damage or different buffs.


Dendro
Dendro on-fielders that enjoy Dendro Resonance and the other utility Collei provides.


Example Teams
This is not a comprehensive list of teams. The inclusion or exclusion of any given team does not necessarily reflect its power level.

Collei provides Dendro application for Aggravate uptime and the potential to hold supportive sets. Xilonen brings RES Shred and buffs the team with 4pc Scroll. Both Xilonen and Collei lessen the limitations Aggravate teams face in multi-wave content.
Sample Rotation
(Raiden E)¹ > Xilonen EQ N2 > Collei EQ > Fischl N1 Q > Raiden Q combo > (Fischl N2 E)²
¹First rotation only
²Every other rotation

This team performs decently in AoE. You can replace Sucrose with Xilonen to eliminate any limitations that come with multi-wave content. Collei should only use either her Skill or her Burst each time she takes the field; using both would lengthen the rotation unnecessarily.
Sample Rotation (Clorinde on 4pc Fragment of Harmonic Whimsy)
Opener: Fischl Q > Collei Q > Sucrose ED Q > Clorinde E combo
Ongoing Rotation: Sucrose N1C > Collei E/Q > Clorinde Q > Fischl E/Q > Sucrose ED(Q) > Clorinde E combo
Sample Rotation (Clorinde on 4pc Thundering Fury)
Fischl Q > Collei E > Sucrose N1 EDQ N1 > Clorinde E combo > Collei Q > Fischl E > Sucrose N1 ED N1 > Clorinde E combo > Sucrose N1C > Clorinde Q
Collei helps Alhaitham with his ER requirements, and the whole team uses the effects of both Dendro and Electro Resonance.
Sample Rotation
Yae Miko 3[E] > Shinobu E > Collei Q E > Alhaitham hEP 2[N3D] N3 > Shinobu Q > Yae Miko (Q)¹ 3[N1E] > Alhaitham Q² > Collei E > Alhaitham N3D N3CD 2[N3D] N3
¹Can be skipped or used every other rotation
²Can be used after Collei E if you’re struggling to get his Dendro Conversion

Lan Yan triggers Electro-related reactions on-field to trigger Fischl’s A4 Passive.
Sample Rotation (On-field Lan Yan)
Yae Miko 3[E] > Fischl E > Collei EQ > Lan Yan E N1 Q 3[N3D] > Yae Miko Q 3[E] > Fischl N2 Q > Collei E > Lan Yan (E N1)¹ 3[N3D]
¹Skip this Skill if Lan Yan is not C6 / not using Sacrificial Fragments
Most of the damage in this AoE team comes from Aggravated Swirls. Kazuha should use 4pc Thundering Fury; using Sacrificial Sword can also be quite helpful. Shinobu provides healing along with her Electro application, while the Fischl variant is more damage-focused.
Sample Rotation (Fischl; Kazuha on 4pc Thundering Fury)
Venti Q > Fischl N1 E/Q > Venti E N1 > Collei E > Kazuha tEPQ tEP > Venti E N1 > Collei Q > Kazuha N2 tEP N2
Sample Rotation (Shinobu; Kazuha on 4pc Thundering Fury)
Collei EQ > Shinobu E Q > Venti EQ > Kazuha tEPQ N1 tEP > Venti ED > Kazuha N2 tEP
Hyperbloom and Burgeon

Hyperbloom and Burgeon teams are simple to build yet very effective at dealing with most content; Burgeon is more AoE-oriented, while Hyperbloom is primarily single-target. Collei’s Dendro application is enough for these teams, and the team structure offers enough flexibility to allow different kinds of strategies that make use of the reactions.
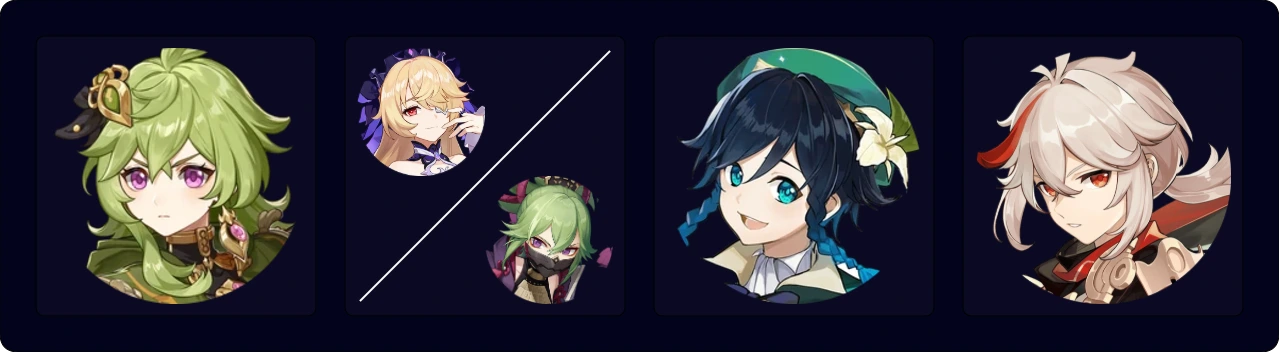
Notable Teammates
Hydro
They facilitate Bloom reactions and usually also deal Talent damage.


Hyperbloom / Burgeon Triggers
Essential part of a Hyperbloom / Burgeon playstyle. May also have support capabilities.
 Raiden Shogun |  Kuki Shinobu |  Thoma |  Ineffa |
 Pyro Traveler | Xiangling |  Dori |  Electro / Pyro on-fielders |
Dendro
On-fielders and off-fielders that provide Dendro Resonance, Energy, additional Dendro application, and damage or other utility.


Example Teams
This is not a comprehensive list of teams. The inclusion or exclusion of any given team does not necessarily reflect its power level.
A staple F2P Hyperbloom variant. Pay attention to Dendro Traveler’s Burst: it will explode upon contact with Pyro.
The sample rotation provided below uses characters’ abilities in a fixed 21s rotation revolving around the longest-cooldown ability — Xingqiu’s Skill. Nonetheless, this team can do a desynced rotation where abilities are used as they come off cooldown.
Sample Rotation
Dendro Traveler EQ > Xingqiu Q N2 > Shinobu N1 E N1 > Collei N4 Q N1 > Dendro Traveler N1 E N2 > Xingqiu ED N2 > Collei N4 E N4 > Shinobu Q > Collei N3

Fischl helps eliminate Burning and provides strong personal damage. If Thoma’s shield is not sufficient, you can swap Fischl for Beidou or Ineffa, but ER requirements for Beidou as solo Electro can be incredibly high.
Sample Rotation
Ayato Q > Fischl E N1 > Thoma EQ¹ N1 > Collei EQ > Ayato E N15 > Fischl N1 Q > Thoma E N2 > Collei N2 E > Ayato E N15²
¹Use Q E instead if Thoma holds Kitain Cross Spear
²Can be shortened to N12

An accessible team consisting of all 4-star units, where Sucrose acts as the on-field Hyperbloom trigger with her Electro Swirl.
Sample Rotation
Collei E > Xingqiu Q N1 > Fischl E N1 > Sucrose N3D N3 ED N3D N3 (Q) > Collei Q E > Xingqiu ED N2 > Fischl N1 Q > Sucrose N2 ED 5–6[N3D]¹
¹Sucrose’s combo can be flexible; keep her on-field for around 12s
A rare opportunity to play Collei and Amber together! R5 Sacrificial Fragments is highly recommended on Kokomi to align her Skill cooldown with the rest of the team, but it’s not necessary. If Kokomi holds any other Catalyst or non-R5 Sac Frag, add 1–2 more Amber Charged Shots depending on your rotation execution speed. Rosaria helps with Bloom core generation, occasionally Freezes enemies, and weakens the Burning aura if it occurs.
Sample Rotation
Rosaria EQ > Collei EQ > Kokomi E > Amber 5[C]
Pure Bloom

Pure Bloom teams take advantage of the Bloom reaction to deal massive amounts of AoE Dendro damage in quick succession. While highly effective in AoE content, these teams can also function well against bosses when built right.
This Quick Guide will only focus on Pure Bloom teams with Nilou in them as they are the most effective versions of this archetype.
Although Bloom ownership is hard to track, the Hydro units with slower Hydro application would generally trigger a good amount of them. It is still encouraged to build EM or use EM buffs whenever possible since it is highly likely that Collei will also be triggering some of the Blooms.
Notable Teammates
 Nilou | Enables the Bountiful Bloom playstyle but limits character selection to only Hydro and Dendro characters. The trade-off is usually worth it; Bloom teams are rarely recommended without Nilou. |
Healers | Having at least one healer is highly recommended in the team due to Bountiful Core self-damage. They also act as Elemental appliers: Dendro units help maintain Dendro aura, whereas Hydro healers can double as damage dealers by building EM. Note that it is fine (or even recommended) to run two healers in the same team. |
Hydro
Since Hydro is the “weak” side of the Bloom reaction, Hydro units are able to trigger Bloom more often than Dendro units, resulting in more damage overall even if the team’s Hydro characters are not fully built with EM.


Example Teams
This is not a comprehensive list of teams. The inclusion or exclusion of any given team does not necessarily reflect its power level.

A premium Pure Bloom team, where Collei’s fast front-loaded Dendro application helps generate more Dendro Cores. If Nahida is already wearing 4pc Deepwood Memories, Collei can hold 4pc Flower of Paradise Lost or buff teammates’ EM with 4pc Instructor.
Sample Rotation
Nahida E Q > Kokomi E N1 > Nilou E N2 E > Collei EQ > Kokomi Q combo > Nahida N2C

A more affordable Pure Bloom variant with Yaoyao as a driver, thanks to her healing and increased Dendro RES during her Burst. Either Yaoyao or Collei can use Deepwood but not both. Both EM and Talent damage builds are viable for Xingqiu.
Sample Rotation
Nilou E N2 E > Collei Q N1D > Xingqiu Q N2 > Yaoyao Q 6[N1J]¹ E > Collei E N3 > Xingqiu ED N2 > Collei N4 > Nilou N3 (Q)
¹Dash and jump cancels are interchangeable
Other Teams
Collei’s Dendro application can be used to enable some of the more niche archetypes, like Burning and its variations (Burnmelt, Burnvape, etc.) or Freezebloom. Collei can also be slotted in different teams to help with certain mechanics (like Lava Dragon Statue’s Fury bar or Aeonblight Drake’s airborne state), but such examples are not covered in this guide.
Example Teams
This is not a comprehensive list of teams. The inclusion or exclusion of any given team does not necessarily reflect its power level.
A satisfying Burning team where Anemo units function as Burning triggers. Especially effective in AoE against enemies that can be lifted with Venti’s Burst.
Sample Rotation
Bennett EQ > Venti EQ > Kazuha tEPQ > Collei Q > Bennett E > Venti E > Kazuha tEP > Collei E N3
Credits
Quick Guide Contributors: auntyplays, acerbus114, lesterberne, breadcatow, lostguide, alehannita
Extended Guide Сontributors: Emiliabyss#1641, Latiwings#3308, Tibo#4309, koko#1111, idkanonymized#4166, LostGuide#4812, juko#9385, Rare Possum#0511, Ena#6013, Magnus Artifex#8719, Cuzimori#1535, naivety | pkach#6934, jamie#9248, koko#1111, TheGaminSeshion#1648, Rathalos#2875, Lesterberne#9695, mina#4448
Team images made with the KQM portrait generator.